By Fred Kachelhofer
A member of the Barnesville Woodturners
There are many times when building your own shopmade faceplates for your lathe can help make a turning project easier and more fun. After hearing about faceplates made out of Medium Density Fiberboard (MDF), I decided to try making a few myself. I found that it's not hard, but there are a few tricks which can help make the process go more smoothly.
The quality of MDF is important. Chip board and other types of board are not suitable. When you look at the side of the board and you can see a density change from the outside of the board to the middle, stay away from it. The MDF should have a very uniform density all the way through and showing a very dense, close fiber pattern. If you can see voids, select another MDF.
The first attempt to make a wooden faceplate I glued three pieces of wood together. When I drilled the hole and used the tap I realized that it is impossible to thread to the bottom of the hole because I did not have a bottom tap. With that experience and some other thinking I came up with the following method.
1. Cut pieces of 3/4" MDF into squares. I started out about 4-1/2" square, though the exact size is not important. However, I would not go below about 3-1/4" round since that is the size of the faceplate that Powermatic furnished with my lathe. You will need three pieces for the basic faceplate that I will detail here. While you are at it, you need to make two or three of the tapped portion since that is what takes the most setup time.
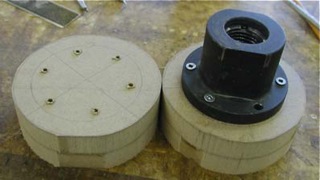 2. Glue two of the pieces together, and mark for the maximum circle and bandsaw approximate round. In the picture at left you can see the blank roughed out and marked with a 3-1/4" circle to aid in positioning the faceplate. The holes in the faceplate are marked and pilot holes drilled.
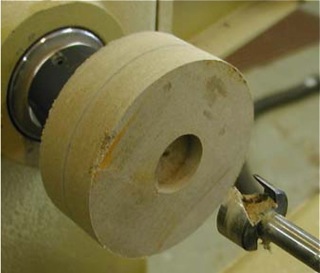 3. Place the block on the faceplate on the lathe and rough out the blank rim to a smooth circle. Then using a Forstner bit, drill a 1-1/4" hole about 3/8" deep. If you look closely at the picture above of the end of the faceplate, you will notice that there is the same type recess in the end that mounts to the lathe. This recess fits tight onto the shaft of the lathe and aligns the faceplate when it is screwed up tight against the headstock. Next drill a 1-1/16" hole with a Forstner Bit the rest of the way through the blank. After drilling the last hole, face off the end of the block towards the tail stock. Make sure this surface is flat since you will be gluing another piece to it later on.
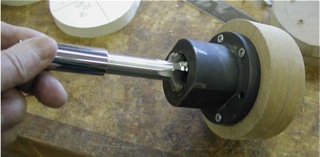 4. Remove the faceplate and blank from the lathe. Using a Beall Lathe Spindle Tap for the 1-1/4" x 8 TPI (for a Powermatic Lathe), tap all the way through the blank. Here having the tap go straight through the center of the bore is a must.
To do this I started the tap through the faceplate and used that to start the threads in the blank as shown at left.
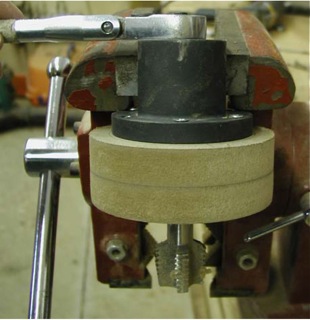 There is no cutting action with the tap passing through the faceplate so there is no damage to the tap.
I have attached a 15 mm deep socket to the tap since I did not have a tap wrench large enough to hold the tap. If you cannot hold the piece in your hands while running the tap through the blank, place it in a vise like this. Caution!!! Be certain to keep the shaft of the tap in the center of the bore of the faceplate while holding in the vise. I found it easy to get off center when using the vise. I did not have the problem when holding the blank in my hand. Also note in the picture that I tap all the way through the blank so that I do not have to reverse the tap out of the blank. Just remove the socket wrench and pull the tap through. Another note here: I used a 1- 1/8" bit to drill for the tapped hole. This drill will work but it will not give a full thread depth and the drill will hit the face plate at the end of the hole. The 1-1/16" drill will pass on into the faceplate giving a cleaner hole.
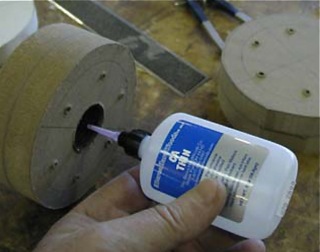
 5. There is a sharp thread pattern after running the tap through the blank. Repeated use will cause the sharp edge to break off. Using CA Thin Glue, coat all the threads with the glue to more or less "case harden" the threads.
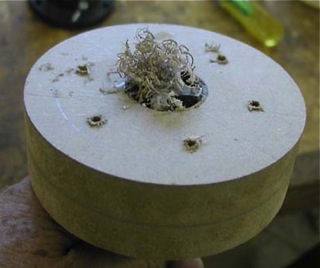
Then use the Activator to almost instantly set the glue. Now there is the possibility of having interference with the threads. To alleviate this possibility, pass the tap through the hole again. The picture at the right shows the "fuzz" that the tap cut out of this piece.
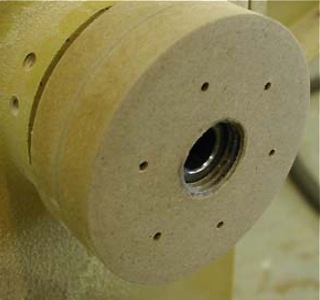
 6. Now mount the piece on the lathe making sure that the large end is towards the head stock and fits up tightly on the shaft. This will allow you to "true up" the piece. The piece will always go back on the lathe in this position because of the internal thread and be lined up because of the seating on the shaft. Take a light cut on the rim to true up as necessary and face off the piece again making sure that the face is flat. Note for future reference that the end of the shaft of the headstock is in about 3/8" from the new face of the blank. In the future you can cut off the end piece and by starting at this point again add any new piece that you want. You might need a larger diameter face piece and it is easily done with the removal of the existing end piece and gluing on the new piece.
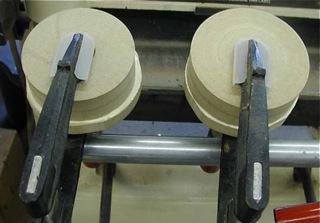
7. Next take a piece of round stock and glue to the blank that was just removed from the lathe. This piece can be of any configuration from the same size of the base piece to something smaller or larger. For my use I made the piece the same size. Note I turned the piece so the threaded portion of the base is up to keep glue from flowing down into the threads as shown in the picture at above right.
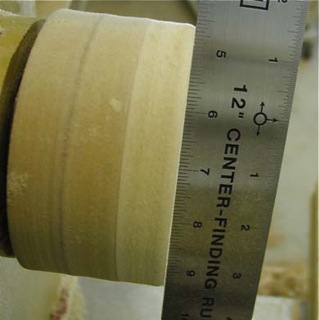 8. When the glue has dried, place the piece back on the lathe and true up the rim of the new piece and face off this piece to assure a good, true running surface. Again the last piece added could be any diameter. This piece is only about 4-1/2" but could just as easily have been 6" or larger.
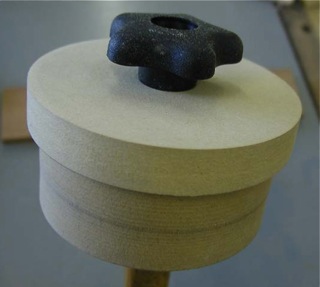 9. Another way to use this face plate is to drill a through hole in the center. In this case it is a 1/4" hole and using a 1/4" carriage bolt and a knob, I have made a new faceplate that I needed for a specific project.
Your imagination is the only limit for how you can make these faceplates work for you. If you need a sacrificial faceplate, this is the way to go. You can also make these up to use on bowl or platter blanks where you do not have enough thickness to make a spigot or dovetail. Glue this faceplate on and then part it off when through. The MDF is also very easy to remove to clean up the bottom.
You can email Fred Kachelhofer at Kplus10@bellsouth.net.