Progress on my Lower Cabinet
by Dilo Marcio Fernandino
Belo Horizonte, MG, Brazil
 I am back again to report to
Wood News
readers about some woodworking battles I have fought and won since the
publication of my
previous article
describing my initial work building a rococo-style lower cabinet. These victories were
achieved in the areas of both design and construction.
I am back again to report to
Wood News
readers about some woodworking battles I have fought and won since the
publication of my
previous article
describing my initial work building a rococo-style lower cabinet. These victories were
achieved in the areas of both design and construction.
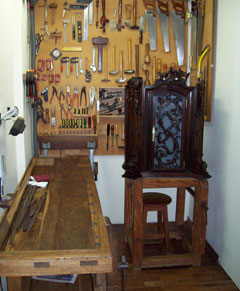
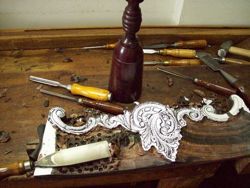
Before beginning, I should warn those readers who are not already acquainted with my
workshop
that the
woodworking operations
I describe here may appear somewhat primitive and awkward because I have voluntarily replaced all the
usually mechanized operations with my single specialty of woodcarving. I also remind you that my
exclusive use of hand tools is due to the severe restraints that my urban lifestyle imposes on me,
not because of any prejudice against power machines.
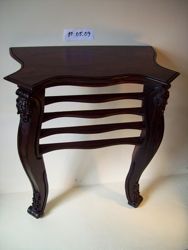
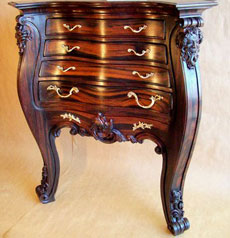
The lower cabinet presently under construction will be a stylish chest of drawers intended to serve
as the supporting piece for the upper cabinet completed in October 2008 (pictured in my shop at right), in accordance with my
mental image of a two-bodied rococo cabinet (like the American highboy).
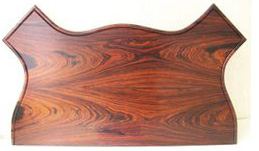
The first big technical
challenge that I faced was to develop the project in inverse logical order, meaning
to begin from the end of the process: the top board – previously made. Thus, I calculated the
adequate proportions for the sinuous front legs ("cabriolet" in French) and for the
concave-and-convex frontal face ("bombe").
The second big challenge was the total absence of right
angles and straight surfaces – a heresy to all cabinetmakers. The scope of the challenge drove me
to a new way of thinking (a "non-Cartesian way," I would say) that eventually proved satisfactory.
By the way, an engineer friend of mine observed a clever parallel between my empirical
method for extrapolating curved surfaces and the technical method known as "reverse engineering of
shapes," which made me very proud!
The rosewood available for this project was salvaged from a demolished old farm larder and was bought twelve years
ago. The actual rosewood trees had been felled a century ago. Such old-growth Rio-rosewood is a
rare gemstone for woodworking, and I believe anyone using it should apply
traditional principles that will achieve the best visual effects from its unique physical
properties. Originally discovered by the Portuguese artisans of the 16th century, these principles were
capably summarized by the anonymous author of a magnificent Victorian book originally published
in 1853:
"...Rose-wood is the least fitted for carving of all the woods used in furniture; its long open grain
requires filling up with so much polish, that every curve shows a sharp dash of light like polished
metal; while its dark and rather dull colour, when cut across the grain, absorbs the light, and
entirely obliterates the distinction between half-tints and shadows; so that all we should aim at,
in ornamenting rose-wood, is to produce sharp sparkles of light, glittering like dewdrops on a dark
ground. Elaborate modelling is entirely lost; a bold free ornament, contrasting strongly the black deep
shadow against bright sparkling lights, is best suited to it; when the wood is very orange in
colour, then these objections are lessened."
Accordingly, I designed the massive front legs to be sinuous and smooth columns whose capitals are
composed of light scrolls atop Greek-Roman mythological masks – Bacchus and Medusa –
which together represent opposing feelings. The lower extremities of the legs were designed in the shape of
bulky scrolls decorated with bold acanthus leaves.
Construction
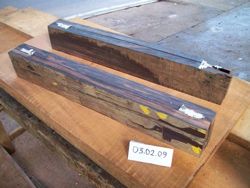
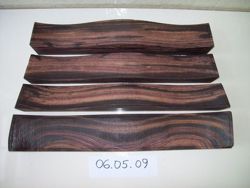
Concerning the construction itself, the first problem was to sort the appropriate pieces to use from
among my rosewood stockpile. The rough pieces are irregular in shape and dimension, and they contain hollows
and cracks as well. So, for each leg I had to carefully select a pair of
planks and glue them face to face to get the necessary thickness while trying hard to conceal any
hollows.
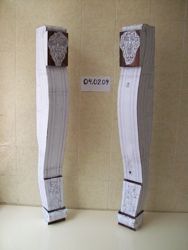
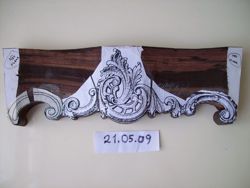
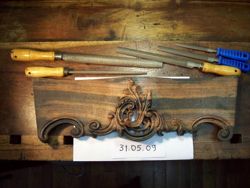
Once the blanks were trimmed to their overall shape, I "dressed them up" by gluing onto them
paper photocopies taken from the project drawings, intended to be used as visual carving guides
since pencil lines appear virtually invisible on rosewood. At that time the blanks resembled funny
Egyptian "mummies," especially because of the grotesque masks.
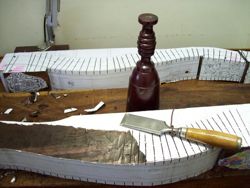
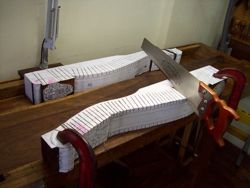
In order to carve two lengthwise smooth slopes on each leg, I initially made many transversal
handsaw kerfs on them, not only to serve as depth carving limits but also to reduce the rosewood's
extraordinary resistance to the penetration of chisels.


Then I
carved the stylish friezes and dadoes, the acanthus leaves on both feet, as well as the mythological
masks on their tops.
Next, I glued both legs to the top board railing resulting in an upright rigid
structure.
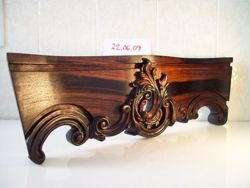
Continuing on, I projected downwards the necessary curved lines to delineate the belly-shaped
frontal surface and I also made cardboard patterns for the sinuous front rails, which were then hand
sawn and glued to both legs, thus completing the frontal structure of the intended chest of
drawers.
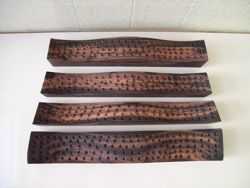
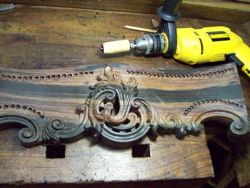
Afterwards I prepared four thick rosewood blocks in the exact size of each drawer front and
carved a specific sinuous-twisted surface on each. I performed a second excavation on the same
surfaces to make a lower level ground in order to leave contouring fillets, with the help of my
"controlled-depth holes" method.
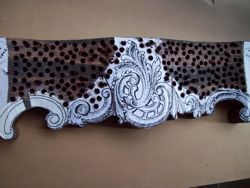
For making the cabinet apron, I prepared a thick board according to a previously-made cardboard
pattern and applied the same carving methods.
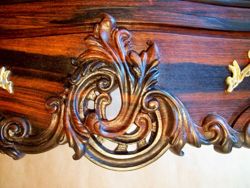
Finally, the apron was glued to the frontal structure.
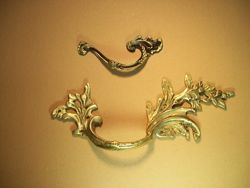
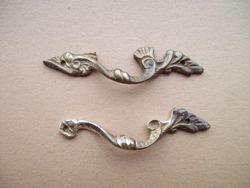
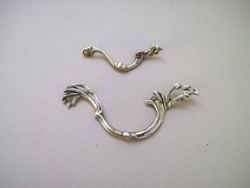
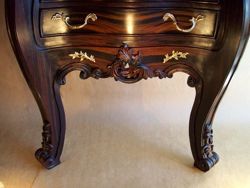
The metallic handles for the drawers constituted another problem. Considering that one
characteristic of the rococo style is its asymmetry, I looked for asymmetric handles at the local
hardware shops without success. So, I bought much larger bronze handles from an artisan's foundry
and sawed and filed them to the size and shape that I wanted.
The bronze
leftovers were quite useful too since I used a pair of them for decorating the apron. All the bronze
pieces were provisionally set in position with steel screws, which in the end will be replaced by brass
screws.
Now I must say a word about my personal way of carving the very hard woods. I just came to the
conclusion that those processes I have empirically developed ("depth-controlled holes" and "handsaw
kerfs") are equivalent to the methods the old Egyptians and Greeks must have used for carving granite and
marble. (The primary difference is that I am about five thousand years behind the times.)
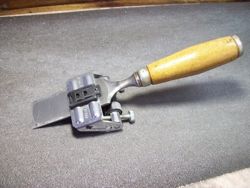
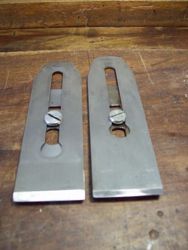
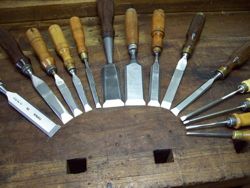
In addition, I decided early on to conduct a risky customization of my chisels and hand plane irons
in order to make their penetration into very tough woods less difficult. Hence (except for my Japanese chisels)
I used honing guides on sandpaper to hand ground them to a bevel of 20 degrees or less.

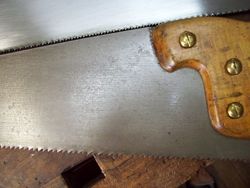
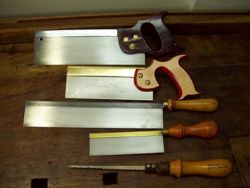
Another important customization has been to keep all my handsaw blades completely polished, even
considering that those handsaws are over 25 years old, just in order to reduce the sawing friction
and to avoid rosewood resin impregnation.
I will provide another report in a future edition of
Wood News
.
Dilo can be reached via email at
dilofernandino@gmail.com
Return to
Wood News
front
page
