A Unique Woodturning Project:
Turning Wooden Lampshades
by Andrew A. Sawyer
Chanhassen, MN
Hello, my name is Andrew Sawyer. I am the Executive Chef at a hotel in the Twin Cities area.
Seven years ago I started woodworking. I made many pieces of furniture, and then one spring, my wife
wanted a new wood floor in the house. As compensation, I got my first lathe - A Craftsman from
Sears. For the money, the capabilities of that lathe could not be beat. However, it did not stand up
to the paces I put it through, and I decided to replace it with a Jet 16/42 - a big upgrade. Anyway,
the minute I started turning, I knew it was a fun and productive use of my time. I stumbled upon a
couple of walnut logs, and made bowls for Christmas presents, then started making ornaments. Each
year I tried to "outdo” the year before. Well this year I made lamps and lamp shades.
The process I developed for making the lamp shades is a little different from all the bowl
turning I have done. I will describe it the best I can.
I want to start by saying that any form of wood turning can be dangerous. With a 30 pound chunk
of log spinning at 500 RPM, it's important to always place safety first. Check to make sure the tool
rest and tailstock are secure, be careful when you start the lathe and do not cross the “path of
exit” for the wood. Wear a face shield! That said, let's do something fun!
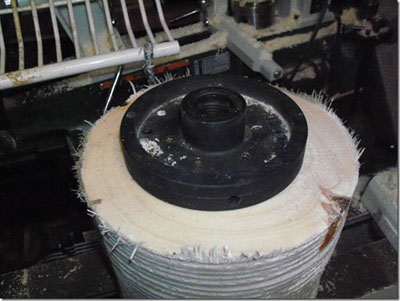
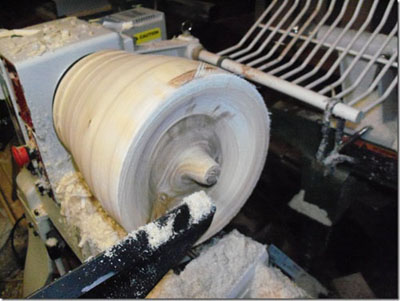
I choose green wood, the fresher the better. I cut it with a chainsaw to about 9 to 12 inches in
length and about 14" to 16" in diameter. I mount the log on a faceplate, and further secure the
screws with CA glue before driving them in.
When I am finished I sometimes need an impact driver to get them out. That’s okay, you cannot be
too safe with this process. After I put it on the lathe, I move the tailstock and lock it in place.
I then advance the ram, tightening it and locking it as well. I start at 500 rpms, or as fast as the
out-of-balance piece of wood will let me.
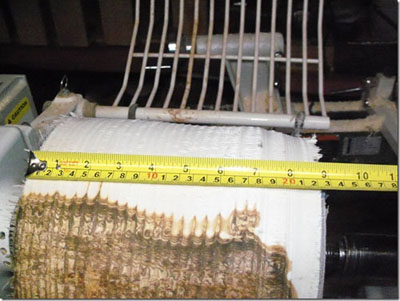
With a roughing gouge, I remove the bark and begin to shape the outside of what will eventually
and hopefully become a lampshade. My ultimate goal is about 7" to 10" diameter at the top and 10" to
14" at the bottom. As the shade begins to take shape, the speed can be increased. I stand out of the
line of fire while doing so, and check the tail stock each time I increase the speed.
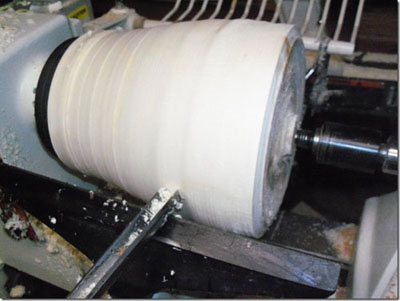
I switch to a fingernail grind bowl gouge for the final shaping of the outside, and then I sand a
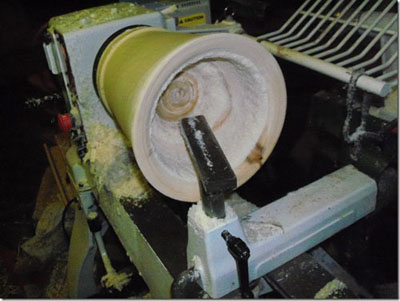
little. Once I am happy with the outside appearance, it is time to start hollowing out the inside.
This is the point of no return...if you need to take a break, put a plastic bag over it. Otherwise
once you start to hollow, you won’t stop until you are finished.
At some point I need to take a leap of faith and remove the tailstock - it is usually when I
start to get the inside cone. At this point, you have to check that the screws in the faceplate are
holding strong, and be very careful to stand out of the way of potentially flying objects. For the
hollowing process, I use a variety of tools: a heavy duty scraper, bowl gouge, and a bedan. There is
no real rhyme or reason for the selection of tools I use, but if one of them is getting “grabby”
with the wood, I just change tools. I also use a couple of tool rests: a 6” bar, a 5“ box rest, and
a special rest my neighbor made for me that overhangs 9” into the shade then has a 3” radius towards
the center. This makes it so my tools get plenty of support close to the cutting.
If you take a break now, you risk the wood warping, and some sections will end up thinner than
others. I usually just keep at it, hollowing and thinning the walls, until they are about 1/4"
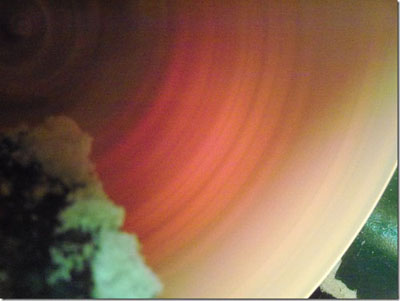
thick. Here is where things get a little weird: I turn off all the lights in my shop except a single
100-watt bulb that I position under and behind the lampshade. This is going to tell me how thick the
wood is by how bright the light is coming through the wood.
This is also when I switch tools and use the
Easy Tools Wood
Finisher
, purchased just for this reason. While the tool is contacting the wood at 9 o’clock, I
am looking at 5 o’clock. I can see the light getting brighter as I cut, and I know exactly where my
tool is. This takes a little getting used to since it is not natural to look away from the tool.
Before I get too carried away, I need to determine how thick the top (rim) of the shade should be. I
like about 1/2" thick and 1" wide. This gives plenty of stability and support for hanging it. Using
my natural calipers (my hands,) I do the best I can to make my measurements. Precision is not super
important. I do make sure to cut out the middle so that when I part it off, I don’t need to cut much
more than an inch into it before it releases.
Getting back to thinning the wood, this is where I really start to be careful.
The brighter the light the thinner the wood. After spending this much time working on this, I
would hate to end up staring directly at the light bulb!
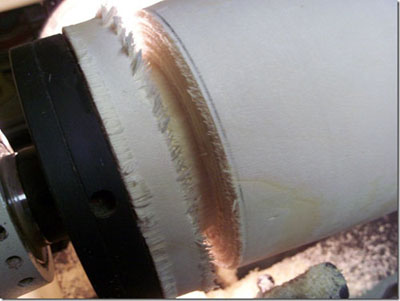
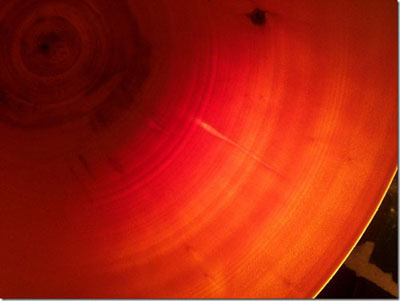
You can see in this picture the line that tells me where to part. Before going all the way I will
take a gouge and clean up as much of the end grain as I can. And now it is the moment of truth,
parting it off. Because I already cut out the middle from the inside, I can set the light so it is
facing the inside (where it will go if we are successful). Same trick, as I get closer to parting it
off, the light that shines though my cut will get brighter. I do like to don a leather glove on my
catching hand, with the wood being this thin and spinning at 800 rpms, it is better safe than
sorry.
It is always a little nerve-racking to catch something that big moving that fast but it is easier
than it appears.
I take it into the house for about 2 weeks to dry, then I will do a little finish sanding. They
always warp a little, but I sand the inside with 100 grit just to get the residual fuzzies off, and
I will sand the outside to 320 grit, to make it smooth. I will also smooth out and/or enlarge the
hole in the top by rotating it around my oscillating spindle sander.
This particular shade was made from poplar from a friend's really wet back yard, and displays
almost an inch between growth rings. I have also made them from willow and maple.
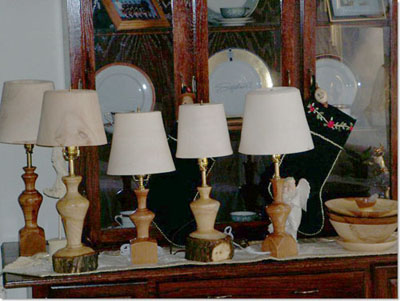
Here is the finished shade. I have also developed a manner to hang the shade on the lamp that
involves cutting a wire hanger into smaller lengths and bending a small portion 90 degrees at one
end. This gets CA glued into small holes drilled into the underside of the brim, and then the end
that faces the middle get soldered to a brass washer, both top and bottom.

Another word of caution, I use regular light bulbs to dry the lamp shade and I have not had any
problems. As long as the top hole is big enough, there is enough air flow to prevent heat build up.
But for daily use, my suggestion is to use a CFL bulb, (a lot cooler) and heck it’s a better way to
go all the way around.
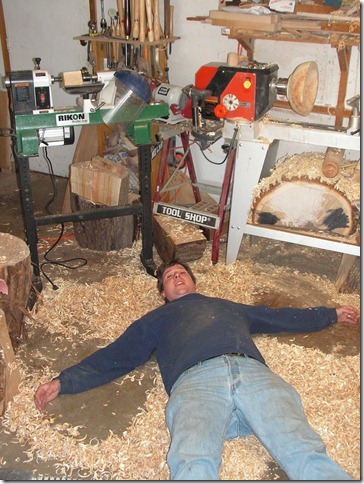
Here I am making Lathe Angels, happy is as happy does.....
Andrew can be reached directly via email at
andrewasawyer@msn.com
.

