Here's My Woodturning!
by George Davis
Rutherfordton, NC
Note: click any picture to see a larger version.
In 1952, I elected shop as one of my subjects in high school. Working with wood has been a passion
of mine for years. My interest in woodworking also encouraged me to volunteer as an assistant to
the instructor the following year. After graduating from high school in 1954, I located and
purchased a used Shop Smith which I still use. Over the years, I have accumulated other equipment
and I now have a reasonable amount of tools. The lathe that I like best and use most is a Jet 14-42.
"Turning" became interesting to me after attending one of the monthly meetings of our
Rutherford Wood Workers Club, where
a member was making segmented bowls.
Since I do not like to follow patterns that belong to someone else, I prefer to develop my own design.
First, I decide how many segments will be in the item and then I'll divide this number into 360 in
order to determine the angle of each segment. Using a sliding compound miter saw set at the
prescribed angle, I cut the segments to size. I use a sub-base on the miter saw to attach the stop
block, hold down and make minor adjustments in the cutting angle. After one half of the segments
have been cut, I lay them on a flat surface forming a half circle. I then place a straight edge
across the center of the half circle and verify the segmented pieces are parallel to the straight
edge. Minor adjustment of the sub base on the miter saw may be required for proper alignment of
these segments. If I make any changes, I re-saw all segments and re-check for proper alignment. I
will continue adjusting the sub-base until alignment is obtained. After this has been accomplished,
I cut the remainder of the segments and start gluing.
Next I place glue on both sides of alternate segments and clamp the circle using metal hose clamps
which may require chaining together for large pieces. To insure that segments stay flat during
glue-up, I sandwich segments between two plastic laminated 3/4 inch plywood boards and clamp.
Placing a coat of wax on the laminate will assure easy removal after the glue dries.
The solid base for the segmented item is cut using a home made jig on the band saw. This jig
requires me to cut a small shallow hole in the center of the board. I screw a wooden block to the
face plate and glue the base to the wooden block. After the block is screwed to the face plate, I
drill a small hole in the center of the block and insert a nail that will protrude through the block
1/8 inch. This nail aligns the center of the base to the center of the wood block using the small
shallow hole I made on the band saw earlier. I then turn the base on the lathe to obtain a flat
face. After flattening one side of the glued up segment, I glue it to the base. If I am using more
than one segment, I will flatten the two before adding additional layers. After turning and sanding
is complete, I leave the segmented piece attached and apply the finish. This makes sanding after
each coat of finish, if required, a snap. I finish with a coat of Zinsser SealCoat wax free shellac,
a coat of sanding sealer and six to ten coats of urethane gloss applied by brush. After all is
complete I cut a groove in the base adjoining the wooden block on the face plate. Using an old
pruning saw, which saws on the pull stroke, and turning the lathe on a slow speed, I begin sawing
from the back side of the lathe in this groove and continuing until only about one to one and a half
inches remains. Then I pry off and sand the base to finish. On small items a chuck with a block turned
to make a face plate may be used: gluing two layers of heavy brown paper between the face plate and
the base works very well and can be pried off when finished.
As for turning the collars (knots), that is another story. Any way I can get it between the two
centers is sufficient. Sometimes it is necessary to glue a block of wood to the large end to have
something for the tail stock center to hold to. I have had the most success cutting end grain on dried wood
with a carbide cutter. If a cavity exists at the bottom, a few turning shavings mixed with Titebond
III glue makes an excellent filler. A small amount of wood dye may also be added for color matching.
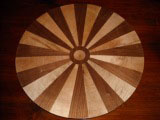
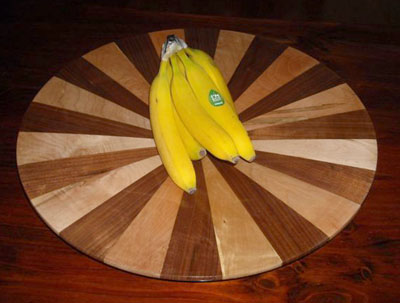
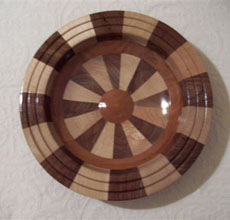
This is a large segmented disk made from walnut and maple with a cherry base and center. Starting
with 2" stock and turning to a 3/8" thickness. The finish is 1 coat of dewaxed shellac with 1 coat
of General Finishes Enduro water based Pre-Cat Sanding Sealer and 10 coats of General Finishes
Enduro water based Pre-Cat Urethane gloss. May be used for a serving tray of an accent wall hanging.
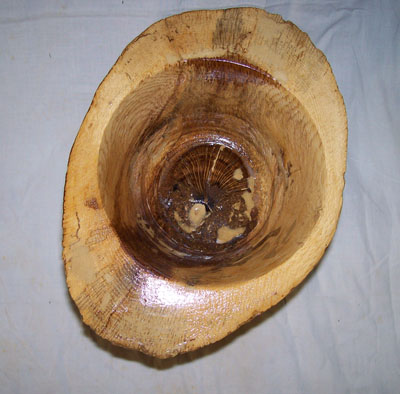
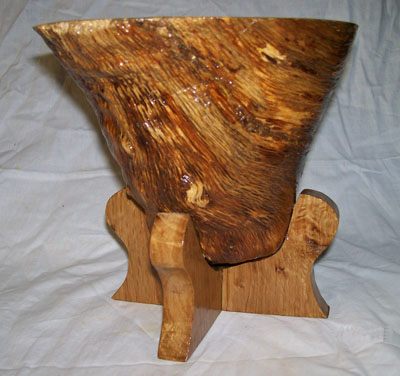
These are some of the other turnings I have been working on recently.
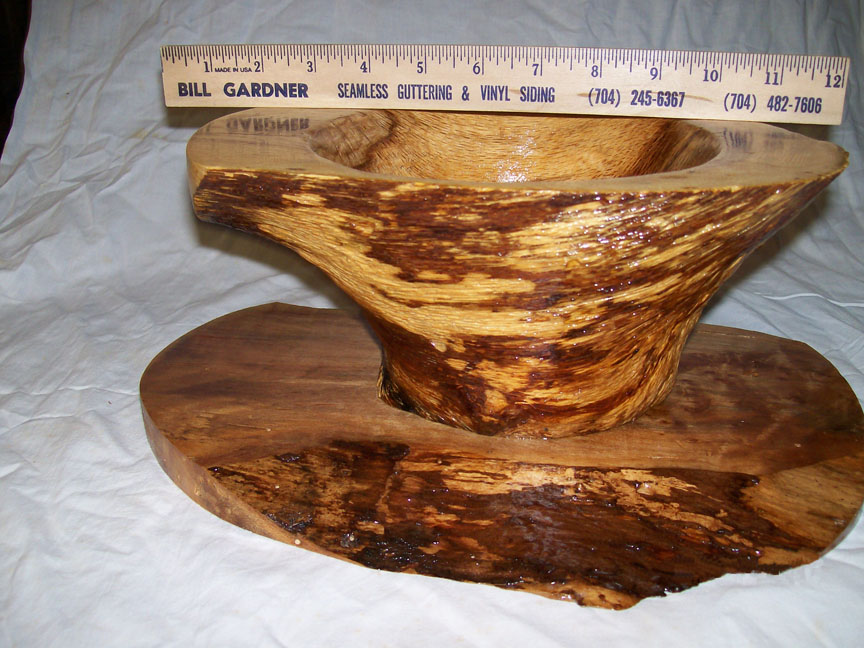
These three are turnings of hollowed out white oak "knots" or "collars" which grew after a limb was removed.

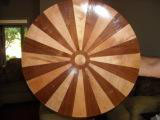
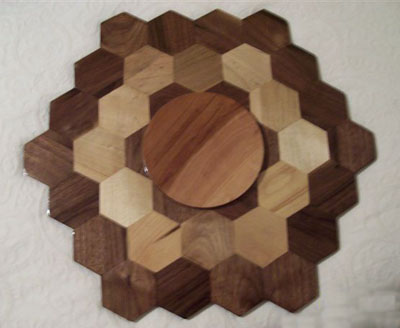
A 20" diameter by 1" high plate consisting of walnut and maple hexagons with a slight taper toward the center.
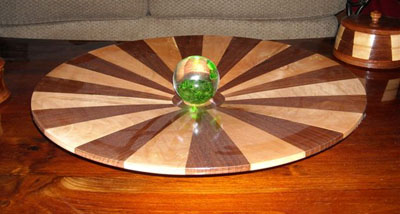
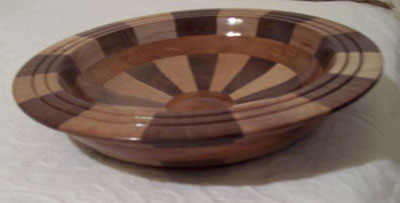
This is a plate 13" diameter, 3" high consisting of walnut and maple segments with cherry rings and bottom.
You can email George at
geodavis@bellsouth.net.
Submit your own woodturnings to this column! Simply
SEND US PHOTOS
of your woodturning
projects along with captions and a brief history and description of your woodturning. (Email photos
at 800x600 resolution.) Receive a $50 store credit if we show your turning in a future issue!