Making a Stropping Slip
by Curtis Turner
Round Rock, TX
Note: click on any picture to see a larger version.
Change is often good, right? There are times when old practices must be changed. Just because a task has always been accomplished in a particular way, does not mean there might not be a better way to do it.
I continually try to improve my processes and methods to become a more skilled woodworker. But in one area, I have allowed myself to go unchallenged and haven't made improvements: maintaining a super-sharp edge on my curved carving tools. Those inside curved edges are tricky to keep sharp. I have learned that stropping carving tools greatly improves how cleanly they cut wood. I have used a leather strop for years to refine my carving tools. However, I always struggled to strop the inside curves. To do it, I typically would curl up a scrap bit of leather charged with
chromium oxide buffing compound
and attempt to refine the tool. The leather scrap was much too small to safely strop, so consequently, I never really did an effective job. Occasionally, in a desperate move, I would apply the compound to a dowel and make the best of it. As you might guess, the diameter of the dowel rarely fit the curve of the tool that needed stropping. So, I finally had enough and decided I would turn a stropping slip with a handle.
It turns out that this project is extremely easy. I wish I had made one years ago! As an extra bonus, this project can be the foundation for several other turned projects.
First, let's explain stropping. Stropping is often simply defined as "sharpening". However, it can be better considered to be polishing a tool to enhance its sharpness. One refines the tool's edge by using a strop to polish the edge, as the final step in the sharpening process. Stropping is typically accomplished by pulling the edge of a tool across a piece of leather charged with a polishing compound.
Let's get started
I used a small blank about 1-3/4" square by about 12" long. This was a blank I had cut from a log I harvested several years ago. I think this was from a locally harvested elm or sycamore. I recommend any straight grained wood for this project. For example, maple, cherry or mesquite would make for a good stropping slip.
I started by mounting one end in a chuck. I could have just as easily mounted the blank between centers. I used the chuck because it was on the lathe when I started this project. Also, the blank was square and was held securely by the jaws of the chuck. If the blank was somehow out of square, I would have chosen to use a drive center.
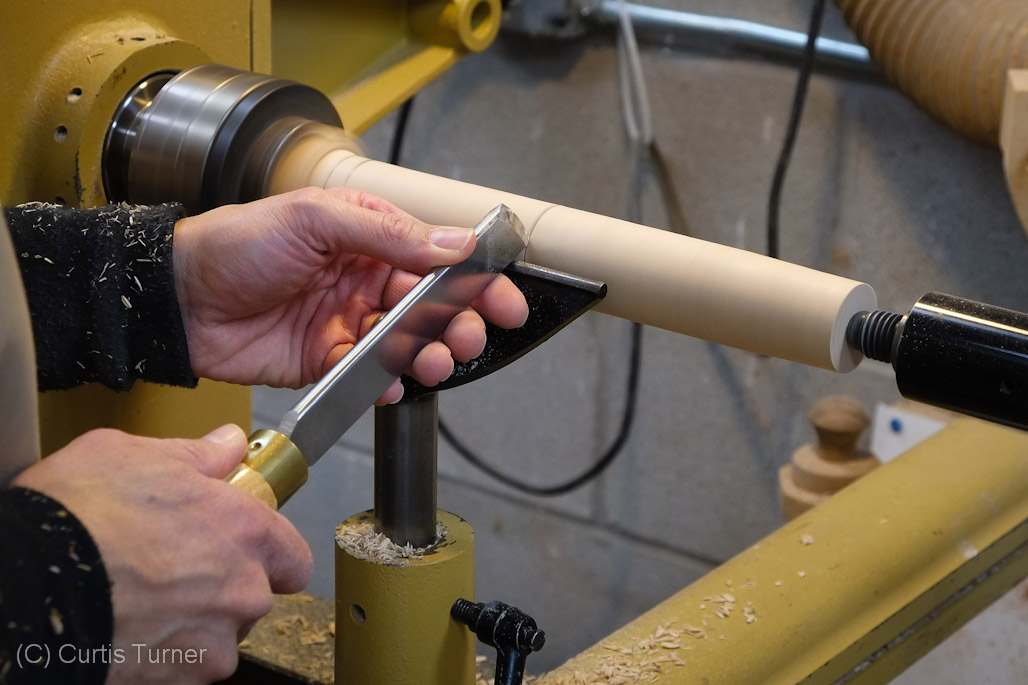
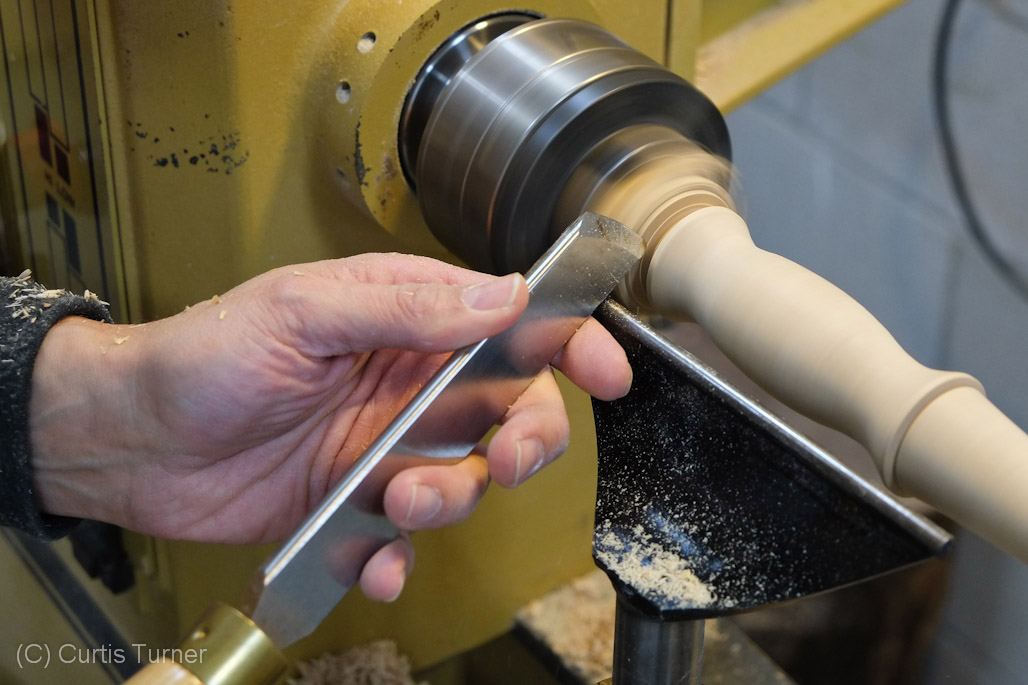
I began by turning the square blank into a cylinder, first using the spindle roughing gouge, and then refining with a skew. Next, I marked out the handle transitions and the ends of the slip. I then used the long point of the skew to further define these lines.
Shaping the handle
Then I began shaping the handle to fit my hand. The handle is very similar to
a handle one would shape for a turned mallet.
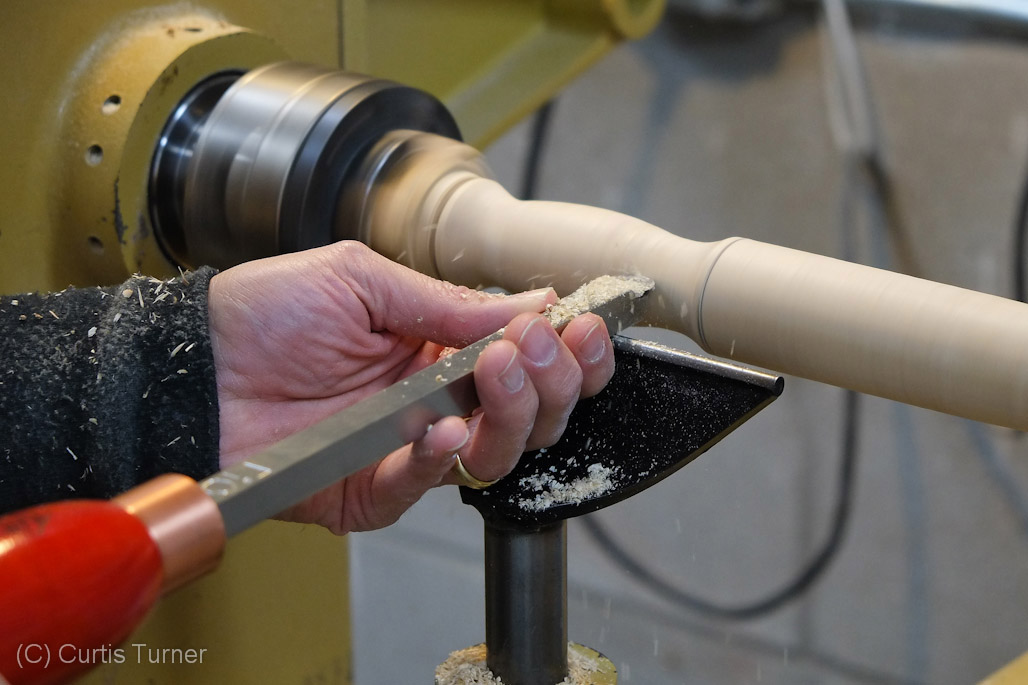
I completed the handle with a spindle gouge, skew and an
Easy Wood Tool Easy Finisher. While I used three tools to shape the handle, it could have been done with any one of the three by itself.
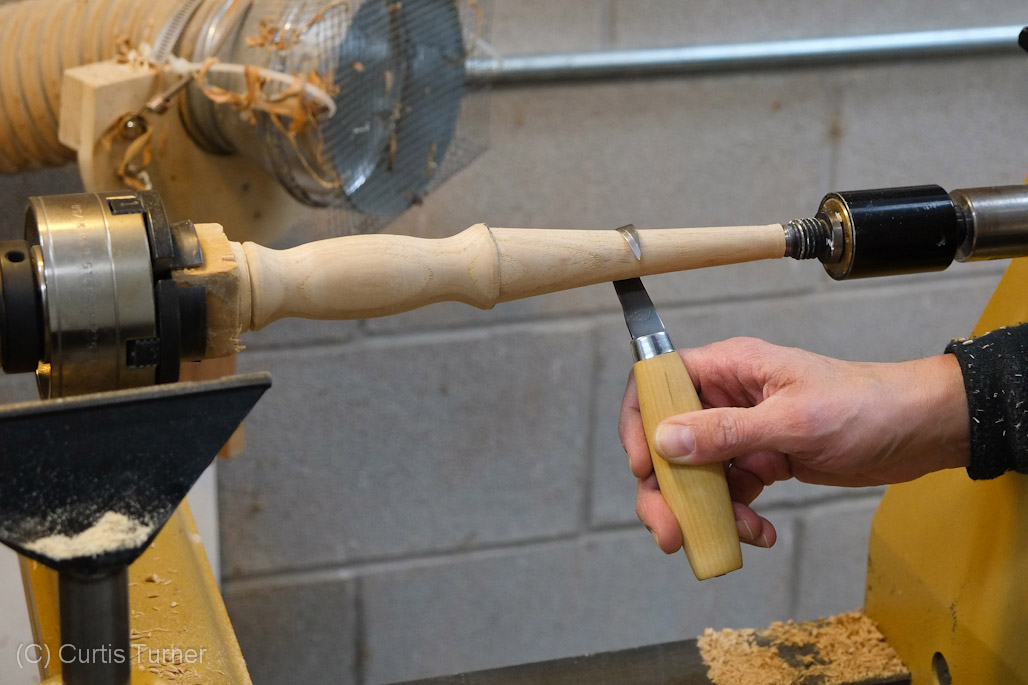
I shaped the end of the handle by paring with the long point of the skew. I trimmed only about 25% of the end grain, because I still wanted plenty of wood to support the turning at the tip of the slip. This partial removal helps me to better visualize the project.
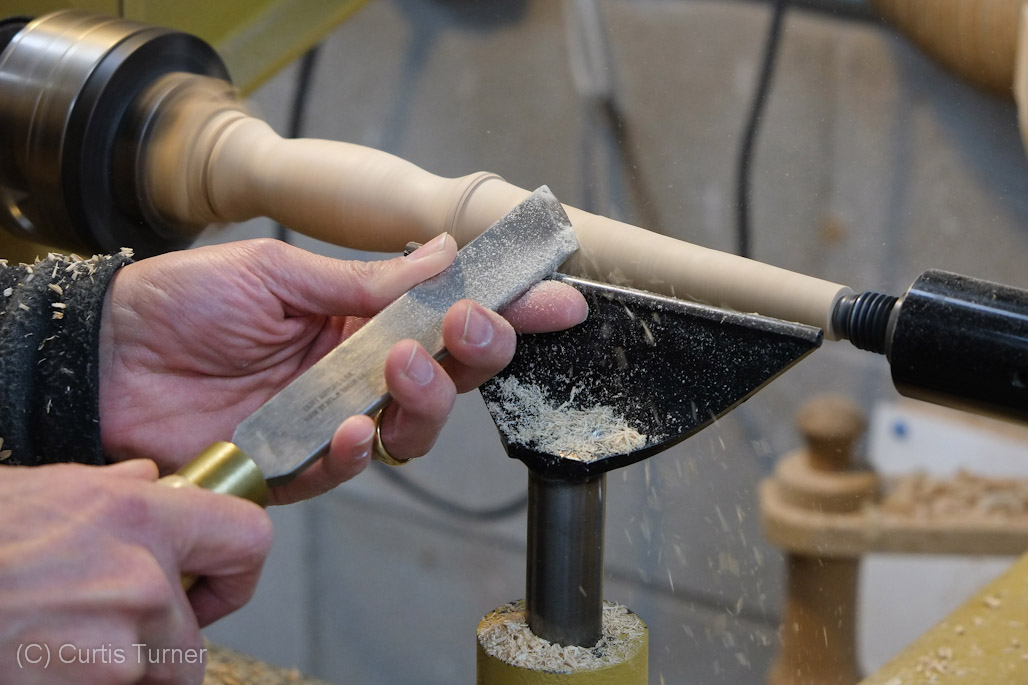
Turning the cone
Next I turned my attention to the cone end of the slip. The goal here is to turn a cone form that matches the tools you plan to strop. I aimed for a relatively straight-sided cone. I turned this by eye, however, if you want to be precise about it, you could place a straight edge on the cone, and turn away the high spots, until you had a perfectly flat side.
Once I had a rough shaped cone, I tested various carving tools to ensure I had the proper radius. I had to go for several rounds of testing and turning to find the fit that worked for my tools.
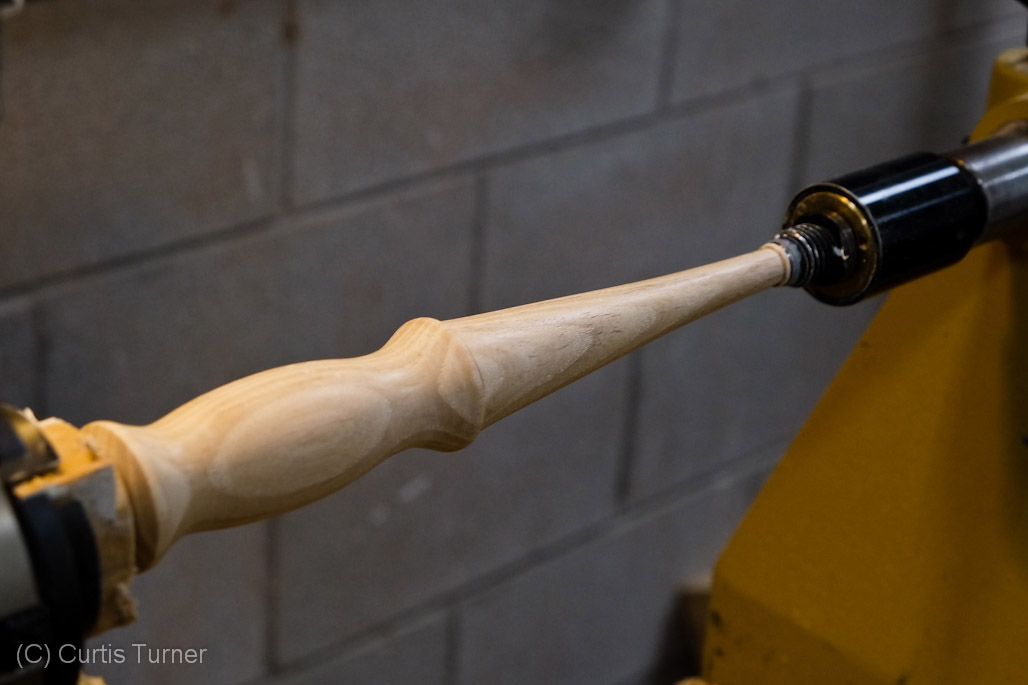
After I was satisfied with overall shape, I sanded to 320 grit. Then I burnished the entire project with a handful of shavings. This is an old turner's trick: you hold a handful of shavings to the spinning project to polish the wood. Of course, one should be very careful to avoid injury with this technique. I would not do this on a project that had sharp details, nor attempt it near the chuck or centers. I have also used an old brown paper bag to accomplish the same effect. I think you can see the shine in this photo.
Next I used a thin parting tool to remove more wood on the waste side near the chuck. I then used the long point of the skew to cleanly cut the end grain down to about a 1/4" tenon. I then removed material at the tip end, and finally, I removed the piece from the lathe and cut the remaining tenon with a small flexible saw. I sanded both ends to smooth and cleaned up the end grain.
How to use a strop
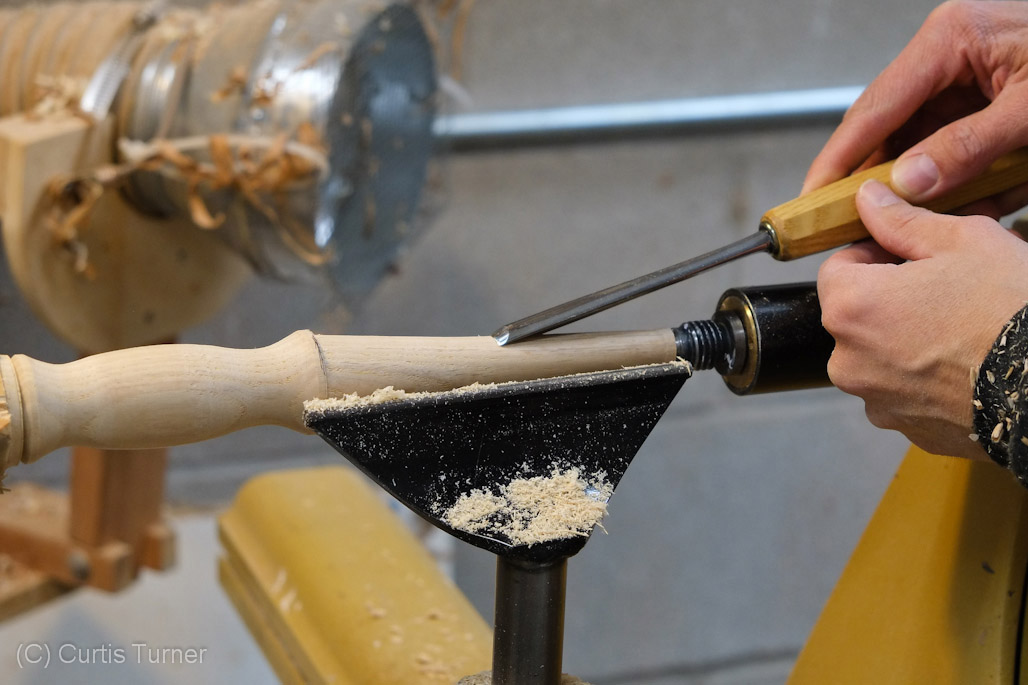
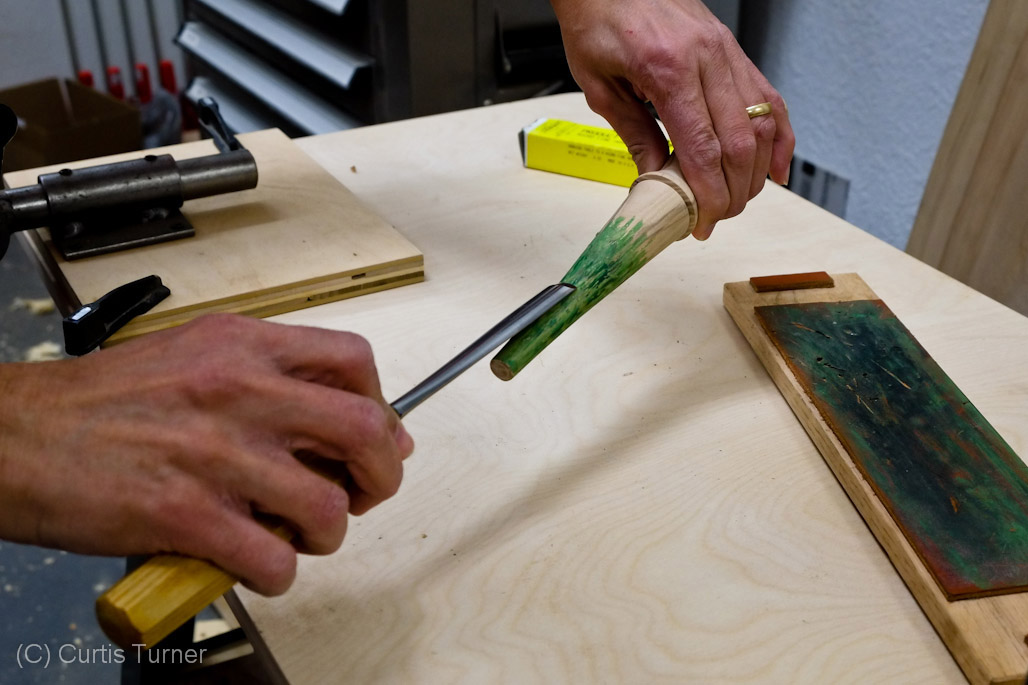
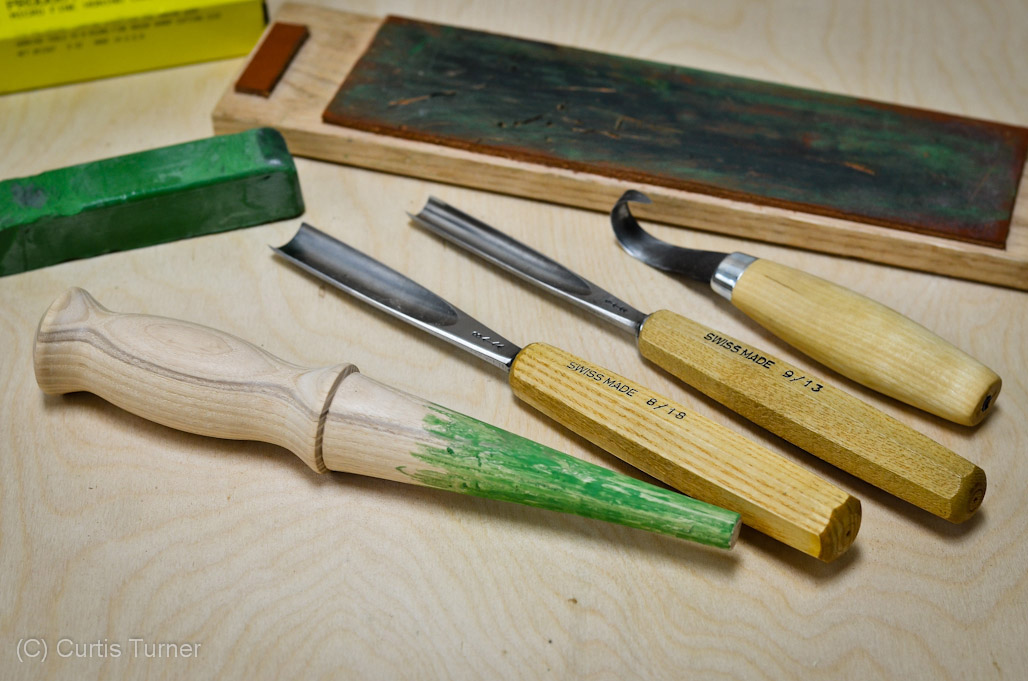
To use my new stropping slip, I applied
green chromium oxide honing compound
to the cone. The bar is used a like a crayon, and rubbed onto the surface. This extremely fine compound will polish the edge of the tools to a mirror finish.
The purpose of this technique is to improve or refine the cutting edge. This is a polishing process, not grinding or sharpening. Those initial tasks are accomplished with water stones or grinding systems. I am right-handed, so I prefer to hold the strop with my left hand and the tool in my right. I place the tool edge where the edge best matches the cone. I then slowly pull the tool down the cone and away from the handle (left) side. You are essentially dragging the edge down the grain. I do this 5-10 times. I also stropped the outside edge of the hook with a flat strop. It is important to equally work both sides of a cutting edge for maximum performance.
So how does the new stropping slip perform? Amazingly well! I tested this on the hooked knife in the photo, and was able to cleanly cut pine with ease. Prior to stropping, the knife was crushing fibers in the scoop portion of a spoon. This slip could also be used on turning tools, provided the cone fit the radius of the tool.
For a bonus, turn an extra one for the gardener in the family. Tell them you made a custom dibbler just for them. (Don't know what that is? Just Google "garden dibbler").
Now for the double extra bonus. These can be scaled up a bit, and used as the basis for making a tapered reamer for chair making.
This is such a simple project, you could turn one just for practice, or to give as a nice gift for a friend who likes to carve. I am sure they would find this to be a very handy tool.
Curtis is a former President of
Central Texas Woodturners, a member of the
American Association of Woodturners, and a member of
Fine Woodworkers of Austin. Curtis teaches and demonstrates nationally for Lie-Nielsen Toolworks. He also teaches for TechShop. He owns a studio where he teaches and works. Curtis lives in Central Texas with his wife and four young children. Take a look at his website at
www.curtisturnerstudio.com or visit his
Instagram: tx_planes.