Turning Rowing Oars
by Temple Blackwood
Castine, ME
Note: Click on any picture to see a larger version.
Living on the coast of Maine, we enjoy a rich history of maritime activity that includes significant boatbuilding, boat maintenance, and even boat use! The
Highland's Woodturning
gallery attracts a number of one-off jobs that include turning various boat parts for both new boats and boats needing repair, particularly for the large fleet of coastal wooden schooners, like Timberwind, addressed in the
July 2015 issue of The Highland Woodturner.
One seemingly small but critically important task fell to me this past fall when we broke one of the oars for our small rowing dingy. While rowing oars do not seem like a particularly fancy project in today's world, those of us who use them know them to be among the unsung hero tools of yesteryear that retain their value into the present and promise to do so well into the future. Like the ever-useful household broom or shop mallet, oars represent a unique technology of efficiency and effectiveness that spans centuries of human tool development. While making them work well does require some skill (observe a young person trying to learn how to row), crafting them to work at greatest efficiency requires some understanding of the physics involved in matching the human muscle action to the desired task.
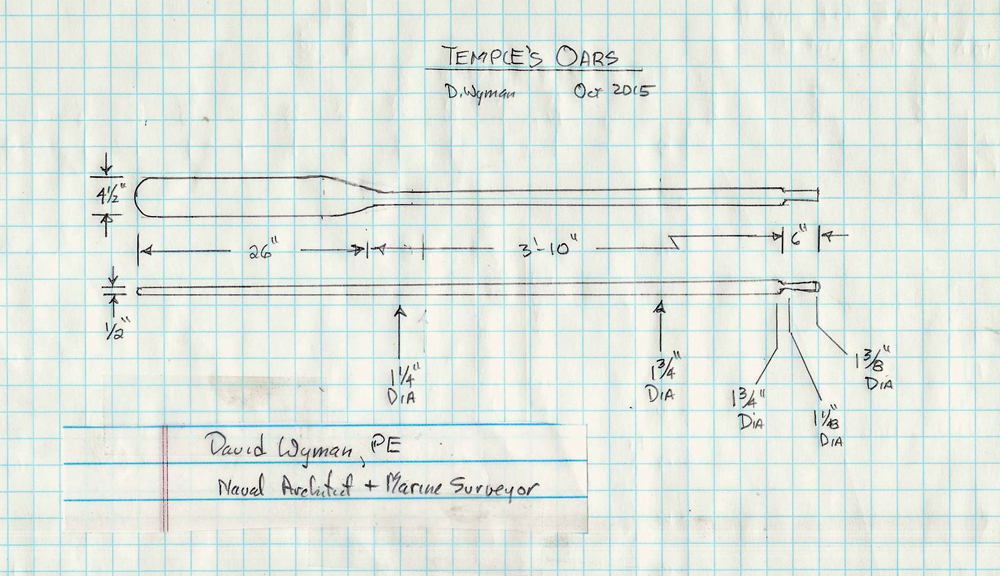
Realizing that although I am intimately familiar with oars and their operation, I have only limited practical experience making them from scratch. This resulted in my turning to my good friend David Wyman, PE (Naval Architect and Marine Surveyor) who kindly obliged me by scaling the design for my new oars and helping me unlock the mysteries of crafting this tool that I had been happily, but ignorantly, using for more than sixty years.

|
|
Figure 1 - Scaled Oar Design by David Wyman
|
|
|
Figure 2
|
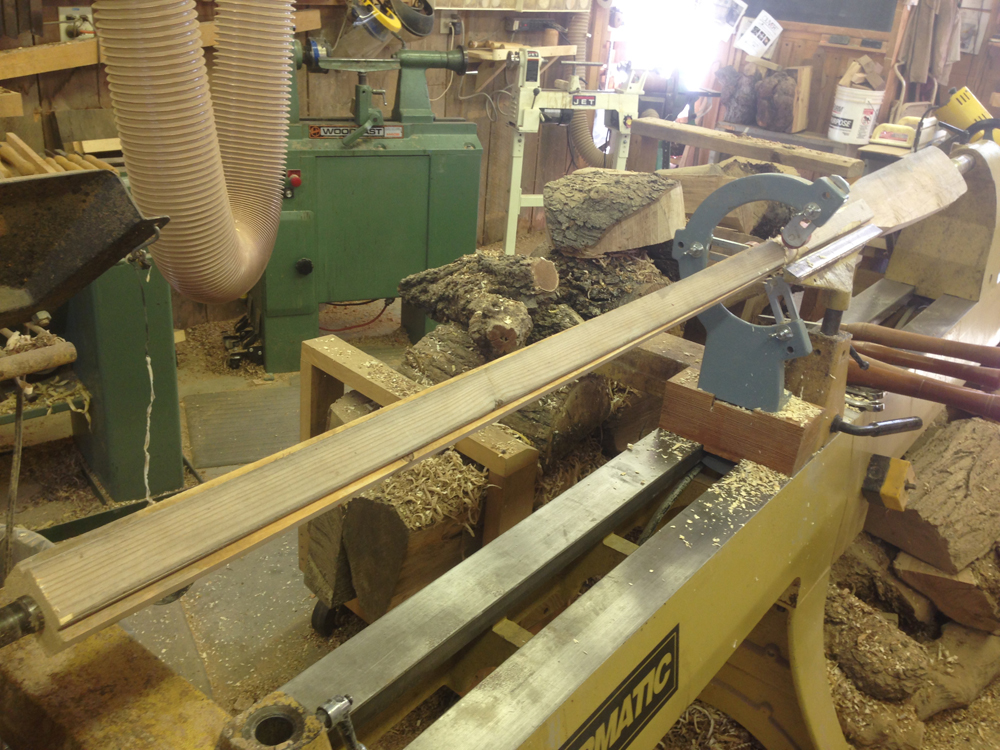
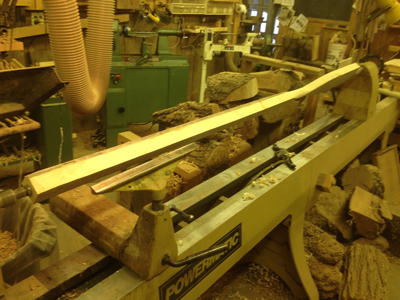
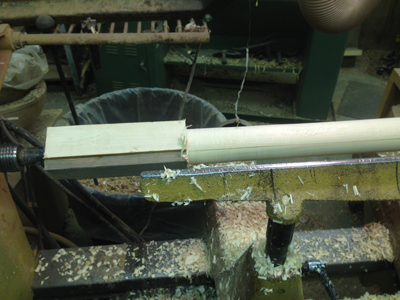
Using David's scaled drawing, I started with a glued up, band-sawed blank of relatively knot-free, relatively straight-grain #2 spruce 2X6 mounted on the long lathe. Typically for water-based environments
Titebond III
works best with a long cure time.

|
|
Figure 3
|
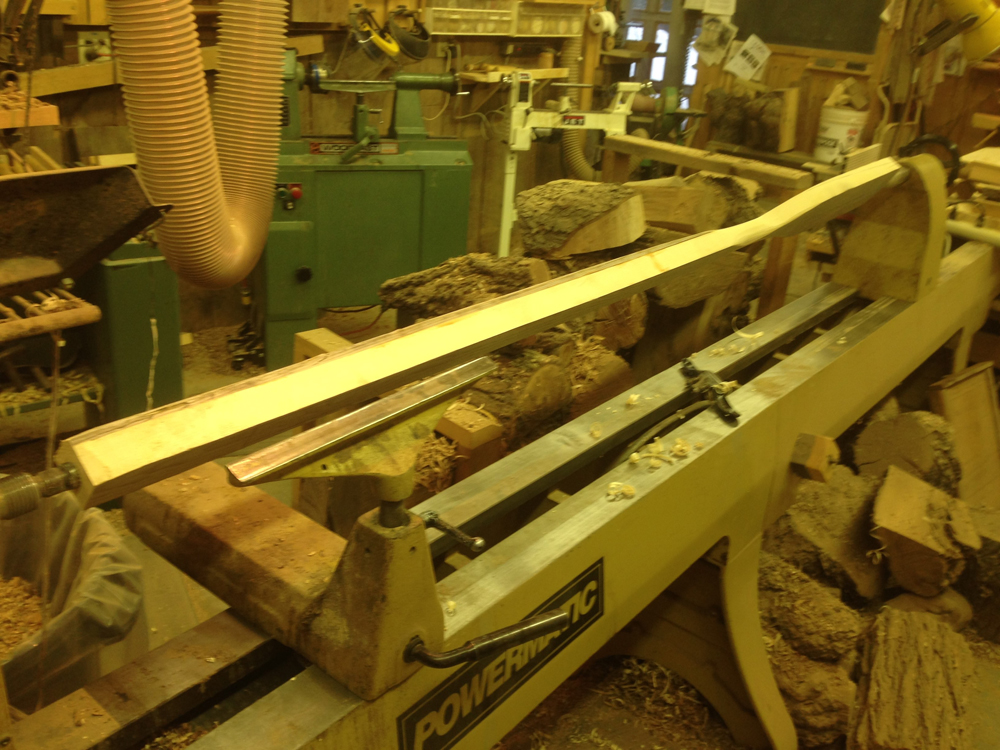
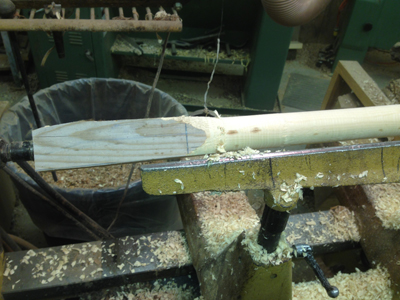
Long, thin turnings vibrate and are prone to breaking unless held firmly in one or more places by a solid, steady rest. Even with a steady in place, these turnings prefer a relatively slow speed somewhere between 400-800RPM, slower when first rounding.
|
|
Figure 4
|
One way to prepare the blank for the steady rest is by hand using a good vise, a well-sharpened chisel, and a spoke-shave. This with a
drawknife
is David's usual way to shape all parts of an oar or paddle, and he is quite adept at rounding the shaft and handle fairly quickly.
|
|
Figure 5
|
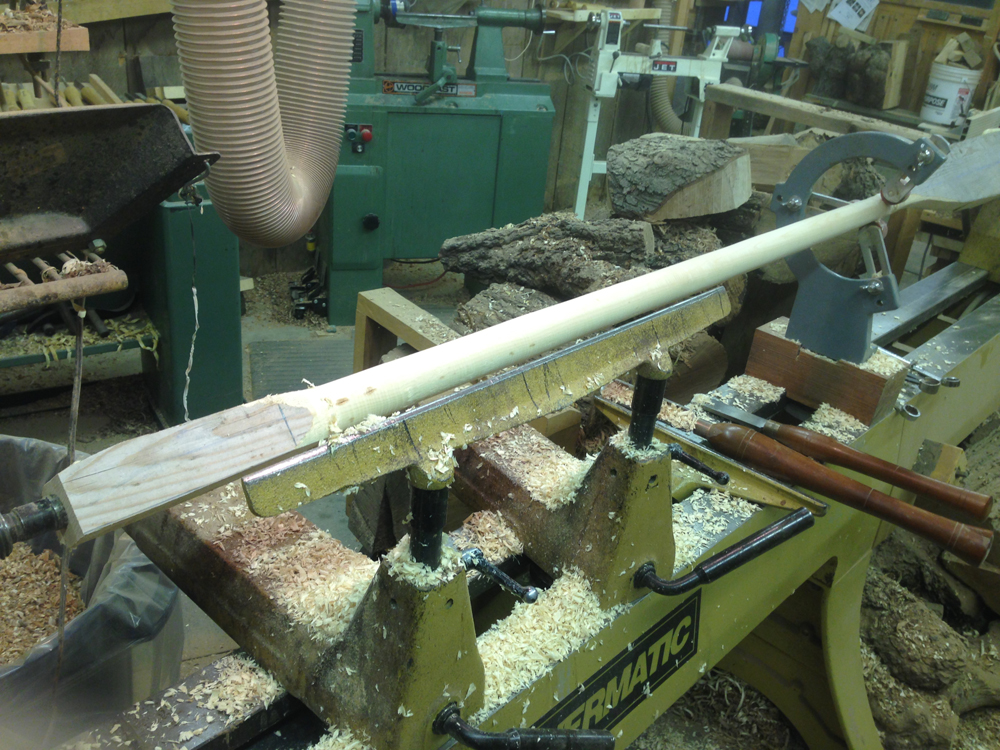
The shaft and handle are more efficiently done with the work mounted between centers on the lathe oriented with the rough-cut oar blade mounted on the tailstock. Like other long turnings, it is important to work on the larger diameters, first starting on the right (tailstock) and working toward the left (headstock) at each diameter. Because the blade of this oar is quite light in weight and will not be turned, it is mounted on the far right, far away from the driving power of the headstock. For long turnings with a significantly heavier portion, such as a baseball bat, the heavier portion should be positioned near the power.
|
|
Figure 6
|
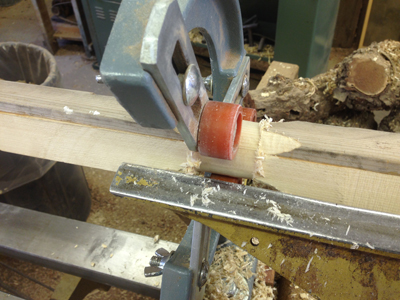
The order of cuts is important and will follow the pattern of: Begin by preparing a rounded portion near the "neck" of the blade but not on it for the steady. This can be done with the lathe stopped using hand-tools or with the lathe at a slow speed using a
roughing gouge
and a 3/8" beading and parting tool (Figure 7)
|
|
Figure 7
|
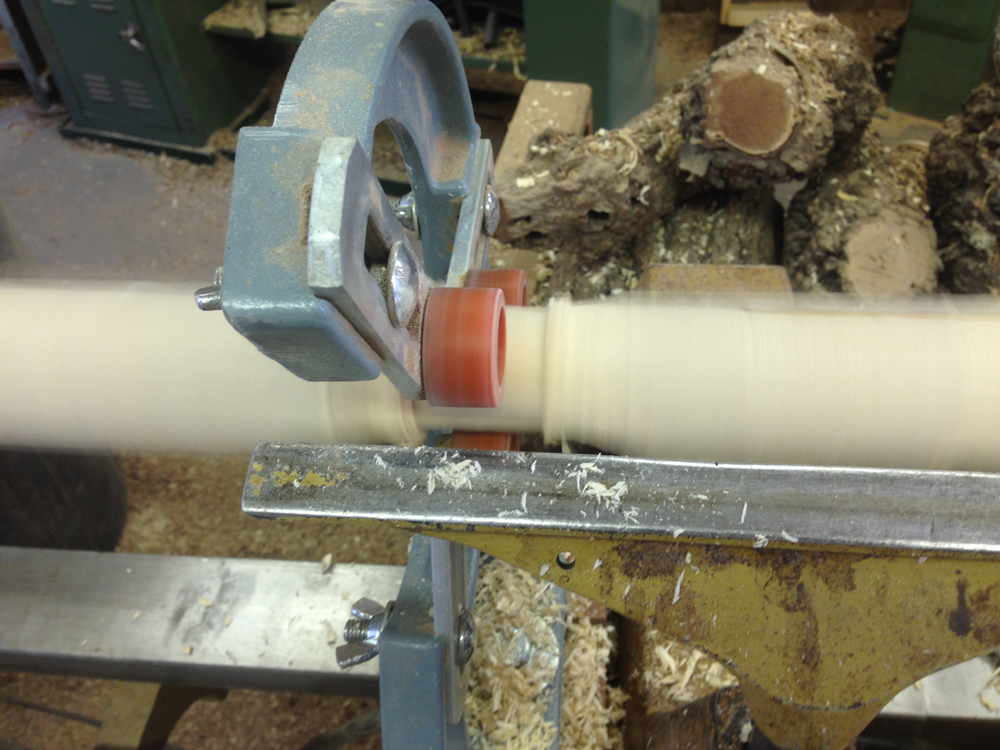
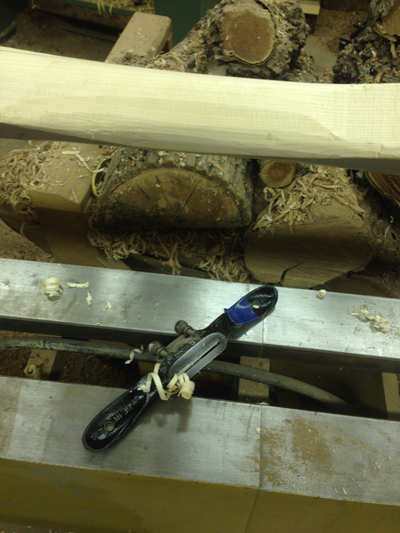
Position the steady (Figure 7) and make sure it runs true (Figure 8)

|
|
Figure 8
|
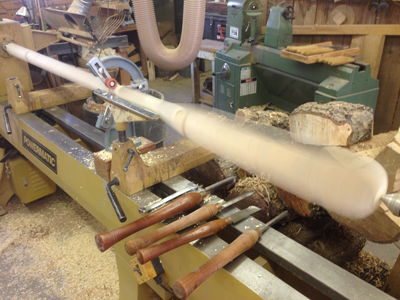
Round the shaft with a broad
roughing gouge
and smooth with the skew (Figures 9 and 10) reaching around both sides of the steady.
|
|
Figure 9
|
|
|
Figure 10
|
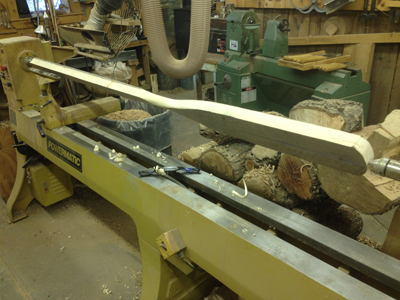
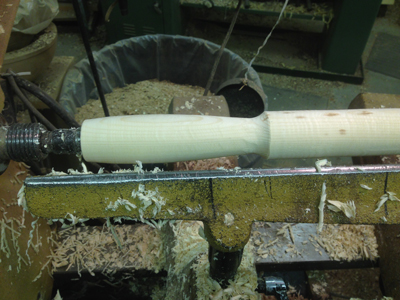
If necessary, reposition the steady or add a second steady. For this oar's overall length of 6'6" that was not needed because the steady was positioned about 3' 4" from the headstock.

|
|
Figure 11
|
Long straight or tapered runs are best managed with a longer toolrest and second banjo (Figure 10), unless the turner is fortunate enough to have access to a powered banjo/toolrest (a very nice but expensive feature usually found on automatic lathes).
|
|
Figure 12
|
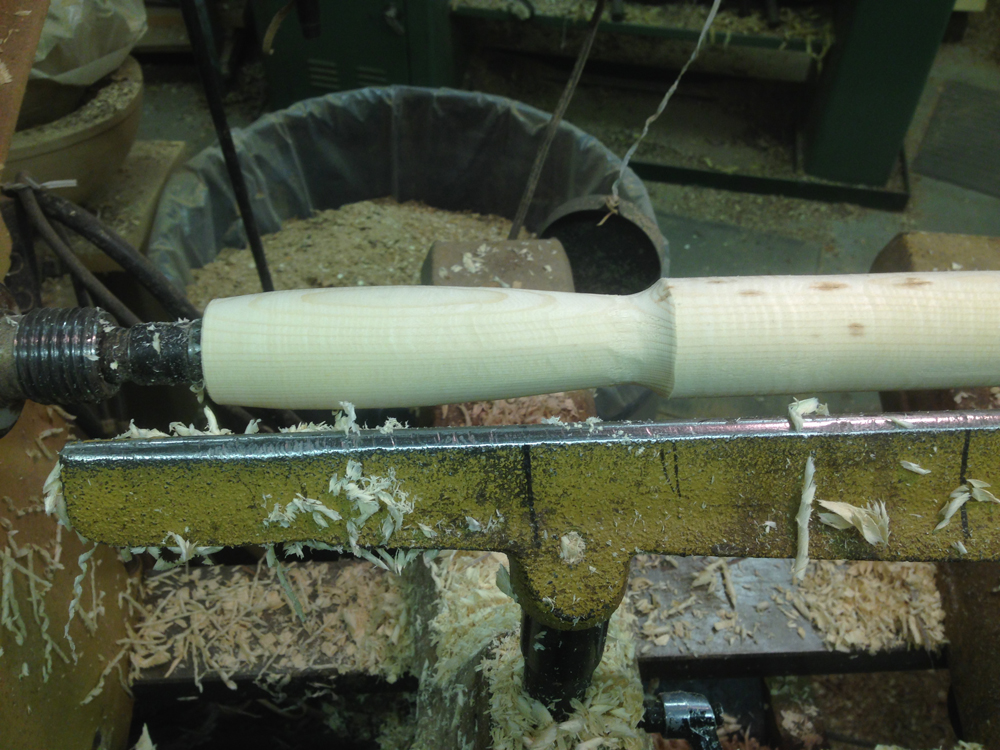
The handle portion can be turned with some modification respecting the size of the hand of the rower, but generally a larger handle such as the one David designed offers more universal comfort.

|
|
Figure 13
|
Keep the steady in place throughout the entire process including sanding to properly support the long, now thinner shaft, which is also driving the weight and air-resistance of the blade.
|
|
Figure 14
|
For this project, there is no need to plan for a waste block on either end. Turning the handle should be fairly simple following the traditional and typically comfortable shape.
|
|
Figure 15
|
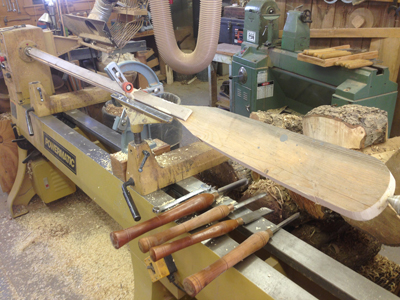
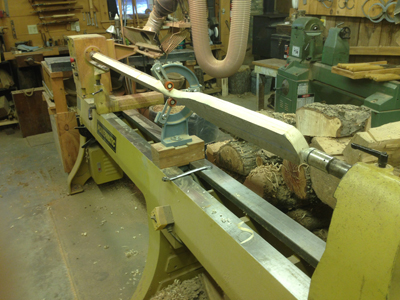
Once the handle is cut and smoothed, the oar appears nearly finished.

|
|
Figure 16
|
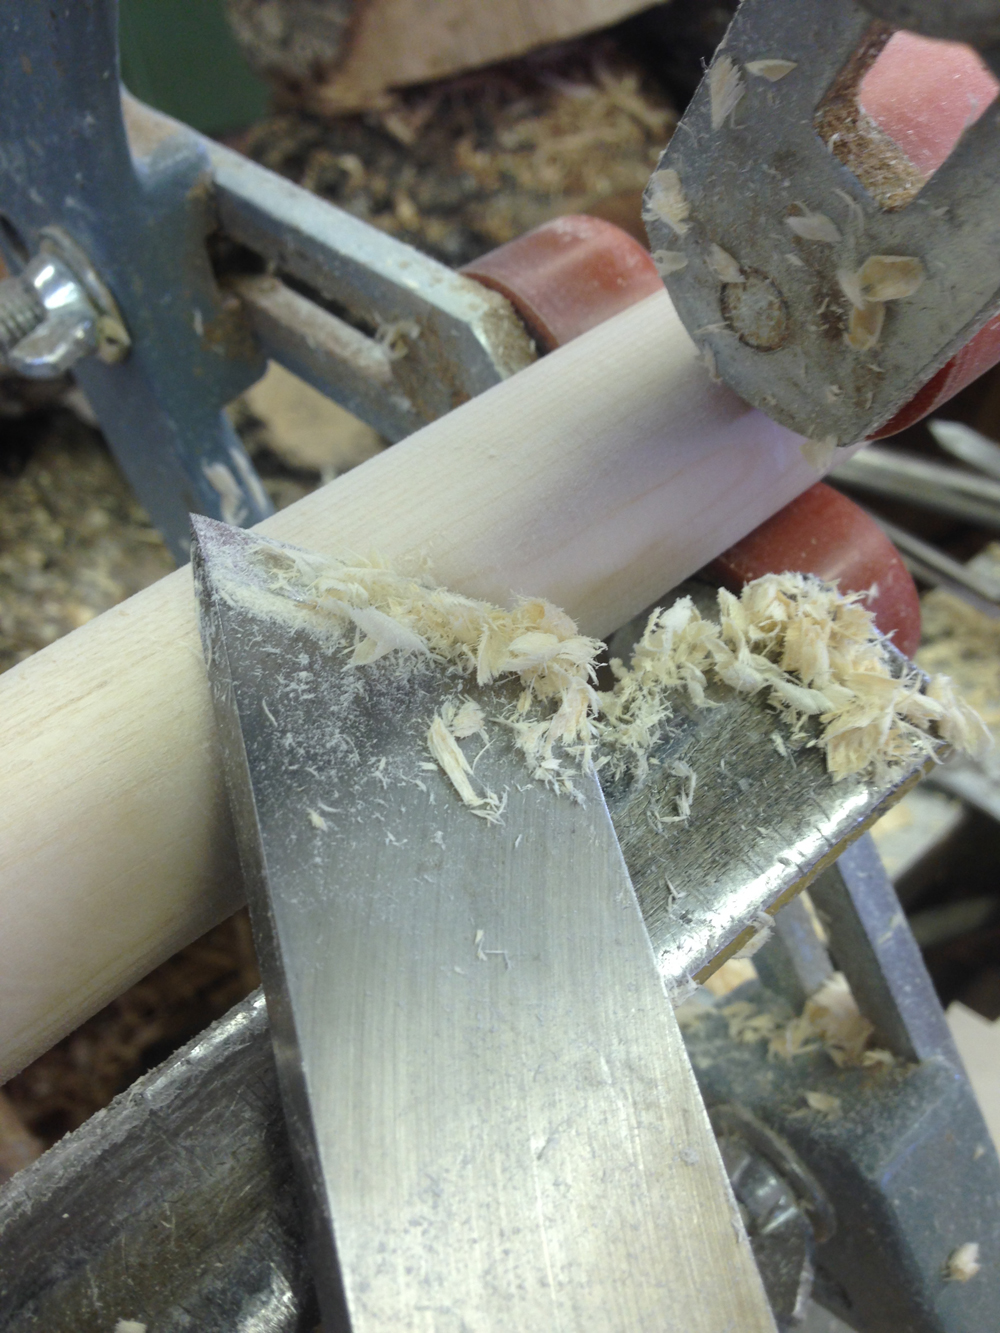
Leave the steady in place while the other features are smoothed and sanded with 220 and 320 grit. The rough, slightly over-sized area of the steady can be finish-cut and smoothed as the last step on the lathe.

|
|
Figure 17
|
Use the skew to trim down the over-sized damaged bearing wood at the steady. Depending on the type of steady rest, the turner might find it possible to cut away that section leaving the steady in place. The other way is to slack off the steady, move it to one side, turn on the lathe, and smooth that bearing surface. Some turners are comfortable steadying the work with the turner's hand. A sharp skew making light cuts avoids setting up the harmonic vibrations that can ruin an otherwise well-rounded and smooth oar shaft.

|
|
Figure 18
|
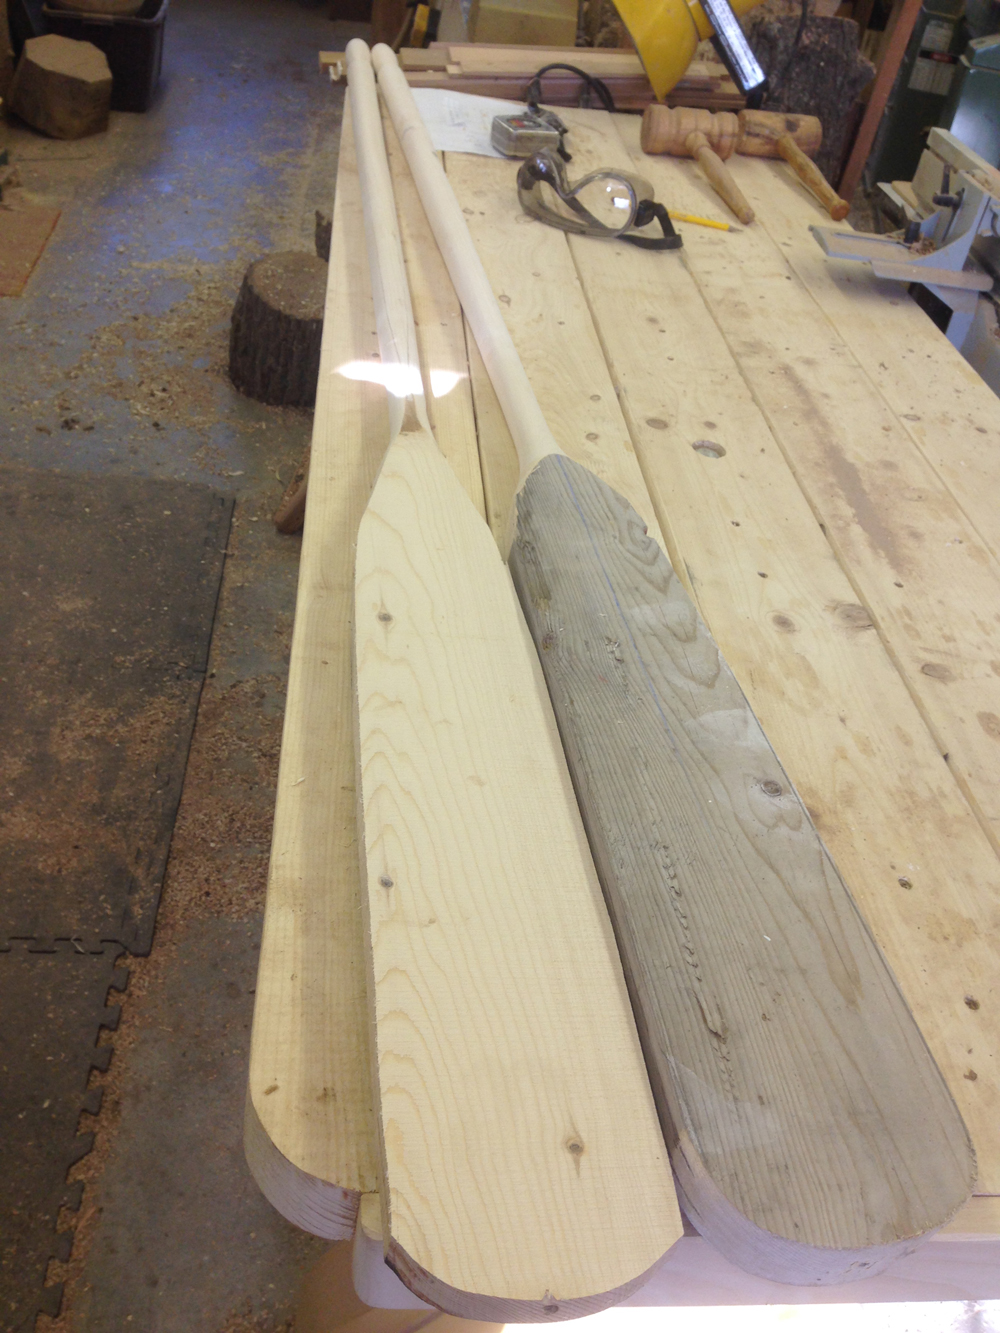
The last steps in shaping the blade of the oar occur off the lathe using a drawknife, spokeshave, chisel, and sanders. This work goes remarkably quickly because there is little wood to remove down the middle and only a bit more toward each edge on each side. The artistic shaping of these oars can be extremely satisfying, but over-aggressive cutting can weaken and ruin the oar, so thoughtful care is well-advised.

|
|
Figure 19
|
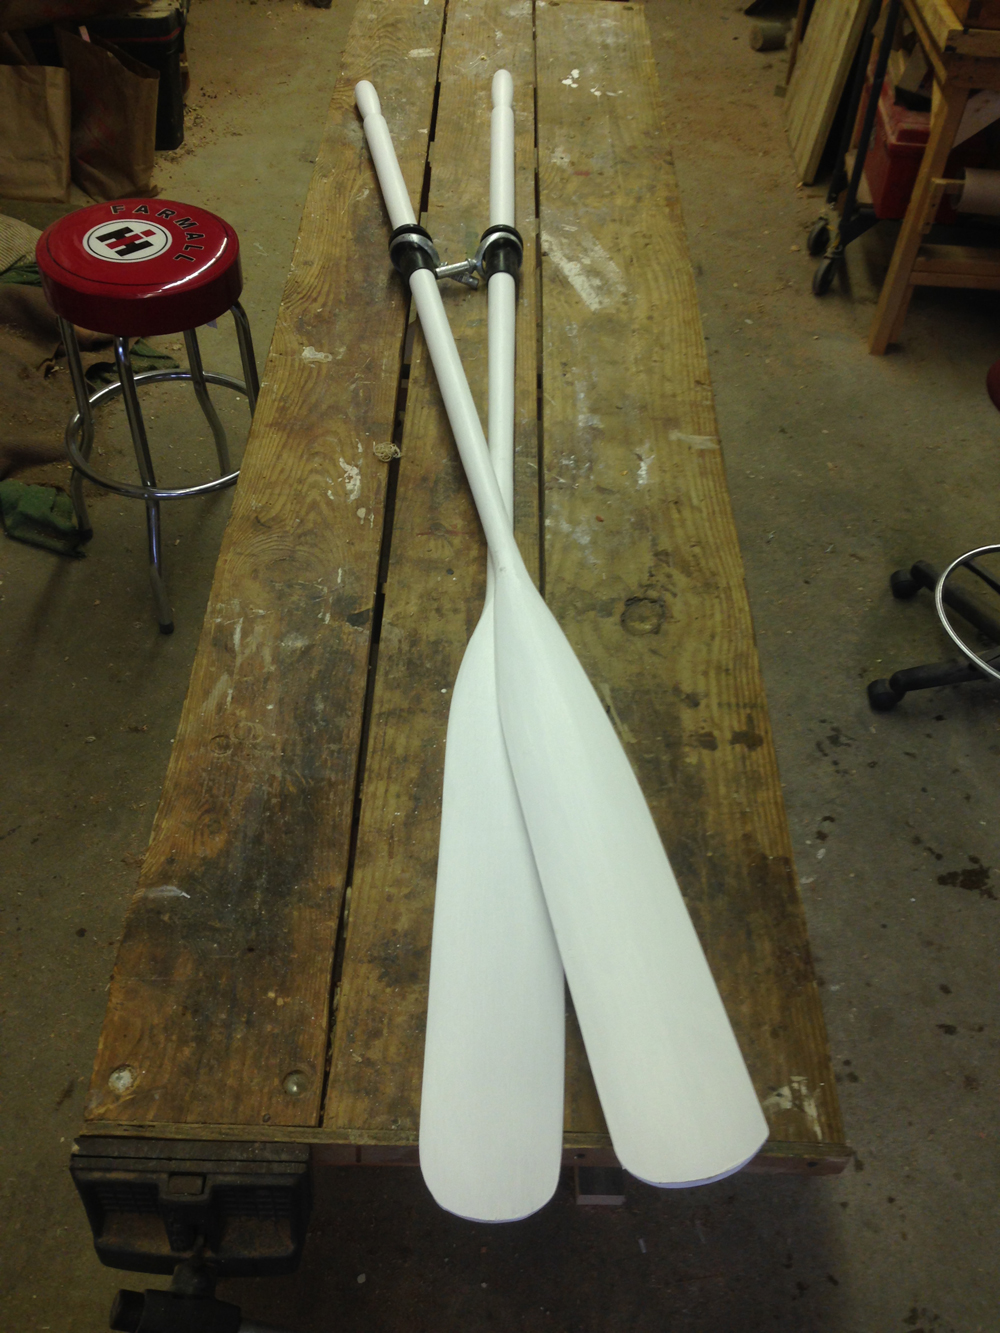
The final step is to prime, paint, and fit the rubber or leather collars to protect the new oars from wear.
Spring will come eventually, and the true test is to take them down to the river for an early morning row along the shore.
Located in Castine, Highlands Woodturning gallery and shop offers woodturning classes and shop time,
a gallery of woodturned art, custom woodturning for repairs, renovations, and architectural installations.
You can email Temple at
temple@highlandswoodturning.com
Take a look at Temple's Website at
http://www.highlandswoodturning.com/.