|
Click on any image to see a larger version.
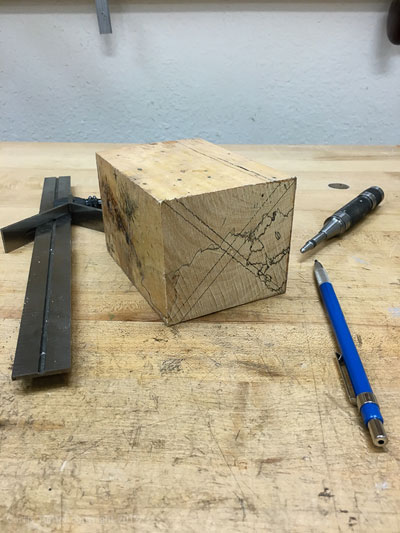
A spalted tamarind blank floated around my shop for years waiting for the right project. Last month, it
somehow made its way to the top of the stack, where it just happened to catch my eye. I could see a
small lidded box hiding in the wood. I knew it was finally time to turn this blank.
The Form
Perhaps it was my subconscious at work. The form I could see in this blank was similar to boxes recently
appearing on Instagram. I did not set out to find a blank to reproduce these boxes. It was simply an
"aha moment" while I was searching for a blank to use for another project. It certainly was a flashback
to my early days of turning.
Boxes similar to this have been popularized by well-known turners including;
Richard Raffan
,
Chris Stott
,
Ray Key and many others. These turners inspired me to venture into box making, among many other
forms. If you have not yet seen their videos or read their books, I encourage you to spend a few dollars
and pick up a
DVD
or
book
.
The Wood
Dry material is very desirable for lidded boxes. A box with a high moisture content will likely distort as it
dries, thus affecting how the lid fits. Of course, if enough distortion occurs the wood will crack. This
blank qualifies as dry and stable.
I started by cutting the blank down to 5" in length.

|
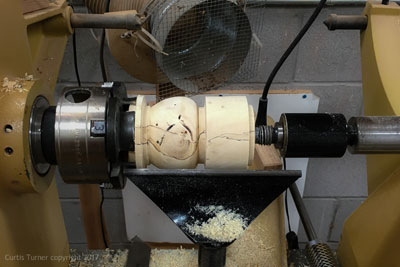
I then mounted and turned it down to the rough diameter.

|
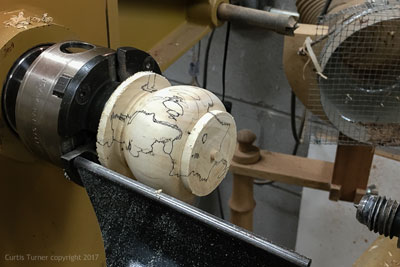
Next, the base was separated from the lid.

|
Hollowing
I used several methods to hollow the body of the box. First, I used a large diameter
forstner bit
, then a
shop made boring bar and small scrapers.
The exterior was shaped with a skew and a spindle gouge. Finally, I sanded the exterior and interior up to 320 grit.
The Lid
Next, the lid was mounted in another chuck and turned to fit the tenon on the base of the box. I left the
base mounted in the original chuck because I wanted to avoid remounting each piece then re-truing
the parts. I primarily used a skew (as a scraper) to finesse the fit of the lid.
This part takes patience. There is typically a bit of back and forth to achieve the fit perfect. I have found if I rush this
step, I end up with a poorly fitting lid. I used a small spindle gouge and a round nose scraper to complete
the interior of lid.
The lid exterior was shaped with several small spindle gouges.
Blending the Fit
Next I installed the original chuck that held the base. I removed the lid from its chuck. I used a jam
chucking technique to hold the lid in place. I then refined the exterior of the lid to blend with the base.
I also took this opportunity to add a decorative ring to the top.
Once that was completed, I removed the majority of the tenon from the lid.
Finally, I used a
depth gauge
to measure the interior depth of the base.
I then transferred this measurement to the exterior.
I marked the outside bottom and parted off the base.
Summary
I am pleased with the results, however, in retrospect I should have reduced the taper of the base. This would allow the box to appear lighter and perhaps taller. Fortunately, I have just enough wood left to make one more.
Curtis was a former President of
Central Texas Woodturners
, is a member of the
American Association of Woodturners
, and is a member of
Fine Woodworkers of Austin
. Curtis teaches and demonstrates nationally for Lie-Nielsen Toolworks. He also teaches for TechShop. He owns a studio where he works and teaches. Curtis lives in Central Texas with his wife and four young children. Take a look at his website at
www.curtisturnerstudio.com
or visit his Instagram:
tx_planes
.
Return to
The Highland Woodturner
front page
|