Make Your Own Saw Bench
by Scott Stahl
Click on any picture to see a larger version.
Whenever I am in a large home center store, I make it a point to go over the construction lumber racks looking for gold. I hit pay dirt on a recent trip in the form of an 8 foot long quartersawn Douglas Fir 4X4 in the cheap white wood stack. The Douglas Fir 4x4 was purchased with no purpose in mind at the time and sat around the garage waiting for a project to come along. It turns out that the right project is a saw bench.
A saw bench is blend between a modern day saw horse and miniature work bench like
the Workmate
. However, if you look deeper you find that modern folks are recreating the past. The saw bench is a simple shop made appliance that renders hand held saws (manual or electric) more effective and ergonomically correct to use. Saw benches have been re-popularized (is that even a word?) by Ron Herman and Christopher Schwarz. Christopher Schwarz has written quite a bit about them;
here is a sample
. Ron Herman of
Antiquity Builders
uses a saw bench nearly every day in his work. Ron goes over proper use of them where appropriate in his
classes and lectures
.
I have looked at many saw bench examples and coupled with my own scant experience with old and new methods of sawing have decided the following bench mostly suits me. I use the word 'mostly' because I have another saw bench design that will be built next. I may be writing in the future that the following example is way off base. As always, I do not profess to be an expert in woodworking. The sharing of my experience is more for entertainment than education. Sharing the thought processes of a beginning woodworker may give comfort and encouragement to other woodworking neophytes out there. Any constructive comments, or suggestions are always welcome.
|
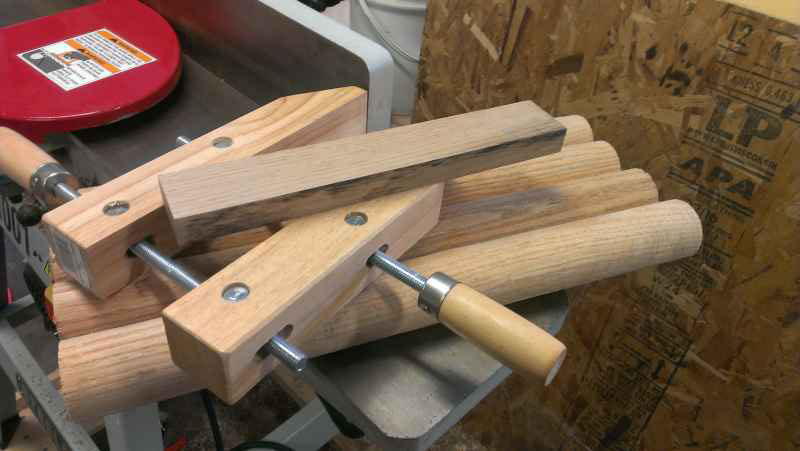
The construction of this saw bench is only a tad more difficult than pounding out saw horses on a job site with four cuts and a hand full of 16 penny nails. I started out by cutting the Douglas Fir 4X4 into two 30" sections leaving a roughly 36" section. Close is fine as the exact dimensions are immaterial to the end product. The three pieces glued together are the whole bench top.
Whether milling the smaller boards is better than the whole 8 foot board is purely a matter of personal preference. I chose to work with the shorter pieces so the focus could be more on the glue faces; who cares how rough the outside edges are? The pieces are milled down to 3"X3" by any means you have available (remember, close is fine). I jointed one face and then used the tablesaw and planer to four-square the three parts. Once milled, they are glued together in a staggered manner. It really is that simple, but why the bench top was done this way deserves more explanation.
|
The three pieces are laid out as in the photo above. Three pieces squared at 3 inches each render a 9 inch wide bench top. I have been studying
By Hand and Eye
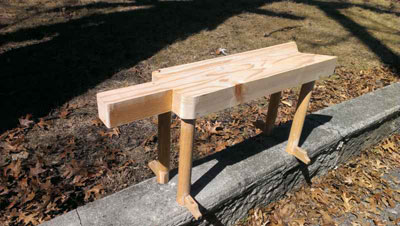
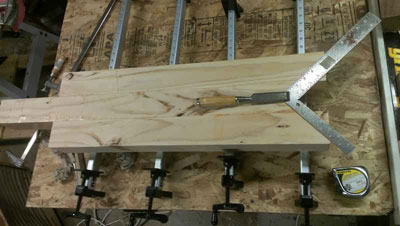
by George Walker and Jim Tolpin. The book goes into great detail about how proportions and ratios really evoke that gut 'looks right' reaction to any built thing. Each leg of the 'V' notch is a two to three ratio (2/3) of the nine inch bench top width, rendering a measurement of six inches. The 'V' is laid out by placing a standard joiners square on the rough 'V' end of the bench top such that the number six is on the edge of the two outside edges and centered on the bench. The photo above shows the layout; the chisel is there simply to weight the square. My eye told me that there is about a quarter inch of bench top on each side of the square (the bench top in the photo is actually about 9 1/8" wide). Draw lines along the square and the exact cut line for the 'V' is created. Adventurous types will now break out a 5 PPI rip saw and go to town on the lines. Those more acquainted with electricity will use a bandsaw. I chose to use a trained beaver named Buck. OK, that was lie. I used a bandsaw. Named Ben.
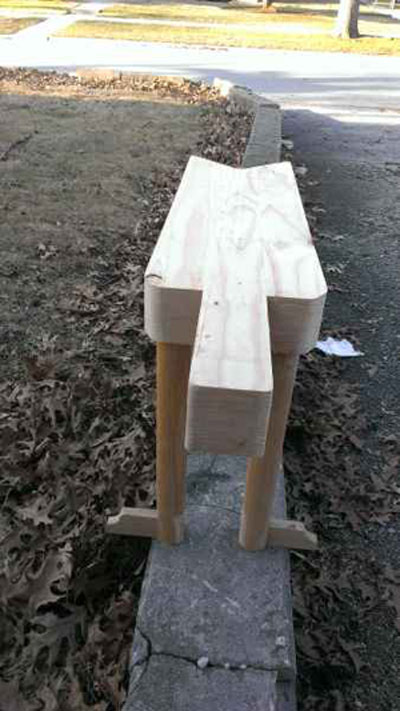
The 'V' notch is the back of the bench, which means the front is the spar. There is no clear idea or purpose for the spar on this bench. My experience is that small parts often need a small support, hence the birth of the spar. I have seen similar features on other saw benches, but nothing to the degree in this piece. The shoulders of the spar were shaped roughly and by eye on a spindle sander. In retrospect they should have been sculpted with more care for a better appearance. It is always a balancing act between aesthetics and function with shop furniture. I almost always tend more toward function than fashion.
|
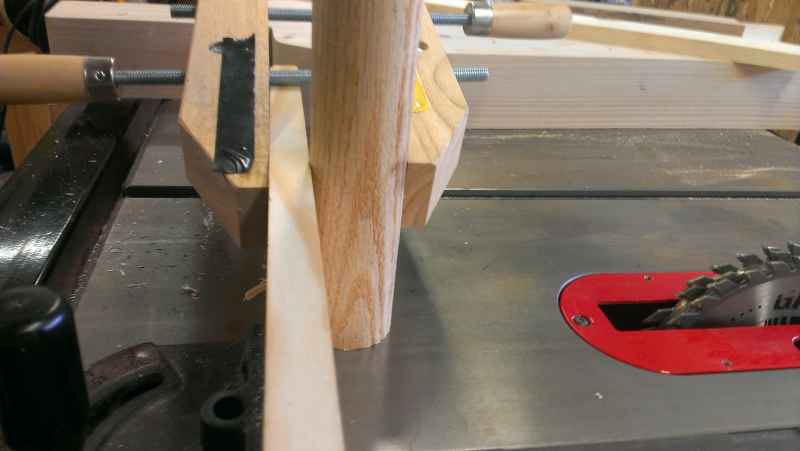
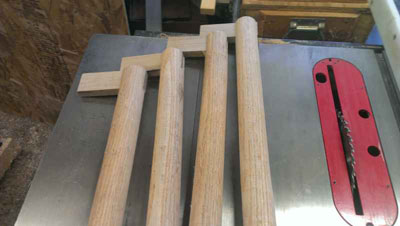
The legs. Definitely a four letter word. The legs as designed for this saw bench feature a tapered mortise and tenon joint with a couple degrees of splay to the outside. Unfortunately my shop does not have the tooling to make tapered joints. The next option is a traditional mortise and tenon, but serendipity caused another design change. I lucked out and scored two 36" long round Red Oak blanks for 5$ each in the clearance bin of a specialty lumber store. The round blanks are a one-of-a-kind find that most people will not be able to duplicate, but the concepts are the exact same with flat or round stock.
The Red Oak blanks were supposed to become stairway railing spindles, but for reasons unknown ended up in the clearance bin. The lucky streak continued in that the diameter of the blanks matched one of my Forstner bits almost exactly (1 7/8"). Mounting the legs was very straight forward. I cut two blanks in half to get the legs. Four 1.5" holes were sunk into the bench top to receive each leg. The assembled saw bench proved to be a bit tippy during dry fit of the legs so I decided to add stabilizers to the legs.

|
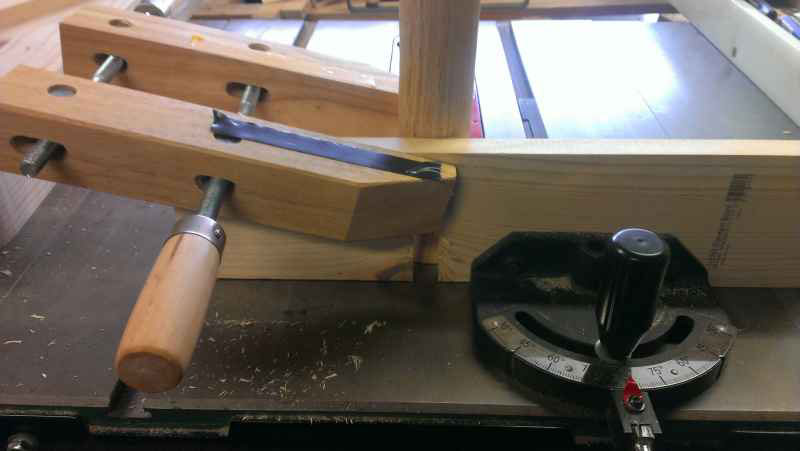
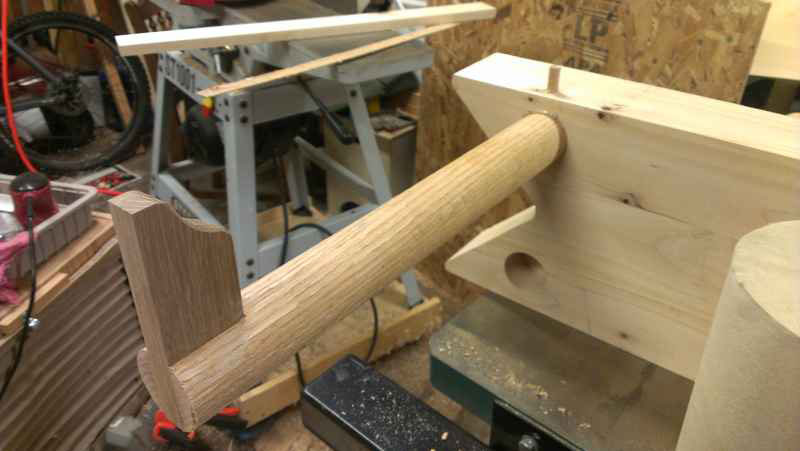
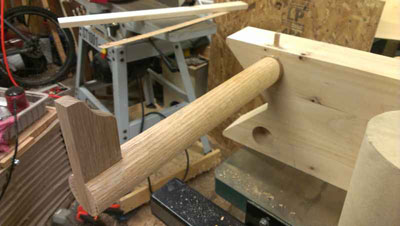
The photo above is the raw legs and small piece of scrap that became four leg stabilizers. Cutting a mortise on round stock is not that easy. Given more time I'm sure a better work holding mechanism could be devised. However, the expedient of a clamp and auxiliary fence on the miter gauge worked well enough for the four needed cuts. I was concerned about biting off too much wood with the dado stack and sending the work flying around the room. The mortise was cut about a quarter inch at a time and no problems were encountered. Glue was applied to the stabilizer and mortise. After squaring the two pieces they were simply left to dry overnight. Here are photos of the setup and one of the completed legs:

|

|
|
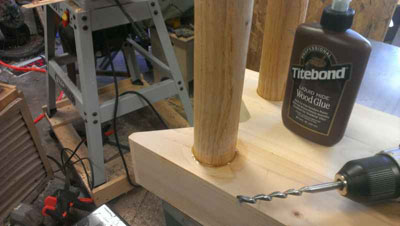
Affixing the legs to the top is easier than child's play (Toddler play?). Slap glue in the hole and shove in the leg, taking care to make sure the stabilizer is perpendicular to the top. I went an extra step and pinned them. Honestly, the only reason they are pinned is because I wanted to. A three inch thick top supported by four nearly two inch thick oak legs can hold me, my tools, and F150 truck up with ease. Installing a pin is as simple as drilling a hole and inserting a glue soaked dowel, just like the legs. I did have one problem with hitting a peg too hard, sending it clear into the 'V' notch. I left the dowel in place and cut it flush; shop furniture does not deserve any better repair. Here are two photos of the leg and pin mounting plus one of the mistake:
|
|
|
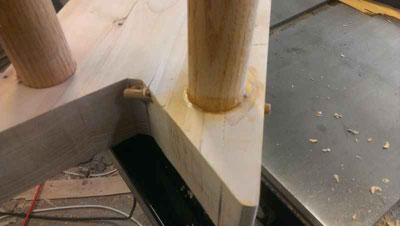
As stated earlier, the original plan was to splay the legs outward a bit like a Roman workbench, or traditional saw horse. I could not figure out how to accomplish the goal of splayed legs with my small drill press. In retrospect, I wish more time were spent on the issue as is plain to see in the photo: the saw bench has hooves. The finished design is pretty far from what is in my project book, but so far the bench is working out well.
Check out my BLOG, if you would like to read more about what I've been up to,
CLICK HERE
If you have any questions or comments, feel free to email me at
tsstahl@gmail.com
Return to
Wood News
front page