Building an Electric Bass Guitar: Part 4 - Gluing the Fretboard, Cutting the Headstock and Installing the Tuners
by Lee Laird
Click on any picture to see a larger version.
CLICK HERE
to read Part 1 of the Electric Bass Guitar Build - Design Considerations
CLICK HERE
to read Part 2 of the Electric Bass Guitar Build - Creating the Neck
CLICK HERE
to read Part 3 of the Electric Bass Guitar Build - Making the Fretboard and Neck from Scratch
This is the fourth part of a multi-part article on how to build a Bass from scratch. The
previous sections are available by clicking the links above, for anyone wishing
to either start from the beginning or to just see what took place earlier. On we go!
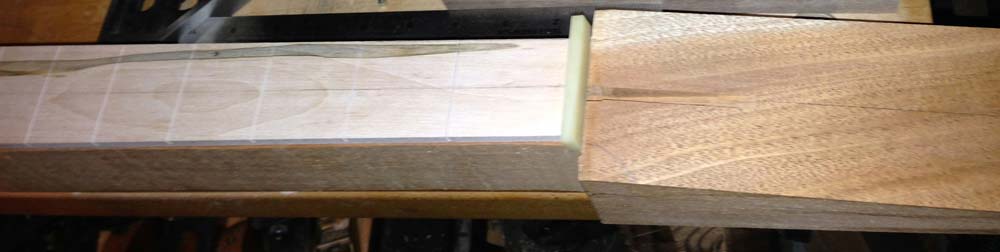
To start this section, I took my fretboard that I'd previously slotted and shaped, and with the
nut blank placed into its slot, set the fretboard so the centerline on it and the one on the neck
were aligned, with the narrow end of the fretboard up against the nut. This registers the fretboard
where it will reside for the rest of its life. While holding the fretboard in position, I took my
fine mechanical pencil (if you use a wooden pencil, make sure to have a freshly sharpened fine point
on it) and drew along both sides of the fretboard, onto the neck that is still extra wide.
After removing the nut and lifting the fretboard from the neck, I was off to the band saw. I
wanted to cut as close to my just-drawn lines as I dared, without accidentally hitting or crossing
the line. Since there is an important curve, at the end of the cuts, at the headstock end, I made a
stop-cut straight in from the edge of the board. I took the cuts slowly, so I would
be as accurate as possible, but even if you aren't super close to your line, you'll ultimately
remove it later with other tools.

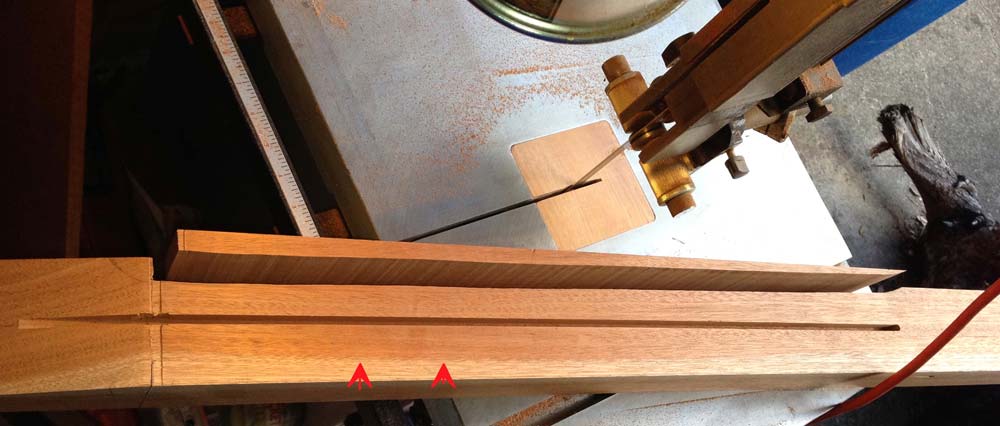
|
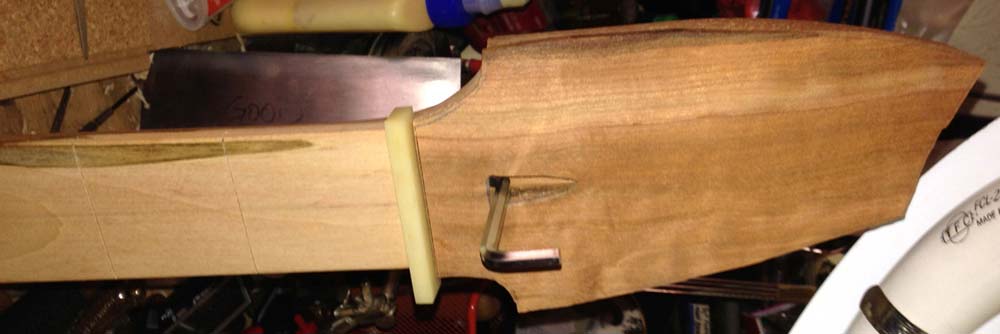
One side of the neck has been cut, up to the stop cut.
Red arrows point to layout on opposite
side.
|
You might notice some scalloping along the sides of the neck in some of the photos, which is in
part due to the blade on the saw getting a bit old and I just haven't swapped it out yet. It is hard
for me to change the blade, when it still has a bit more life in it, at least for some applications.
The next step was to glue the fretboard onto the neck, and one thing you need to remember is to
install the truss rod in the manner the manufacturer instructs. If you get moving along a bit too
fast, it is easy to get your fretboard all glued up nicely, only to notice you forgot the truss rod.
I came somewhat close to doing that on this Bass, but just before I applied the glue I noticed the
lack of the truss rod.
|
Fretboard up against nut, making sure all was good before
gluing. (This is when I noticed the
truss rod was missing.)
|

|
|
Truss rod in its slot, and ready to move forward.
|
Whew, I'm really glad I didn't have to go back and try to remove the fretboard after it was dry.
While you can potentially work a fretboard off, those that are install with glues other than hide
glue, are much more problematic. There is a good chance you'll have to deal with wood tearing out,
which means more work to disguise any problem areas. I also measured the depth of the truss rod
slot, and transferred that depth to both outside edges of the neck at three locations running along
the neck. I'll use these marks as a baseline for an upcoming cut. Before applying glue to the
neck/fretboard, install the nut into its slot, with a very small little drop of superglue. After
the fretboard is in place, with clamps holding it to the neck solidly, you can pop the nut back out
with a light rap from a hammer. I got together my bottle of yellow glue, and used a paper plate to hold my
"working" glue so I wouldn't need to apply the glue directly from the large clumsy bottle. I also
gathered all the clamps I would need and set them so they were ready to fit, and a couple of old credit
cards. The credit cards work great at both applying and spreading the glue to a consistently thin
layer.
Before anything else, apply a tiny drop of superglue to the bottom of the nut, close to one edge
(or both if you don't feel comfortable with just one) and place it into its slot. Hold it for 10-15
seconds and it should be ready to go. With a credit card, apply some glue to the area on the neck,
where the fingerboard will sit. Since I used a truss rod that doesn't require a filet of wood to
cover it, I had to pay closer attention to make sure I didn't accidentally get any in the center
section. I applied a very thin swipe of glue on the underside of the fretboard, again staying clear
of the location of the truss rod slot. I put the fretboard down as centered on the neck as I could
manage, and slid it up against the nut. I started applying the clamps at the end closest to the nut,
while confirming the fretboard didn't drift away from the centerline at the wide end. I used just
enough clamping pressure to make sure the fretboard was staying in place, along with a little bit of
glue squeeze out.

|
Fretboard clamped to neck, with fresh glue. Just about
ready to pop the nut back out.
|
When all of my clamps were in place, and I had confirmed the fingerboard was still in its proper
position, I tapped the nut lightly to remove it. It is a good idea to remove the nut while the yellow
glue is still wet, as this makes the superglue the only thing holding the nut in place. I still have
work to do on the nut, which is much easier accomplished in a vise, rather than in the neck. I left
the fretboard clamps on overnight, to let the glue dry completely, and after that it was time to get some
rest.
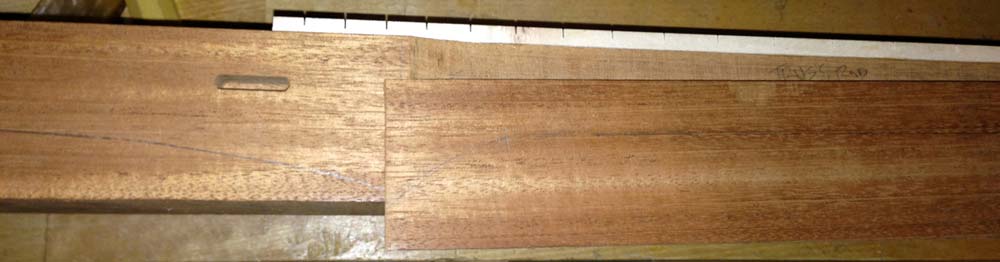
The next day I tested the fingerboard and the neck and they were both rock solid. The excess wood
on the backside of the neck had served its purpose, providing a square surface for clamping, but now
it was no longer needed. Before penciling in my cut line, I looked for my reference marks relating
to the truss rod depth. I added a buffer of a little extra thickness, so there was absolutely no way
I'd accidentally encroach into the rod's space. I worked my way down the neck, paying close
attention to the transition points, where the headstock and body each meet the neck. After going
back over the layout, I confirmed everything looked right. Since I removed some wood earlier, from
each side of the neck, it would be difficult if not impossible to keep the neck in a consistent
orientation with the blade. I had kept my off-cuts from the earlier cuts, so I used a couple drops
of superglue to tack one piece back onto the side that would ride on the band saw table.
|
Here the previous off-cut is shifted downward slightly,
to make it easier to see, and the cut
line is
already drawn onto its external surface.
|
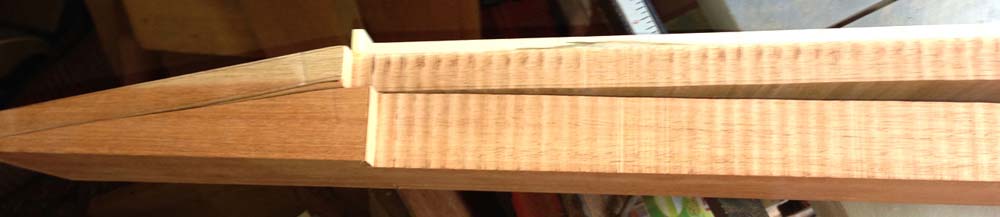
This will be easy enough to remove again, once the cutting is complete. I wanted to get down as
close to the final thickness, as efficiently as possible, so it was off to the band saw again.
Rather than trying to take it all in a single cut, from end to end, I took it in two cuts. I cut in
from the headstock end and proceeded until I reached the transition from headstock to neck, and then
back out of the cut. I swapped the piece around and then cut in from the body end, and again cut
carefully, following my layout until the two cuts met near the headstock. It is good to remember that
this is just another "starting" point, not a finished surface. There will be a large amount of
shaping to do on the neck, with draw knives, spokeshaves, rasps, files, sandpaper and anything else
that gets the job done, before the neck is completed.

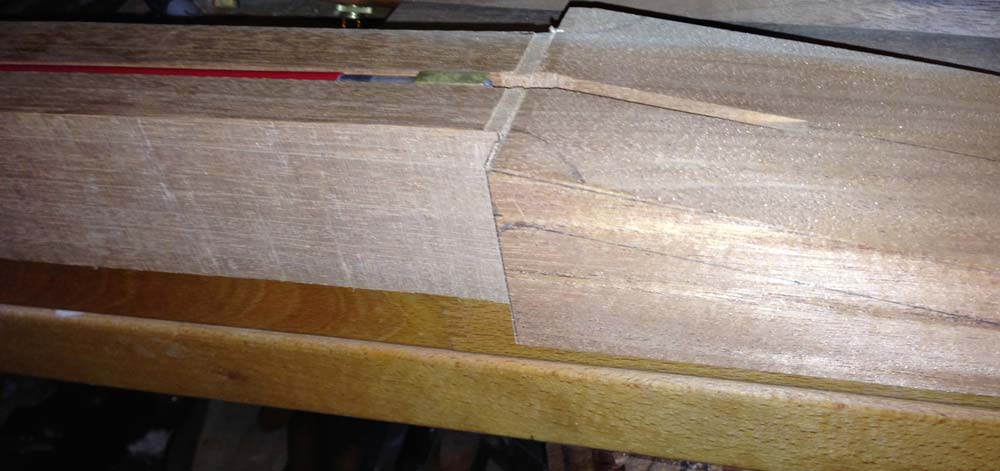
|
Here is the cut from the body-end of the blank, establishing
the neck. (What a hiccup I had just
a few inches into the cut!)
|
|
|
Here is the cut from the headstock-end of the blank.
|
Now, even though the neck still looks somewhat clunky,
the shape of a musical instrument is certainly taking form. When shaping the neck, there are a
number of ways you can hold it to perform the work. A shave horse is an old standard, and it lets
you quickly re-orient the piece, as needed. Surprisingly, I found the front vise on my workbench
to be my choice holder for almost 100% of the neck shaping. Since this Bass started as a long
rectangular piece of wood, and the sides of the body's core are still that shape, it was easy to
hold in a manner that gave reasonably good access to the neck. I started out with what I see as my
most coarse tool, even though it may not seem like a coarse tool at all: my draw knife.
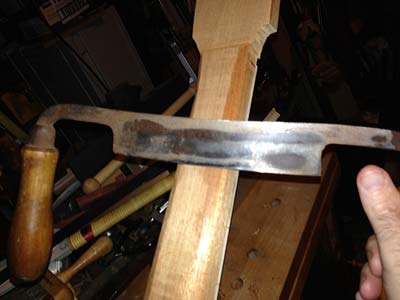
|
A slightly out-of-focus shot of my old draw knife, while
my Bass is held in the front vise on my
bench.
|
It is very important to know what direction the grain is running in the wood, before digging in
too deeply, so you don't go splitting off more than you can fix. I used the draw knife with its
bevel positioned down towards the wood. This allows for easier control, which I find is a good thing
when you have an area that you need to work that is further into the wood than the entry and exit
points. I worked the shape of the neck down until I felt like I'd done as much as possible with the
drawknife. Time to shift to my spokeshaves. I have a number of spokeshaves with very large openings
between the cutting iron and the mouth of the tools that provide a really coarse cut.

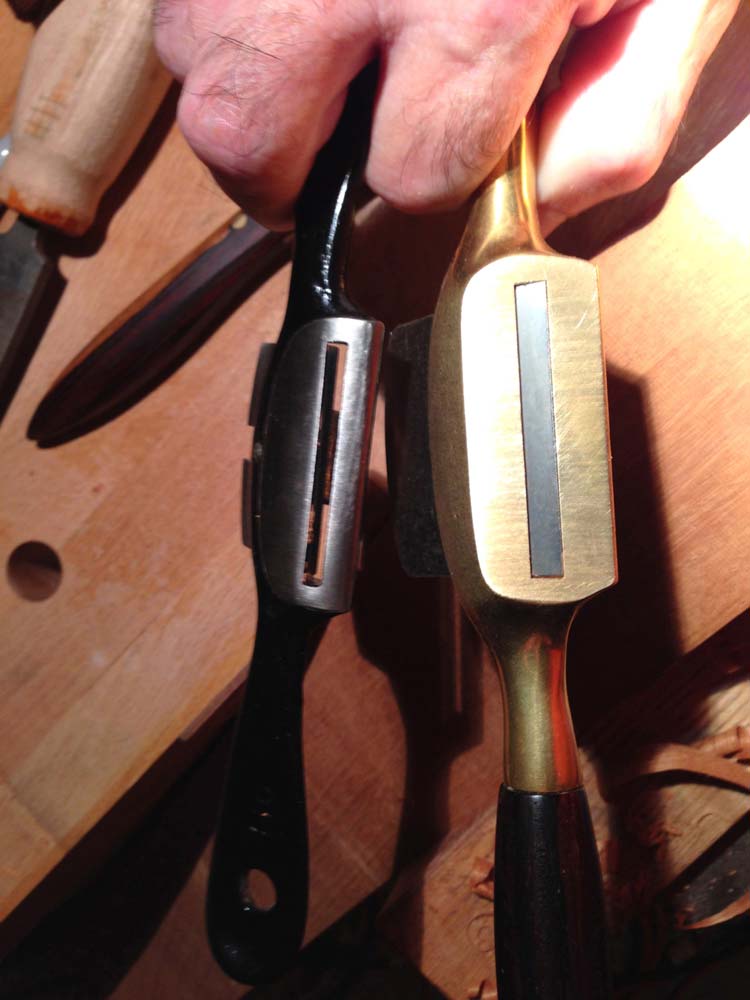
|
Here are two of my spokeshave workhorses. An old Stanley
on the left and my dream Lie-Nielsen on
the right.
|
This attribute came in handy when working to shape the neck as efficiently as possible, since I
could take a much thicker shaving. The first spokeshave I used actually had a curved sole, made so
it could work an inside curve, but paying attention to my touch I was still able to utilize it to
work on what is a mostly straight section (the neck).
|
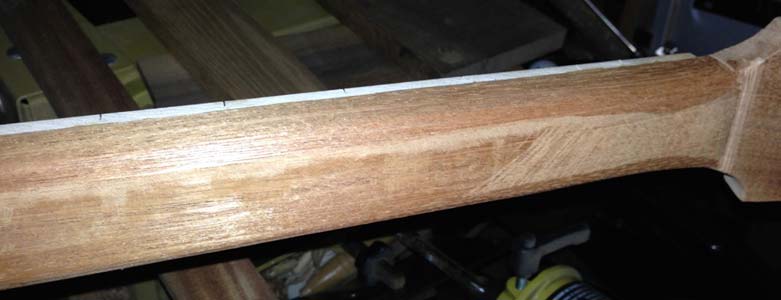
Here the neck is further along. Even though it is still
nowhere close to completion, it still feels good to
see progress.
|
I transitioned over to my two
Lie-Nielsen spokeshaves
(the flat bottom and the curved bottom)
for what became an almost final shape. It is so easy to leave a super smooth surface with these two
tools, since they have such nice tight mouths. I also find I can increase and decrease my hand/finger
pressure to control my shaving thickness, to the point where almost no pressure will remove just the
outside molecule. Ok, I'm exaggerating a little here, but it is amazing just how touch sensitive
these tools are. During my shaping, there were times that I needed to remove the Bass from the vise,
and rotate it around 180 degrees, so I could work the other quadrant of the neck's shape. With my
Jorgensen rapid acting vise
, it was so quick to change the work orientation, that I never had that
"can't I just find a way to work it all facing this way" kind of thought where you just hate losing
time and momentum.
When I started to get really close to the neck's final shape, I did something that felt like it might be
considered a tip or a trick. I found that when I sanded the back of the neck up through about 320-grit,
and then felt the shape, problem areas I hadn't noticed before sanding seemed to be exaggerated. I'm
not quite sure why exactly, but I had this occur numerous times during the Bass build, and my
previous Les Paul build. So now I always go back over the neck with my "fine-toothed comb" attitude,
even after any "final" sanding, just to make sure no issues have slipped past.
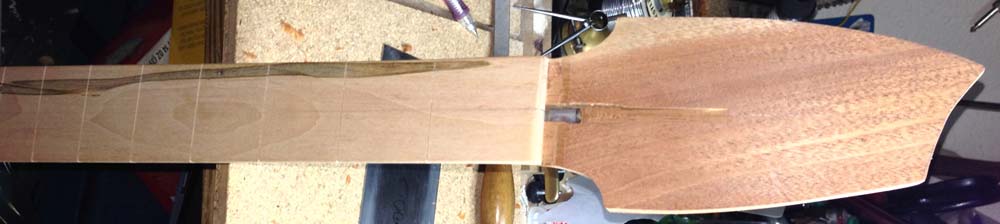
After shaping the main neck section, I came up with a headstock design I wanted to utilize on
this build. Before drawing the shape on the actual Bass, I used a scrap piece of pine that was a
similar thickness to the actual headstock. After cutting the new shape using the pine on the
band saw, I smoothed the edges with my spokeshaves and placed it in front of the actual headstock.
The shape looked good to my eyes, but I took it one step further, before pulling the trigger on the
real deal. I drilled holes in the test headstock, for the tuners, so I would get as close to the
real feel as was possible. Again, I was happy with what I saw, so I transferred the test headstock's
shape to a thick piece of cardboard as my template. I placed the template onto the existing
headstock, and traced out the layout. When I took the Bass to the band saw, I noticed the thickness
of the fretboard made it so I couldn't keep the headstock completely flat to the table. I put my
pine "tester" underneath the actual headstock, so it was supported and tall enough so the fretboard
no longer interfered.

|
|
New headstock design for the Bass.
|
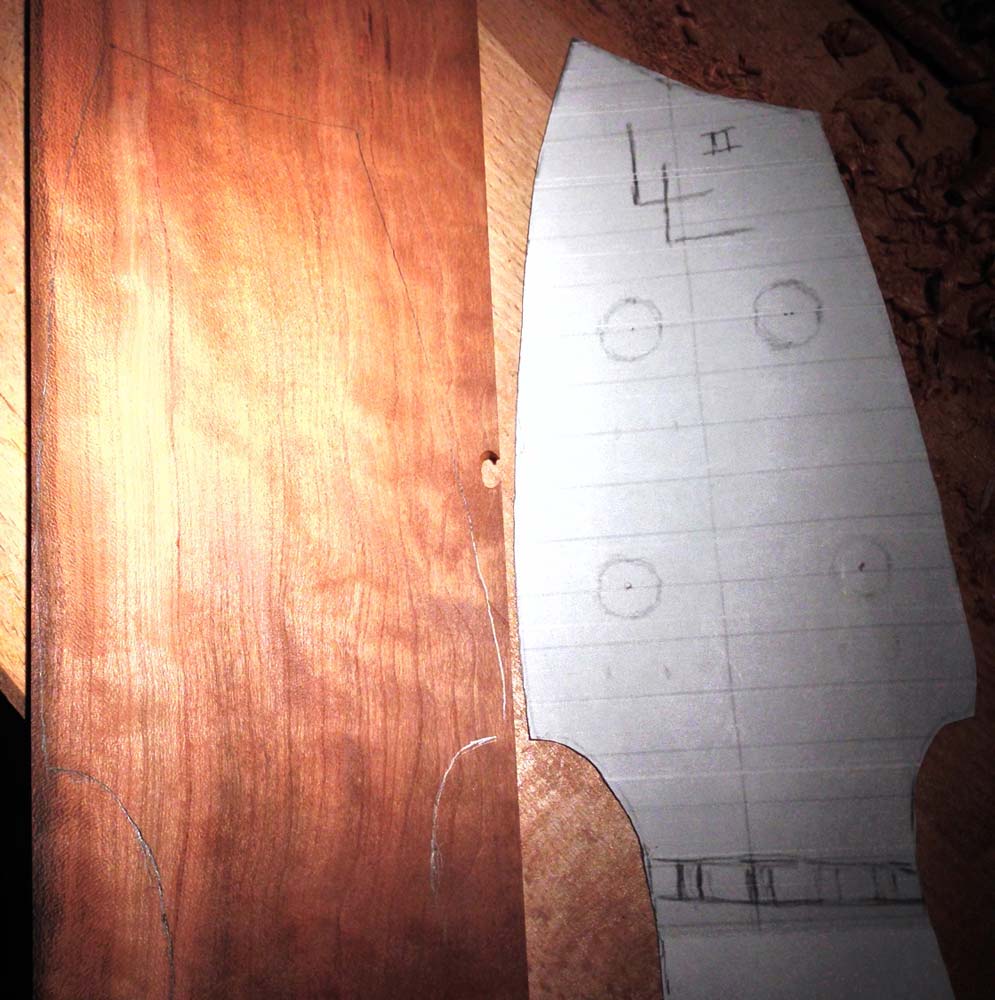
While the mahogany is a beautiful wood, I decided I wanted the headstock to have a bit more pop.
I have some curly Cherry in the shop that is in smaller pieces, but there was enough width and
length to cover the new headstock design. I sliced off a piece of the Cherry at the band saw, and
then hand planed the back so it was perfectly flat. I drew the outline of the headstock onto the
Cherry and then cut outside the lines on the band saw.
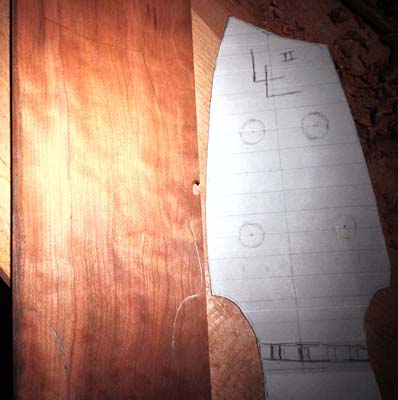
|
Curly Cherry headstock overlay with layout (left),
beside original pattern (right).
|
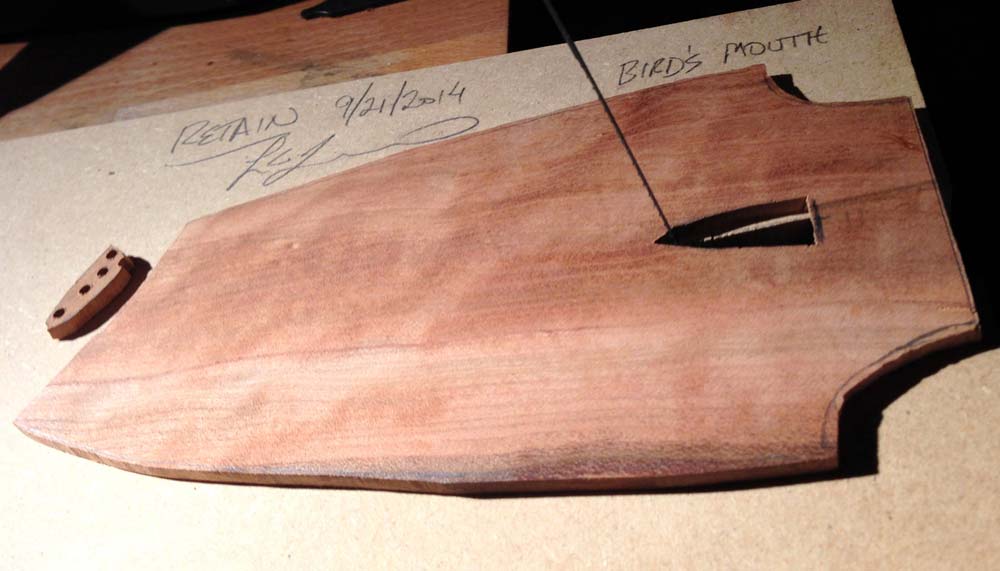
I made sure the flat area that would sit against the nut on the Bass was going to orient the laminate
so it overlapped all parts of the headstock base. With the overlay resting as planned, I marked
the area where the truss rod wrench would gain access to the truss rod. Using the actual truss rod
tool, I designed a minimal shape for access, so the opening would be as small as possible. I drilled
a few 1/16" holes inside the corners of the design, so I could use my
Knew Concepts fretsaw
to cut
out the shape. I loosened one end of the blade in my fretsaw, and fed the blade through one of the
holes I'd drilled so the saw would cut on the pull stroke when the saw handle was below the jig. I
re-clamped the blade in the saw, and then made a quick jig called a bird's mouth. I used a flat piece
of MDF (but plywood could work too), with a very narrow "V" cut into one
end. I clamped the jig to my workbench top with the V hanging just over the end. This narrow V
allowed the saw's blade to be almost as deep into the jig as the V, so the piece I was cutting had
support up extremely close to the actual cut.
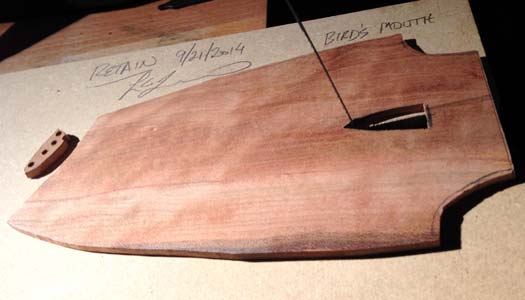
|
Truss rod access hole in overlay, with the just-removed
waste with drill holes, to the left.
Fret
saw blade is still connected to saw in this photo.
|
I use this method often when I am working with very thin veneers, as they need a lot of support when
cutting. My overlay wasn't as thin as many veneers, but this jig worked wonders with my fretsaw, making
the job simple and greatly reducing the risk of damaging the overlay. If you don't think you will
utilize this jig on a regular basis, you can just toss it, and make another from another
piece of scrap whenever you need. Before I removed the jig from my bench, I used it to again
support the overlay while I used a
super-fine Auriou rasp (#15)
to clean up the inside surfaces.
Since these rasps cut on the push stroke, I held the overlay so the rasp could pass down into the
open V area, and kept the handle of the rasp up above the jig's surface. I took small controlled
pushes around the inside opening, until I made it all the way around. Worked great!
It was time to glue the overlay onto the existing headstock. I rounded up as many clamps as I
thought I'd need, and before applying any glue, did a quick clamp up to make sure I was ready.

|
I didn't snap a photo of the pre-clamping, but here I tested
the truss rod was
accessible via the new hole before gluing.
|
Before I applied any glue, I again placed the nut into its slot, so the overlay would register
against it. I applied a light layer of yellow glue, making certain to
stay away from the opening for the truss rod. I clamped the overlay in place and left it overnight,
as it was getting late. I made sure to pull the nut back out before heading to bed. The next morning
it looked great.
|
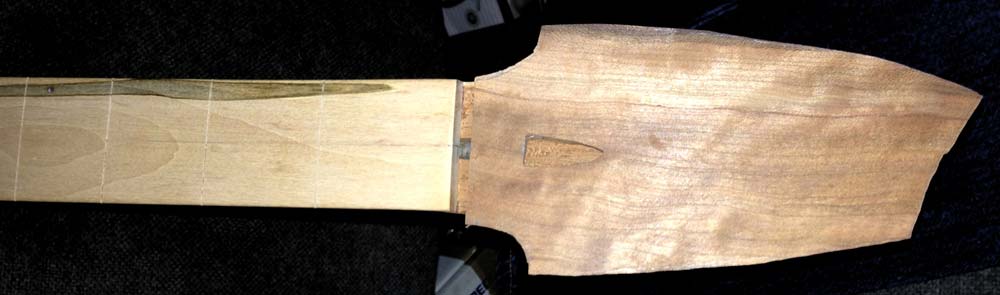
|
Cherry overlay with the glue dried.
|
I used my spokeshaves to bring the overlay down to the same shape as the underlying headstock.
There were a couple of places where my spokeshave wouldn't reach, due to the curve. I used my #15
Auriou rasp again, working down toward the headstock base, so there was less chance of chipping or
breaking. I really like the look of the curly Cherry as the face of the headstock.
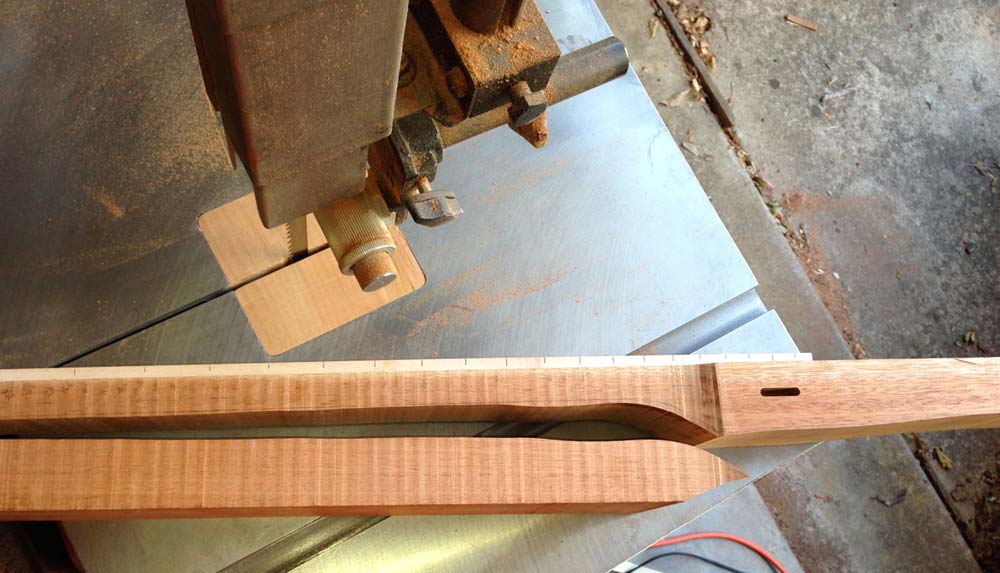
I didn't drill holes for the tuners earlier, so now was the time. Before marking the locations I'd originally indicated on my template, I
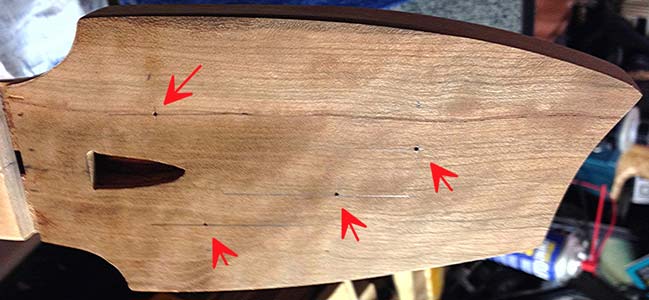
put both the nut and the bridge in place, and marked where string slot locations in the nut.

|
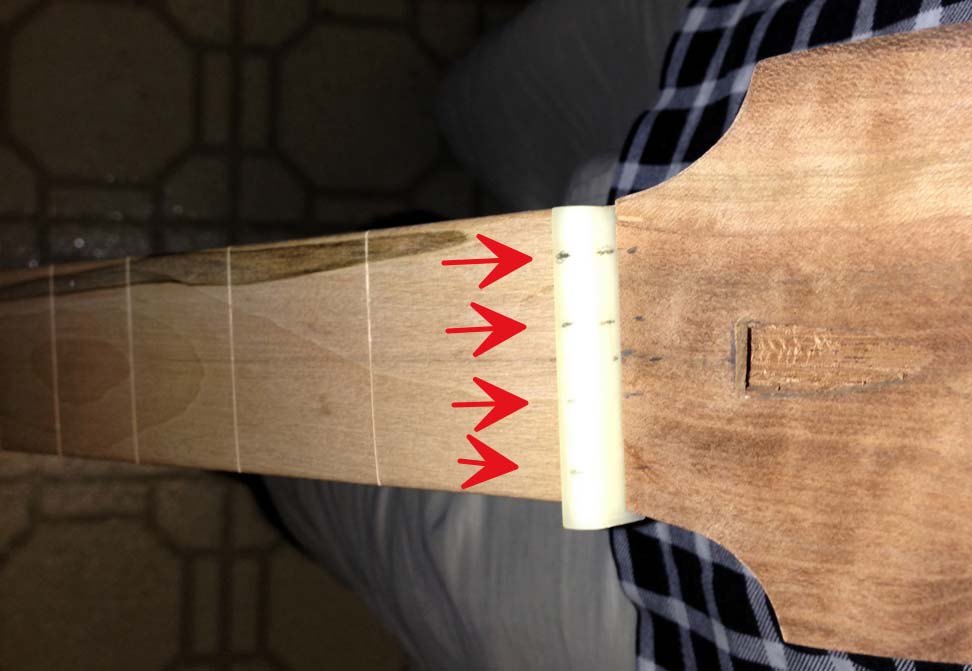
Red arrows help see the locations I'd penciled in,
identifying the planned string locations.
|
I drew perpendicular lines from the the slot marks up toward the top of the headstock. Since
Bass strings are much thicker than guitar strings, it is better to have them stay in a straight line
as they cross the nut and go to their respective tuner. Now I had to find the best placement of
each tuner, along the line I drew earlier. I moved each tuner around and marked the final placement
for all four tuners, and then needed to build another jig.
|
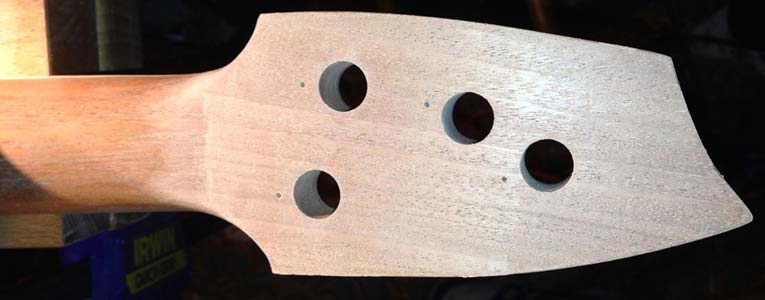
The location of each tuner is marked with an awl.
The red arrows may make the points easier to find.
|
I built the jig to help hold the headstock securely while I drilled the holes with my drill
press. The jig also needed to elevate the headstock enough so that its backwards angle didn't
allow the neck to make contact with the drill press table, which could lead to non-perpendicular
drill holes. If this occurred, the tuner could bind, and
aesthetically it wouldn't sit flush. To make the jig, I installed a clamp onto a 4" x 4" scrap, and a
separate clamp on the drill press table to hold the jig in place.
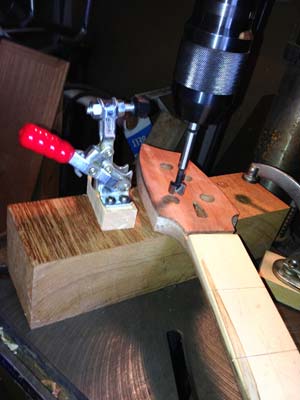
|
Missed taking a photo during actual use, but this shows
the jig, with the headstock sitting under
the bit,
and the clamp on the drill press table.
|
I placed a piece of scrap wood underneath the headstock, to make sure the drill bit
didn't cause any chipping out. The overlay of the headstock faced up
during the drilling, as it is more brittle than the mahogany, and if there were any chips, I wanted
them hidden underneath the tuner bodies.
The tuners I bought for this Bass have a washer and a nut that reaches down into the headstock,
to reach the threads on the tuner shaft. They also have a very small screw that goes through a small
hole on the bottom side of the tuner body, and into the headstock. I positioned the tuners so they
would each have their handle perpendicular to the shape of the headstock, which varied a bit with
the curves on the sides. I also had to make sure they would not interfere with each other. To
find the exact place where I'd need to drill for the small extra screws, I tightened
the tuners' nuts when they were each in their best position. I measured how deep the holes needed to
go, and placed some blue tape directly on the drill bit. This helped me see when I had drilled to
the required depth. I have a small manually powered drill, which was easier to control. I clamped
the neck so the rear surface was facing upwards, left the tuners in
place, and drilled through the hole in the tuner. With small items, it can be hard to mark through a
hole and then have the drill line up exactly as you need it to. After I drilled a
small depth at each tuner, I removed the tuners, and continued to drill until down to the blue tape.
Everything lined up beautifully.
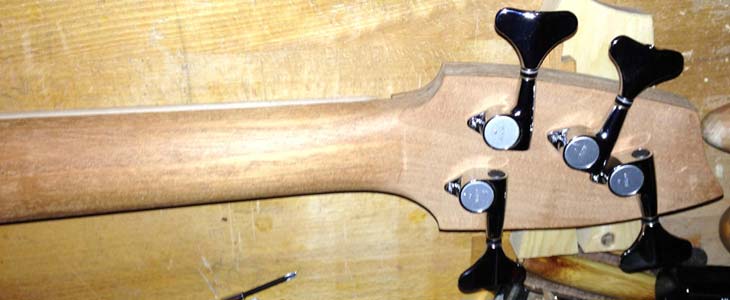
|
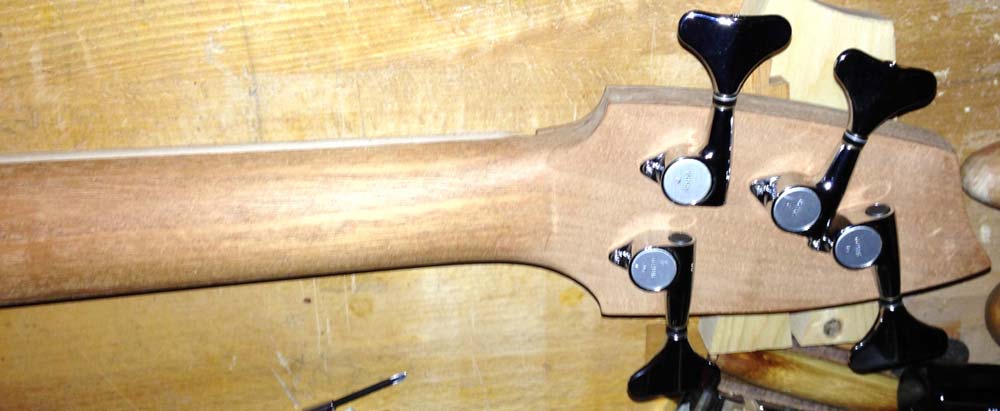
|
The tuners from the back, in a somewhat unique layout.
|
I noticed that the nuts that attach to the tuner shaft seemed to just barely engage the threads.
I took the tuners back off and measured between the two surfaces of the tuner, to see how much extra
thickness I had on the headstock. I had a little over .1" material that I really needed to remove
for the tuners to stay good and tight for the long term. I decided I'd remove about .2", as I was
still nowhere near the minimum thickness. I set my
Tite-Mark marking gauge
for an
appropriate thickness, and worked from the face side of the headstock. That way I knew the back
would be parallel to the front. After locking the tool, I ran it around the headstock a couple of
times, not wanting to apply too much pressure on the first pass. With the neck clamped to the bench,
I used a nice wide Japanese paring chisel, working one side down so it was close to the mark.
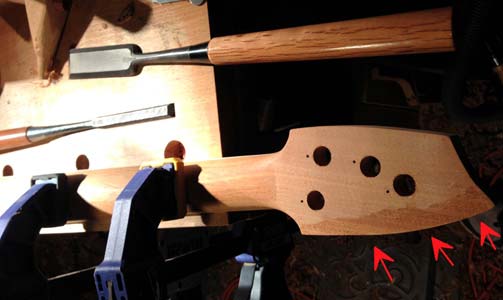
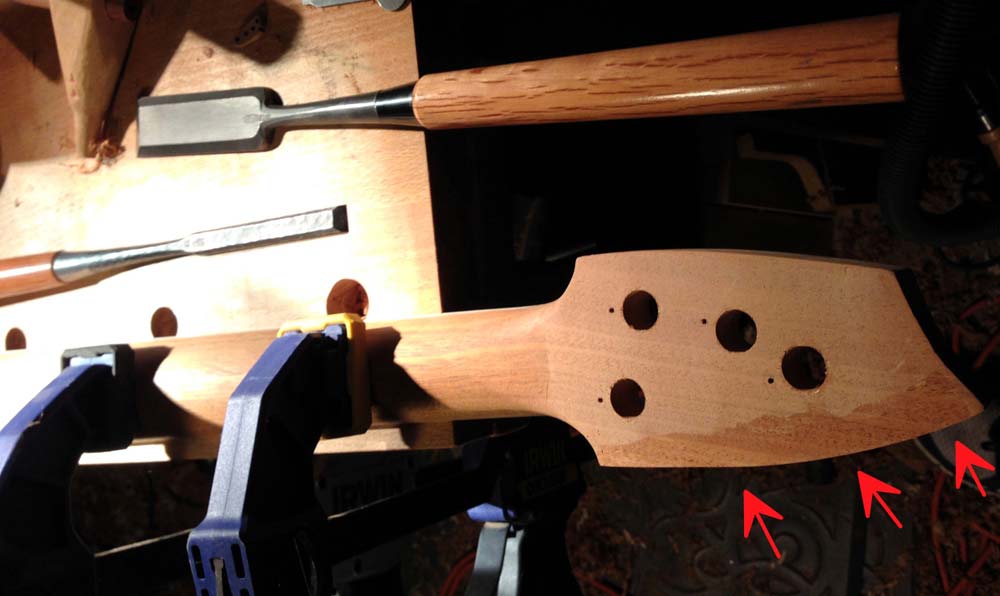
|
Backside of headstock showing the side I pared down first
(red arrows), and the large Japanese
paring chisel I used.
|
I stood directly in line with the neck and with both hands on the chisel, used my body weight to
drive the cut. I repeated my initial work on the other edge of the headstock, and then did the same
at the top. I found it easier to shift over to my spokeshave after those three edges were almost
to their final thickness. I just kept removing material from the center until the iron began to
engage close to the edges. I finished up with the fine Auriou rasp (so good for so
many workshop tasks!), and then followed that with sandpaper on a block.
|
Back of headstock after major work completed. The full
sanding treatment comes
later, before I apply any finish.
|
After the tuners were back on the headstock, two of the screw holes were obviously too shallow,
since the screw became too hard to turn before the head reached the tuner. A little more light
drilling and all was behaving as it should.
In future segments I'll install the frets, which on the surface sounds like a quick 15 minute
process, but there are time consuming aspects that may surprise you. The body is almost ready to
come together and a nice Bass is in our future.
I hope you enjoyed this article and please let me know if you have any questions or comments.
Lee Laird has enjoyed woodworking for over 20 years. He is retired from the U.S.P.S. and works for
Lie-Nielsen Toolworks as a show staff member, demonstrating tools and training customers.
You
can email him at
lee@lie-nielsen.com
.
or follow him on Twitter at
http://www.twitter.com/is9582
.
Return to
Wood News
front page