Project: Broken Hockey Stick Bench
by Dan Zehner
West Lafayette, IN
Click on any picture to see a larger version.
A dream project falls into my lap
August 20th was a day like any other. It was a tough day at work as an engineer, but then one email
changed it all. A Canadian marketing agent contacted me to build a "few" benches from broken
hockey sticks for a hockey festival. Wow! We scheduled a time to talk later that evening, and I
got even more excited as he revealed the true scope of this project.
This was no ordinary festival for his kids' peewee hockey team. He was part of the team hosting
the
Hometown Hockey festival
for Rogers! He ordered 25
benches to give to each town as thank-you gifts for hosting the event.
After I picked up my jaw from the floor we had a great conversation about his excitement for my
work and how the benches would be a perfect fit for the festival. He found me through my
Custom Made Online Profile
, a great website for makers/artists to design and sell their crafts. Here's what he saw from my
Custom Made
profile of my first bench created in 2013:
That bench was my first commission built for a client on
Custom Made
, which really gave me
confidence and validation that I could get paid for doing what I love.
My introduction to woodworking
I started woodworking three years ago when a friend was moving and he didn't have space in
his garage for his tools. Since I had plenty of room in my basement, I thought it would be a good
opportunity to build some things without having to buy the tools first! I built a few projects before
I started creating my own tool collection. I officially caught the woodworking fever and haven't
looked back since! Thankfully, I have a very supportive wife who really enjoys seeing each
project as it comes out of the shop, especially now that I can take the hobby to the next level
into a full-fledged side business.
Project inspiration
The design for this project came from three sources of inspiration - my hockey fanaticism, the
representative NHL players, and Greene and Greene. As anyone in my family or circle of friends
can tell you, I am a rabid hockey fan. For example, I may have more hockey jerseys than dress
shirts. I incorporated sticks into the bench structure because I wanted to communicate that they
still have an afterlife post rink-time.
I also tried to arrange each benches set of sticks to have a theme. Each host town has a junior
hockey team or an NHL player that calls it their hometown. Here is an example of one of my themes:

|
|
This bench is currently installed in London, ON, home of the London Knights of
the Ontario
Hockey League. The team colors are green, black, gold, and white.
I used sticks from my
collection that fit this aesthetic.
|

|
|
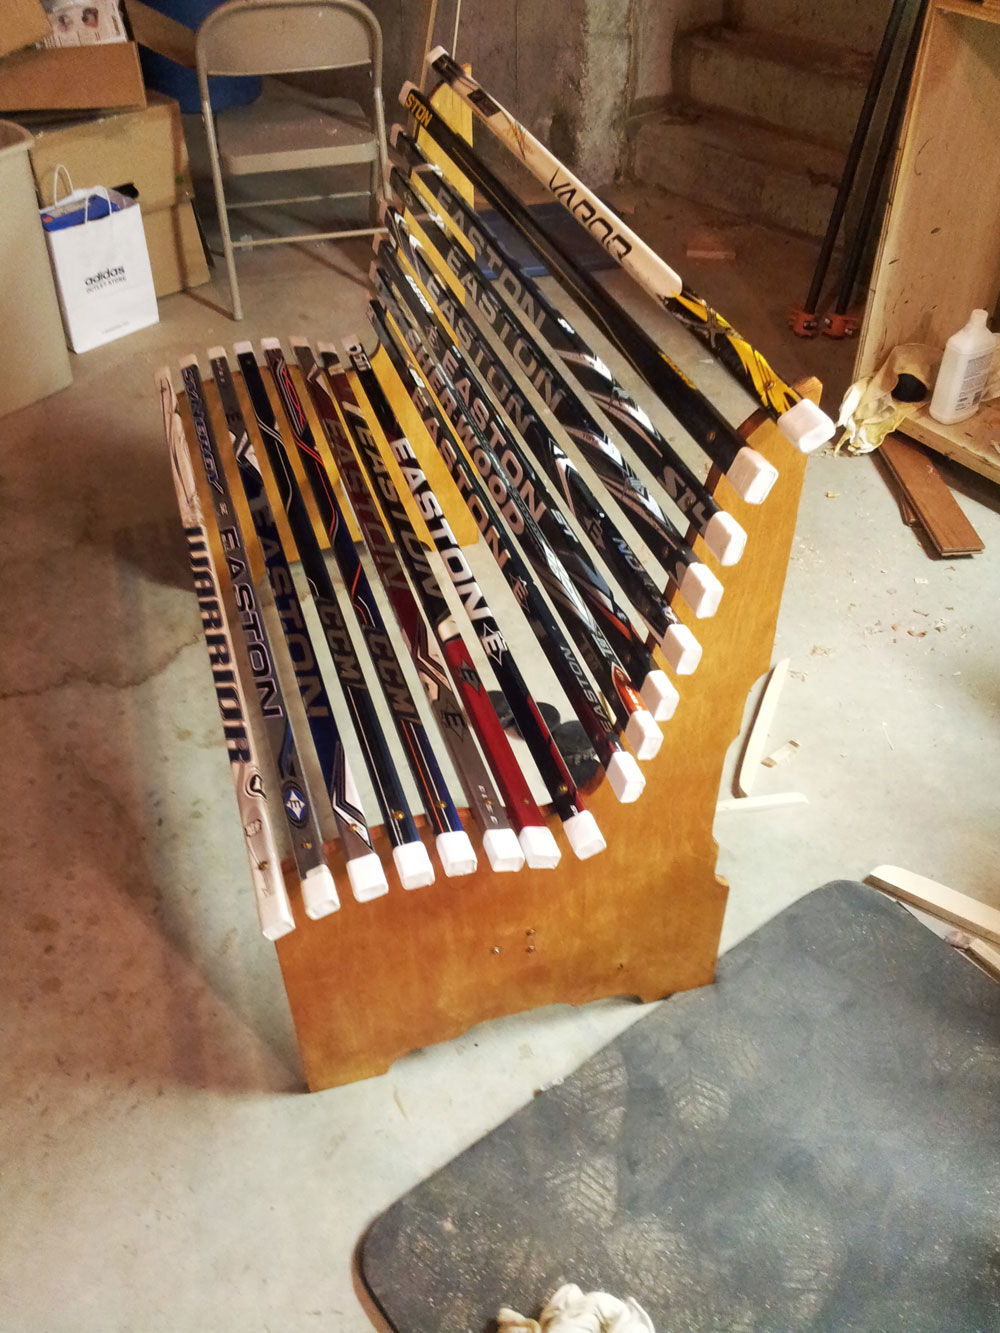
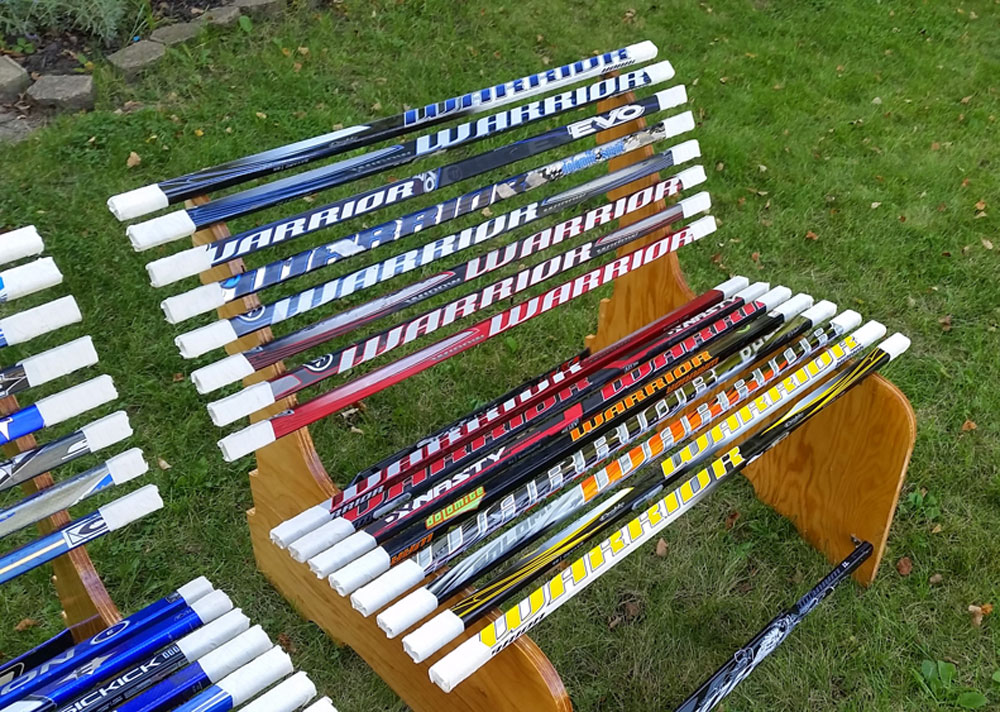
This bench went to Burnaby, BC, the hometown of Anaheim Ducks goalie,
Jason Labarbara. He
uses the Warrior brand of sticks. I tried to keep the bench
from looking too random by creating a
color gradient from the front of the bench
to the back taking the text, colors, and background
graphics into consideration.
|
The plywood sides also have a simple design element from one of my other sources of
inspiration: the style of Greene and Greene. Early in my woodworking journey I discovered the
work of Charles and Henry Greene and I've been intrigued by their design elements ever since.
I put one of their cloud lift details on the bottom and the back of the bench to add some flair and
interest. Keeping with the hockey theme, I used the 3" diameter of a hockey puck to lay out the
curves (on the original bench from last year I literally traced a puck onto the plywood!). For this
mass production order, I drew up the shape of the plywood pieces in CAD and had it cut on a
water jet from a local fabrication company to ensure that it would be accurate.
Materials and Construction
The materials I used for this project were geared towards making this bench stand up to the
rigors of an outdoor hockey rink. The plywood is Douglas Fir marine grade stock from J. Gibson
McIlvain (thanks to Shannon Rogers of
The Renaissance Woodworker
for helping me with this).
The sticks came from my now good friend Sean Deering of
Hockey Stick Stuff
. I ordered stainless steel brackets and screws from McMaster Carr to join it all together.

|
|
You probably never wondered what 530 hockey sticks looks like packed into
the back of a
Subaru, but here you go! This was the real start of the project
for me, and it was quite a wakeup
call.
|
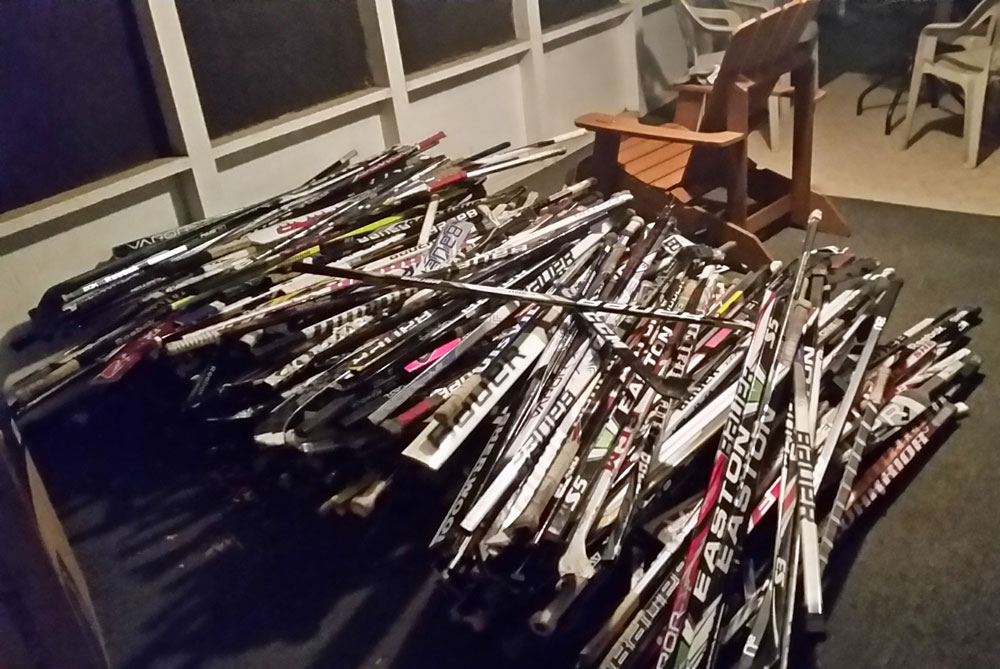
Once I got the sticks home, they were loaded into the prep area (our sunporch). Thankfully, my
wife did not start screaming obscenities about this and was extremely supportive of the project
(note to self, take her to a really nice restaurant when these are all done…).
My entire immediate family rallied together to complete the preparation of all the sticks. My
mom, dad, sister, her fiance, and my wife took turns removing stick tape, applying gallons of
Goo Gone, washing, and drying each of the 530 sticks for the project. I manned the table saw
cutting them all to length, but I also put in my fair share of the manual labor cleaning them. What
a chore! And I thought milling boards by hand was tough.

|
|
After the sticks were cleaned, they were sorted by brand.
|
Thanks to my Incra crosscut sled and a sharp tablesaw blade (a Freud blade meant for non-ferrous metal) all the sticks were cut to length within a weekend. Then, I took them to the drill
press to drill holes in each end for the brackets. I also put stick tape on the ends to ready them
for assembly.
To prepare the plywood sides, I put a half sheet of the stock on my bench with some bench
cookies to raise it up enough to cut it with my jigsaw. I traced my template onto the sheet, and
then cut the rough outline of each side out. I paired up two sides and cut the cloud lift details
while they were clamped together.
To finish off each bench, I took them to a local cabinet shop to run them through their
commercial belt sander. I only thought of this idea after my dad and I spent about 8 hours
sanding half of the benches with a random orbit sander - better late than never! We sanded the
curves with a spindle sander.
Since these benches are going to be subjected to harsh Canadian weather, I went for the best
marine finish I could find:
Waterlox Marine Finish
. This product has been great to work with and
will provide a great weather-resistant finish with minimal maintenance. Application was a breeze
with a foam brush, and only 4 total coats were needed for a good film to build up (two coats of
sealer, two coats of the top coat). I sanded with 320 grit before the final coat to level the surface
for appearance, though the manufacturer says you can skip this step if you don't mind the
surface being a little rough. After it was applied, the finish made the plywood sides really shine
and they look like they were dipped in honey.

|
Now onto the assembly! The first batch was put together while it was still nice and warm out in
September, so I put together 10 of them in a weekend in the front yard. The neighbors were a
bit curious, but supportive. I had an assembly station that I worked from made out of a scrap
piece of plywood, and I supported the sides of the bench with a couple bar clamps while I
screwed the sticks in place. It worked great, but for the second batch I moved the plywood sheet
to a set of sawhorses so I wouldn't have to be on the ground.
The power went out one night, but I was still able to put together 2 benches after dinner.
The final part of the assembly came as a suggestion from a furniture maker I met at a
Lie Nielsen Hand Tool event. I showed him my design, and he suggested putting a
stretcher across the bottom for added support. I had been looking for ideas to increase
the rigidity of the structure, so I welcomed the idea. I took some pieces of white oak, cut
a tenon on each end, and notched the bottom of the plywood sides to accept the piece.
Voila! It even gave me a place to put my new brand that I had just received in the mail!
After assembly, my family thoroughly tested each unit.
Social media response
As the project went on and I posted more pictures to my friends on Facebook, word spread all over social media
about this crazy endeavor. Here are a few of my favorite moments:
Jason Labarbera of the Anaheim Ducks commented on my Twitter picture:
A comment from the official Twitter page of Warrior Sports and Hockey:
This post from Reddit might be my favorite. Need I say more?
Click the links below to see a few more "press" photos that have featured my benches being sat upon by some pretty well-known Canadian mayors:
Mayor Blake and Deputy Mayor Meagher of Alberta, Canada
.
Mayor Walter Gray of Kelowna, Canada
.
Mayor Don Atchison of Saskatoon, Canada
.
Thank you all for following my journey through this project! It has been a lot of fun and I have
learned quite a bit about woodworking, how to run a business, and much more along the way.
I'm looking forward to what comes next!
Photo credits: myself, and Studio 38 Photography
Return to
Wood News
front page