 by Steven D. Johnson
Racine, Wisconsin
(Page 2 of 3)
Previous Page
1
2
3
Next Page
Climate Change - Rush
Click on any picture to see a larger version.
At my age I'm not really worried about climate change on the global, macro, long term scale. Sounds a little selfish, but really, it's not my problem. I'm only worried about climate change on the local, micro, and short term level. I care whether it rains today or gets cold tonight. I look for windows of dry weather when I can work outside, and look at rainy days as "shop days." If an unexpected rain comes while working outside, the climate change disrupts my schedule. If it gets warm and the sun comes out while I'm in the middle of a shop project… well, you get the picture.
Since building my current shop in Wisconsin several years ago, the space between the house and the shop has intrigued me. The former owner erected some kind of awful roof to cover the space. It leaked, and with only the two walls, the house and the shop, separated by thirteen feet, the area was a wind tunnel. The first winter here, the space filled up with blowing snow. The entire area got wet whenever it rained. And in the Fall it filled with leaves. Yes, the "roof," as it was, would keep the direct rainfall off of your head as you stepped from the shop to the house, but that was about it.
A couple of years ago I slapped together some frames, not unlike the frames for the
dust–free knock–down shop finishing enclosure I built
and shared on
video
, only larger. The two temporary walls, covered with 6–mil plastic, transformed the space between the house and the shop miraculously. No more leaves, no more blowing rain and snow. Suddenly there was a nice space, semi–dry, where you could unburden yourself of groceries, hang up your rain slicker, or kick off your snow boots before entering the house. The only disadvantage came in Spring when the woods behind the house, alive with flowers, were obscured by the heavy milky–white plastic. So I replaced several sections of the plastic with Plexiglas panels. The space was then so nice that I would often sit there in the mornings with my first (or second, or third) cup of coffee and enjoy the tableau. But there were still some drawbacks.
The concrete between the house and shop ran at an angle and did not cover the entire space that was covered by the roof (and subsequently enclosed, albeit it crude and impermanent). The concrete was un–level and had a very large crack. The roof the former owner erected was not done properly (ha, big surprise!) and water trickled down the walls of the house and the shop where the roof joined them, whenever it rained or when the snow melted. Every Fall I had to get up on that crude roof and blow off the leaves that gathered (the pitch of the roof was a paltry 1:12 or about 13–degrees), and the thing was so poorly built I felt positive I was one day going to fall through. I dreamed of tearing off that old roof, pouring a full size concrete slab, and enclosing the space properly, transforming it into a large mudroom or vestibule, or three–season room. Whatever the space might eventually be called, it would be a wonderful place to hang coats and store shoes, sit and observe the flora and fauna, enjoy an adult beverage or simply relieve the overflow of "stuff" from my tiny house. I became somewhat obsessed with the idea of enclosing that space properly. But the first big step of the project was getting a new, flat, un–cracked full–size concrete slab poured, and I couldn't find anyone to do it. Prepping for, and pouring, concrete isn't on my bucket list of enjoyable projects.
After dozens of calls, several contractors that never showed, several that did and just didn't want to do the job, quite by accident I found someone willing to do it. I shook his hand and gave him a check the first time we met. Because of the location, all the digging had to be done by hand and all the concrete had to be hauled from the concrete truck to the space by hand… in wheelbarrows… a hundred yards. Tough work! So when I found someone to do it, I jumped at the chance. The guy and his crew did an amazing job. Soon it was my turn to turn the space into a permanently habitable addition.
The first task was to remove the roof the former owner had installed. I figured that removing the old roof would take a couple of days, then building the new roof would take a couple of more. Covering the roof and making it watertight might take another two. I became obsessed with weather forecasts. I needed a stretch of six days or more without rain. Hard to get this year, what with the changeable climate.
A no–rain weather window finally appeared, starting the Tuesday before Labor Day… highs in the nineties, humidity in the nineties, and partly cloudy. Sold! Taking the old roof down went rather well, considering what the un–handiest handyman had done. I will digress here for just a moment so that all you weekend warriors that have cursed something a former homeowner did will realize that whatever problems you had, could have been much, much worse.
This will sound like fiction when you read it, but it's all true. He built the roof in two sections. After building each section, he attached it to the eave of the house with two barn door hinges. He then somehow raised up the other end and apparently propped it up temporarily. After it was positioned where he wanted, he drove long nails through the 2 X 4 closest to the house, through the siding, and into the walls. He then repeated this with the other half of the roof, driving nails into the wall of what is now my shop. In the middle he nailed the two sections together and put a 4 X 4 post at the end to keep the two sections from sagging in the middle. Turns out that 4 X 4 post was not even buried in a hole in the ground… it was just sitting right on top of the dirt.
Removing the roof only took a day… after a few cuts with a reciprocating saw, it pretty much disassembled itself. However, making repairs to the two walls to which the roof was attached took another day, but I was still on schedule… by then it was Thursday. That morning I framed the wall that now stands at the low end of the shed–style roof. After mounting a proper ledger board I used rafter hangers and 2 X 6s and built the roof. I framed it to accept two skylights. On Saturday I covered the whole thing with plywood and made the cut–outs for the skylights. Saturday afternoon the skylights were set in place using the special adhesive underlayment supplied by the manufacturer. By late Saturday evening I had the first strip of ice and water shield underlayment on the roof and the drip edge installed. Sunday afternoon I got back to work and installed the rest of the roof underlayment. Because I was on somewhat of a roll, and feeling pretty energetic, I even got the starter strip of shingles put down. When I wrapped up for the night I looked at the weather forecast and was reminded of the looming climate change… rain coming on Tuesday. I would have to hurry… and spend Labor Day, well, laboring!
Shingles go pretty fast, sometimes. But shingling around the skylights turned out to be tedious and extremely time–consuming. Between the all–but–indecipherable instructions supplied by the skylight manufacturer with their flashing kit, and a woodworker's penchant for "exact" measurements, it took all of Labor Day to get the shingles up, around, and past the skylights. Daylight was fading, I was rushing, but I managed to get a couple of more courses of shingles attached. Only a few more courses to go!
I kept looking at the weather forecasts, and as is often the case, they got more specific and more accurate as time went by. The forecast was now for Tuesday's predicted rain to start around 10:00 AM. Thank goodness! If I started at the crack of dawn, hurried, and didn't run into any problems, I could finish the shingles Tuesday morning before the rain started. Exhausted, I called it a day.
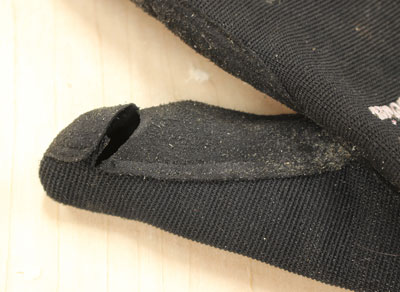
Tuesday morning I was awake and drinking coffee three hours before sunrise. Checked the weather report… no change. Stretched and tried to work out the soreness, drank more coffee. I took a couple of aspirin, thinking that might help the sore muscles. Drank some more coffee. Finally pitch darkness turned to gray and I could see heavy black clouds coming in from the southwest. The predicted rainstorm was definitely on its way. I could hear the thunder rumbling and smell the changing air. I had to hurry. The next course of shingles started with a cut piece. That went fine. Then I nailed in several full–length pieces, then measured for the cut piece to end that course. As I was cutting that piece, the knife slipped off the steel straight edge I was using, went through my glove, and through my thumb.
|
Figure 5 - I won't show you my thumb... this is, after all,
a family publication. But you can get a pretty good idea
of the injury by looking at my glove.
|
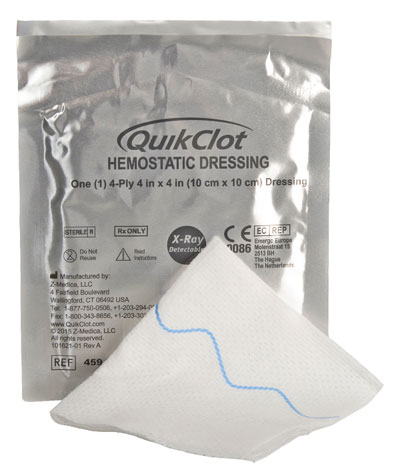
I distinctly remember looking down at my thumb and thinking, "Darn, I cut through my glove!" But when I looked a little closer, I thought, "Uh oh, Steve, you have a big problem!" I scurried down the ladder, into the house, removed my gloves and started running water over the cut. It was obvious by the flow of blood that this was not something I could fix with a Band–Aid. In fact, I was bleeding so profusely I was getting a little light–headed. Then I remembered a product I wrote about several years ago called "QuickClot." I ran out to my shop, fumbled the QuickClot out of my first aid kit and put it on the cut. The bleeding stopped instantly. Amazing stuff!
|
Figure 6 - If you don't have this in your first aid kit, get it…
and I hope you never have to use it!
|
I spent the next four and a half hours in the hospital emergency room. Triage, health background, wound cleansing, X–rays, removing a third of my thumbnail, stitches, bandages, and a Tetanus booster shot. And, by the way, it never rained. The clouds skittered by, it rained to the north and to south of us, but not on my almost–finished roof. Darned climate change! Forced me to rush and I made a stupid mistake. That's my story, and I'm sticking with it.
(Page 2 of 3)
Previous Page
1
2
3
Next Page
Return to
Wood News
front page