|
Click on any picture to see a larger version.
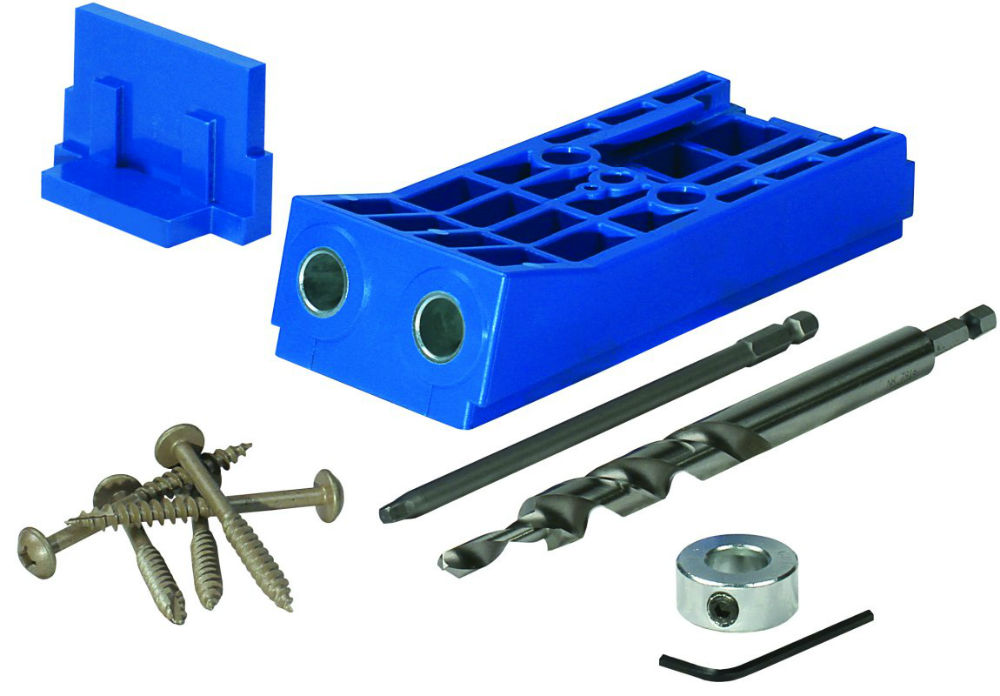
Kreg has been a leader in pocket hole technology and they have a wide variety of pocket hole systems and accessories. For years I have used the Kreg Jig HD Pocket-Hole System seen below.
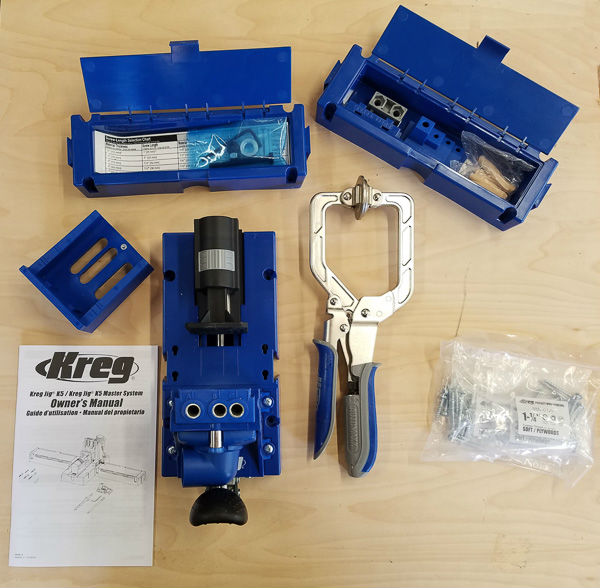
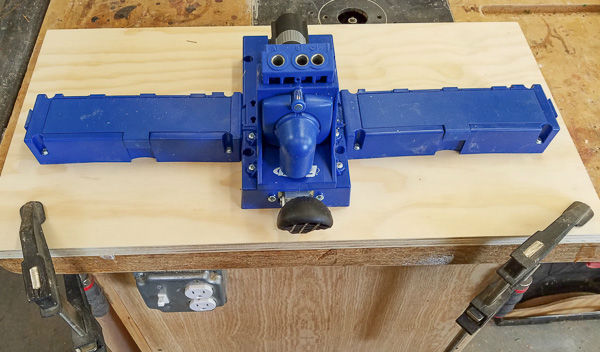
This system has served me well for both small and large projects and it is a wonderful starter system. It's only drawback is the time to setup between each hole. That is why I was very excited to use the Kreg K5 Master System (pictured below) which has a built-in clamping system to help shorten the time between drilling each pocket hole.
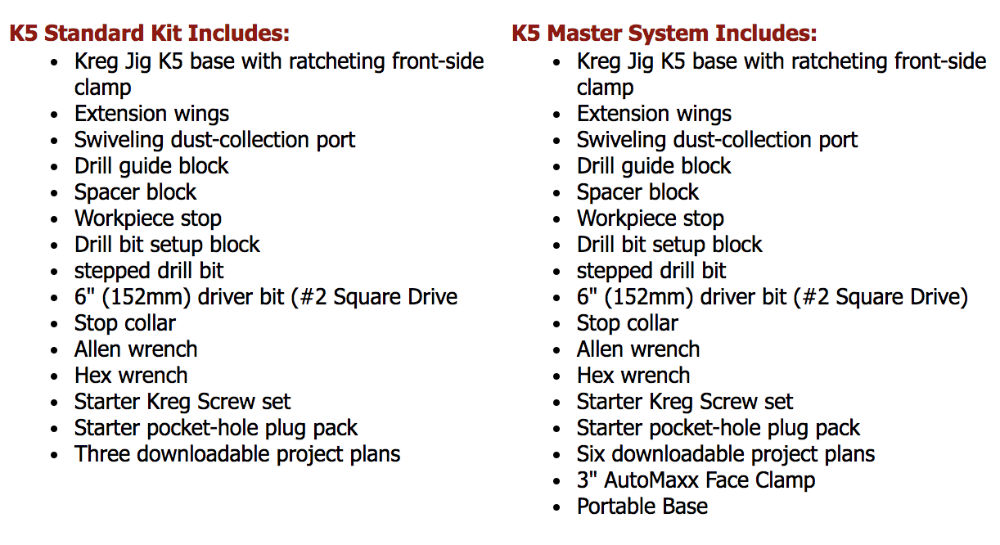
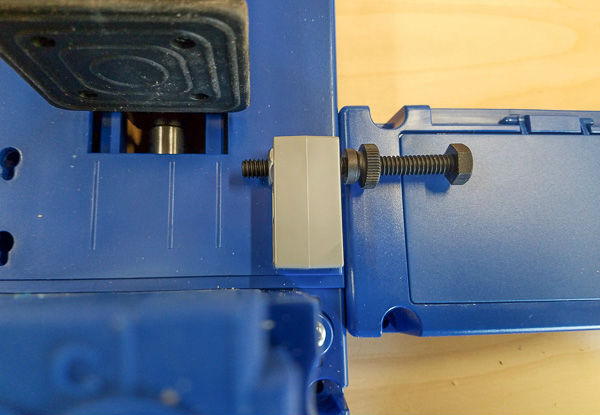
In addition to the K5 Master System, they also have a K5 Standard Kit that doesn't contain some of the accessories included with the Master System. You can see a side by side comparison of the two systems below.
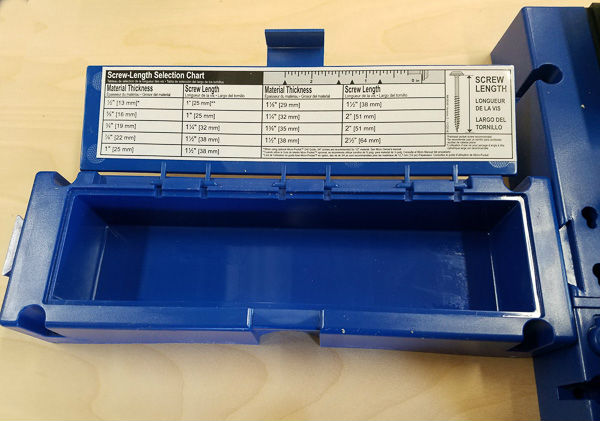
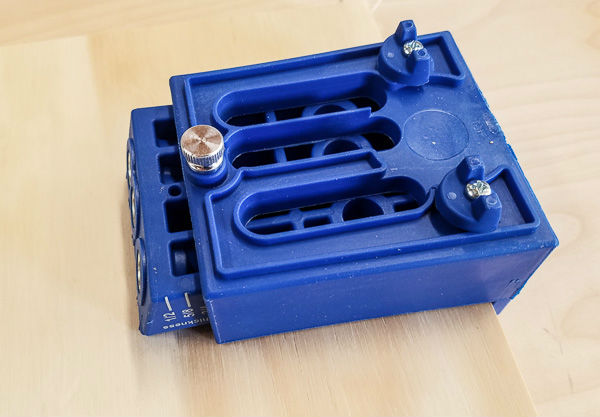
The heart of the system is the Drill Guide that has a front mounted clamp handle with a ratcheting mechanism that adjusts for different size stock thicknesses. I found it very easy to lift the clamp with one hand to loosen it and then slide the board into place for the next cut with my other hand. There are also two extension wings that support your wood while in the clamp and they also open up and act as storage boxes for your accessories. This is a great place to keep the special pocket hole drill and driver along with the tool's setup accessories. There is a screw length selection chart that you can mount on the inside of the lid cover.
Finally, there is a 1-1/4” dust collection port that accepts a standard vacuum hose to help with dust removal while you drill. Keeping the mess down is another nice advantage over my HD system.
If you are going to be using large boards than the accessories found in the K5 Master System may be important to you. The Master System comes with a portable base that can be used instead of the clamping system. It also has an Automaxx Face Clamp that locks into place on the portable base so you can clamp the base to your wood. I'll explain these accessories shortly. The Standard Kit comes with three downloadable project plans for you to build and the Master System adds another three for a total of six projects you can download and build.
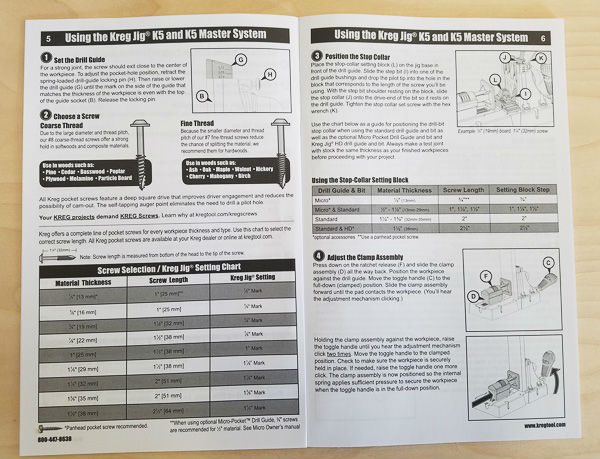
One thing I have noticed in all of Kreg's products is the high quality of their instructions. The K5 has a very nice instruction manual to guide initial setup and use of the system. Here are a couple of pages from the manual.
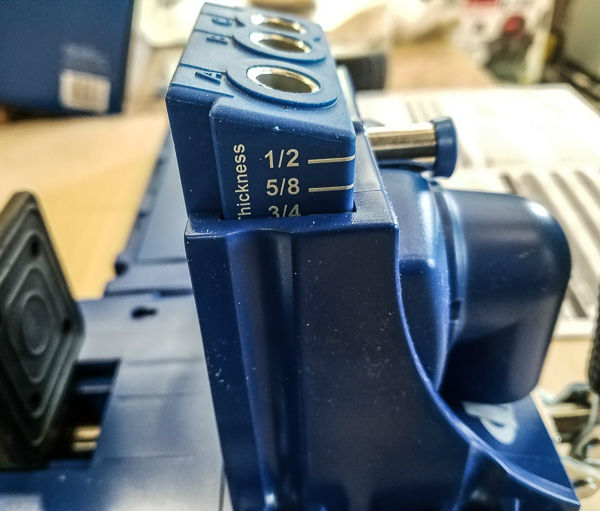
The length of the screw you use in a pocket hole is dependent on the thickness of the wood you are using. The K5 has etched markings on the drill guide to help set the guide at the right height. I have the guide set up for 3/4” wood.
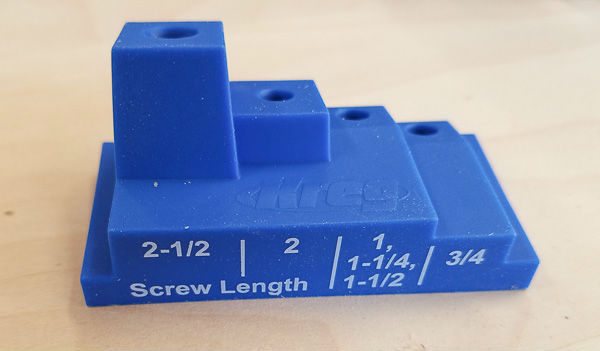
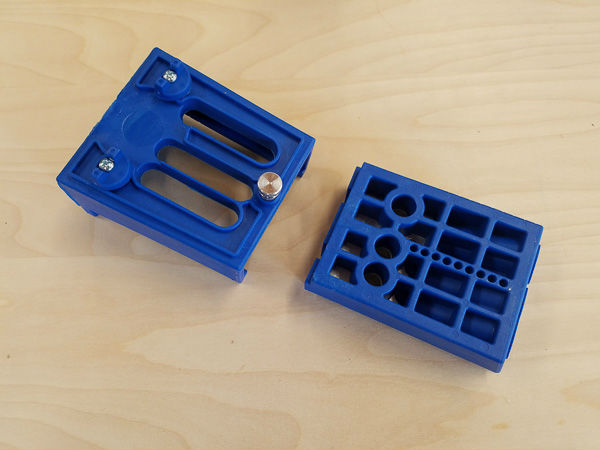
There is also a setup fixture to help set the collar on the drill bit. The collar stops the drill from going all the way through your board. Once the drill guide is set to the height of your wood, you put the screw length fixture in place and insert the drill bit. Once they are in place you can slide the collar onto the drill bit and tighten the setscrew.
The last accessory for the clamping system is a 'stop-block' that fits into keyholes in the base of the system. The stop-block is nice if you want to make repeated cuts on multiple boards and have all the pocket holes in the same place.
The stop-block has an adjustable screw and clamp so you can fine-tune the location of your cut and lock it in place.
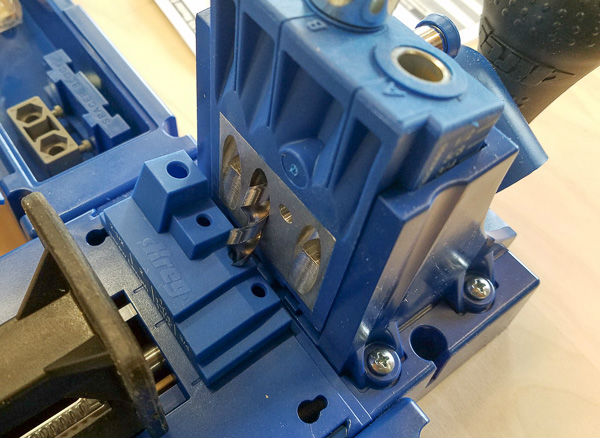
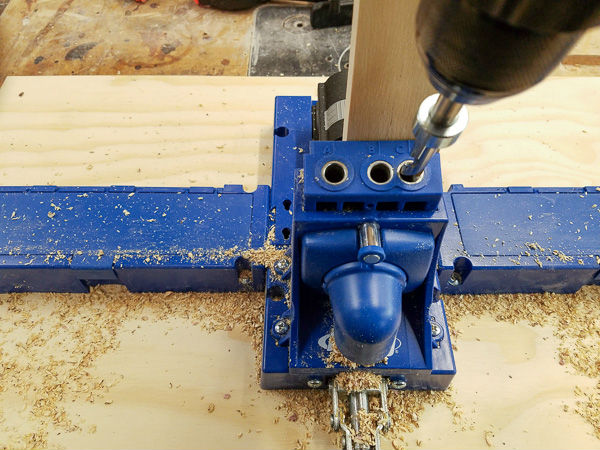
Below is a view of the Master System all put together and a board clamped in place. The board rests on the extension arms/boxes which really helps. I found that they kept the clamping system really stable as I moved the board between cuts and while drilling. Once the board is clamped in place you simply insert the special drill bit and drill down until the collar bottoms out on the drilling guide.
One nice feature that I really liked was the ratcheting locking system for the clamp. You do not need any tools to change the location of the clamp for different thicknesses of wood. The ratcheting system handles the thickness changes automatically.
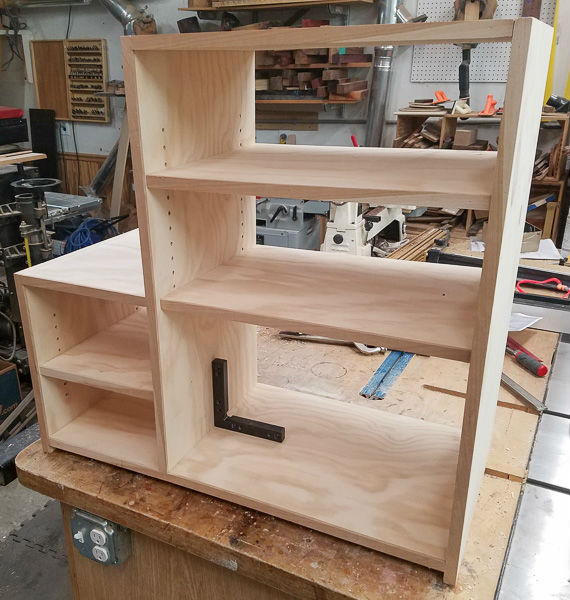
Cabinet Project
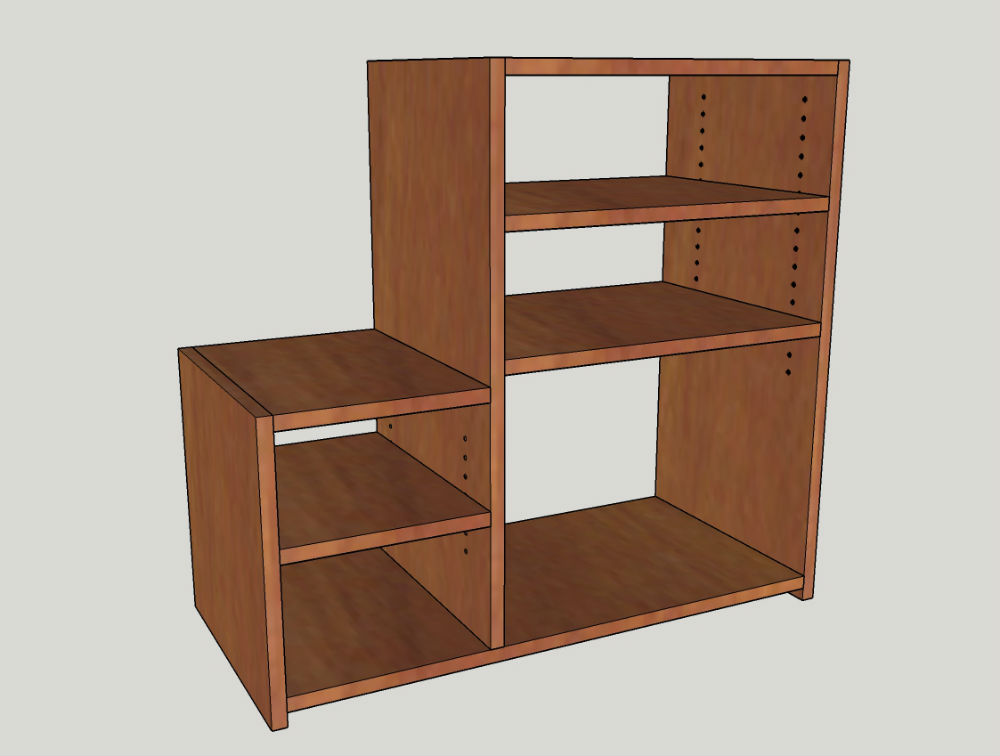
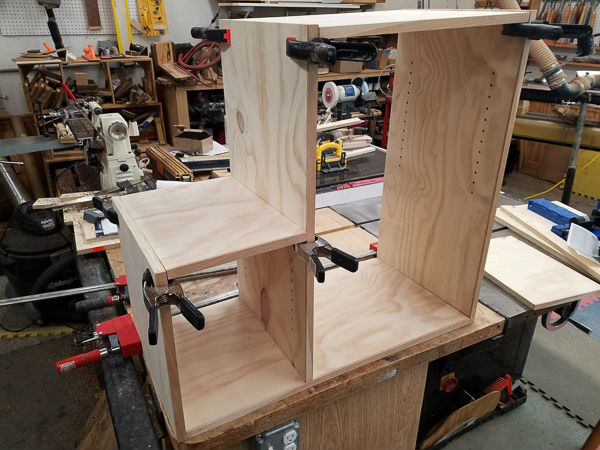
Last month I used the Kreg Accu-Cut Jig to cut up some plywood for a cabinet I was designing for my woodturning club. As with any project for someone else, I had a few 'design enhancements' over the past month. The shop owner decided that it would not be a good idea to cover up a quad-outlet so I needed to remove a corner of my cabinet. But, it really doesn't matter because we are interested in using the K5 to put the pieces together. Here is a Sketchup drawing showing what the current (and final!) design looks like.
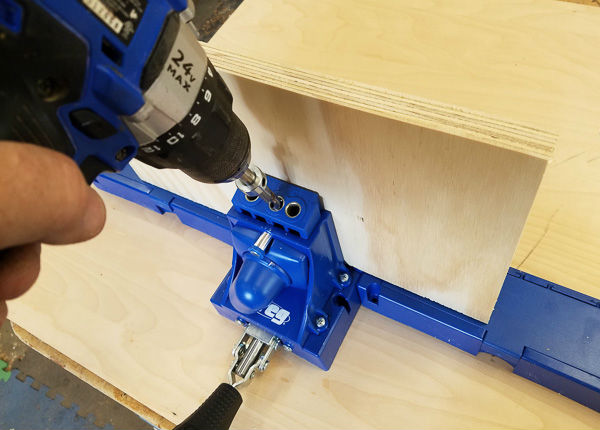
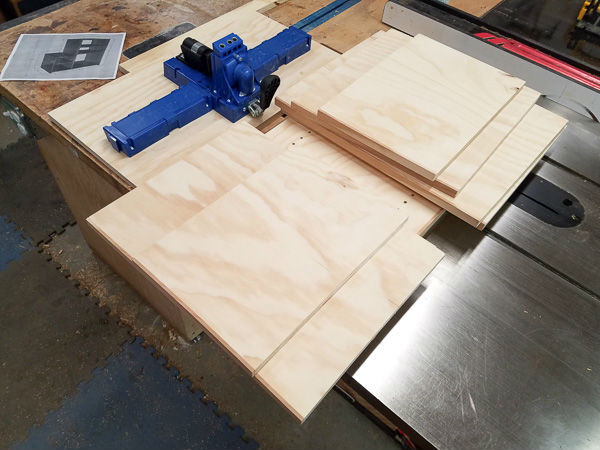
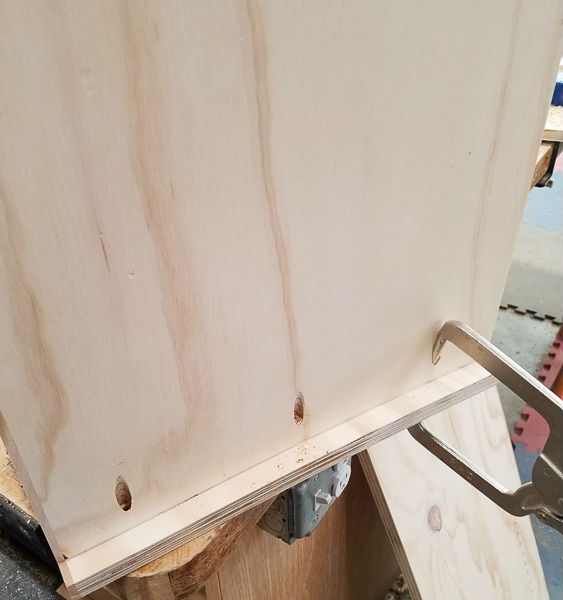
Below are the pieces I'm going to use with the K5 to put the cabinet together. You will notice in this picture that I've mounted the K5 system onto a piece of plywood. This makes the system very stable and I can clamp the K5 to my bench.
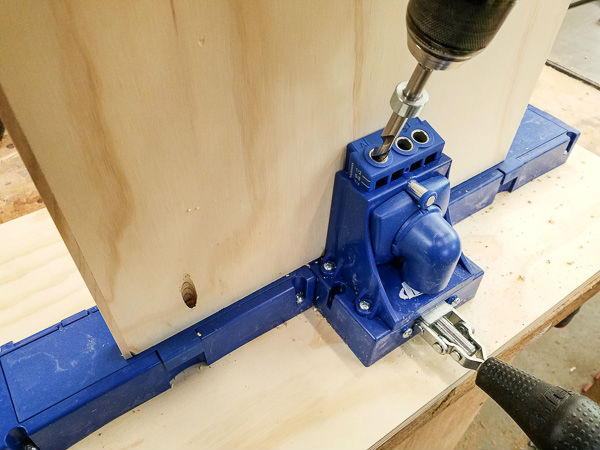
The first thing you need to do when building a project with pocket hole screws is to determine where to put the screws. The instruction manual discusses this and there are both strength and aesthetic considerations. I like to clamp the project together and mark the edges that will get the screws. I like to pick locations that will hide the screws if it doesn't impact strength.
Once it is clamped together I mark the edges and surfaces that will receive the pocket holes. After that, it is just a matter of clamping the boards in the K5 and drilling the holes.
You can use any of the holes on the drilling guide for this type of application. Sometimes you'll use one set of holes versus another for special applications, which I discuss later.
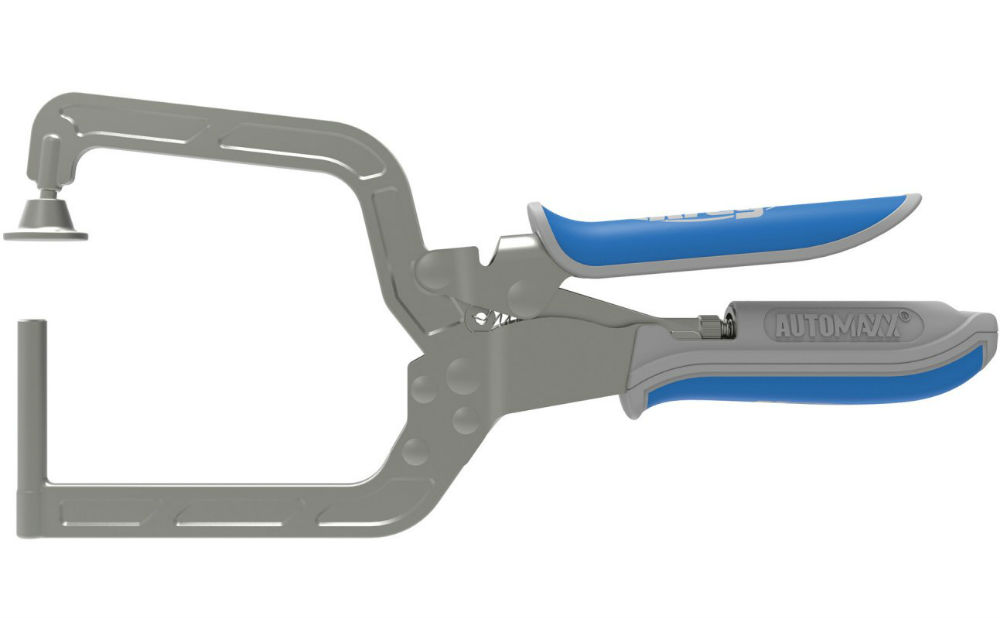
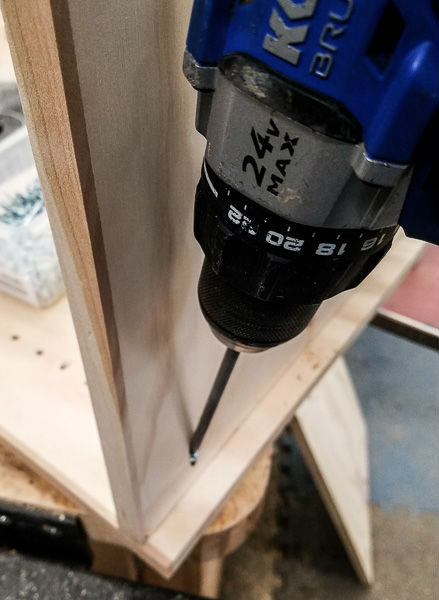
Once the holes are drilled you need to clamp the two pieces together in order to put the screws in without the boards moving. One accessory that Highland sells is the Kreg AutoMaxx Right Angle Clamp. This clamp is designed so the one leg fits into a pocket hole and then clamps around the mating board. I like using this type of clamp because it gives you a nice tight fit right at the joint.
This clamp will help hold the boards together while I'm putting a screw in place.
I also find it helpful to use a second clamp in tricky situations. Above I have the Right-Angle Clamp in the lower right corner and a second bar style clamp in the upper left. This keeps the two boards clamped securely together while putting the screws in place.
If you continue this approach with all your pieces you will end up with a very secure cabinet and if your board edges are square then the screws will pull the cabinet square.
The clamping system of the K5 made it very easy to drill, move, and drill again for each edge of the board. Using a dust collector also helped to make much less mess!
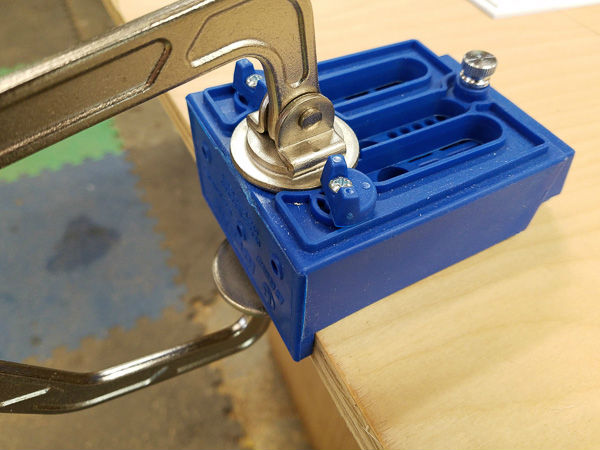
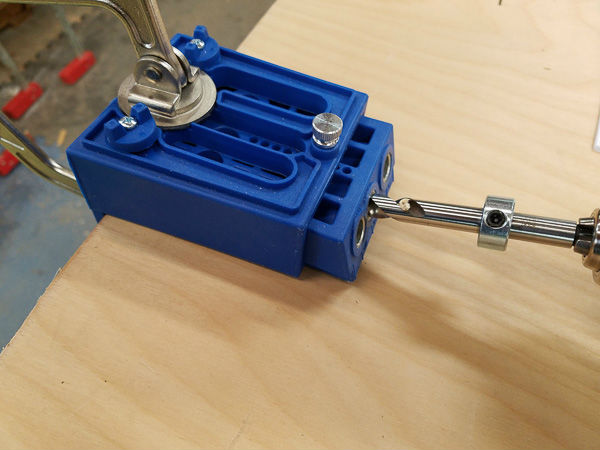
I also wanted to mention the portable base and Automaxx Face Clamp that are included in the Master System. This combination makes it possible to leave a large board flat on your bench while moving the drill guide to drill the pocket holes.
The portable base, pictured on the left, accepts the drill guide and can be set for the wood thickness that you are using.
Again, the drill guide is set to 3/4” via the etched markings on its side. The face clamp fits into the open area on the top of the base. There are two swivel clamps that hold the clamp in place.
You can clamp the portable base to the edge of the board and drill your hole.
The last item to mention is why the funny spacing for the holes on the drill guide? Two of the holes are placed closer together and are not equally spaced. This is done so that it is easy to drill two holes on the end of a face-frame board. A typical face-frame is 1-1/2” wide so if you center the board over these two holes in the drill guide you can drill both holes without having to move the board. If you do this you will get two holes nicely spaced on the end of a face-frame board.
I was very impressed with the Kreg K5 Master System. The construction is very rigid and I believe will last a very long time even with rugged, everyday use. The clamping system holds even large boards in place while drilling the holes. The ratcheting clamp system does not use any extra tools and is a real plus if you use different size boards regularly. The cabinet I discussed went together quickly and was completely square when finished. To me this means that all my pocket holes were square to the edges and were able to pull everything together. Using pocket holes in sheet goods made with the K5 is an excellent way to build your next cabinet.
Click here to find out more and purchase your own Kreg K5 Master System from Highland Woodworking.
Jeffrey Fleisher has been a woodworker for approximately 20 years and a professional woodworker for the past 6 years. He is the president of his local woodturning club, the Woodturners of the Virginias and past president of the Northern Virginia Carvers. You can see some of the furniture he has made at
www.jeffswooddesigns.com. He can be reached by email at furnmkr@gmail.com
Return to the Wood News Online front page
|