More Shop Assistants:
Make a Spray Finishing Turntable
by Curtis Turner
Round Rock, TX
I recently decided to upgrade my finishing setup. First, you should understand that my current spray finishing setup was an old pine board with a few dowels mounted in the surface. This meant anytime I needed to spray the back side of a project, I had to carefully turn the board around. This sounds simple enough. However, smoothly rotating the board without the piece sliding off the dowels was very difficult, and applying a consistent finish was nearly impossible. My success rate was rather abysmal. After one too many spills, I decided enough is enough, and began designing a new solution.
The solution was to build a Lazy Susan. This would allow me to smoothly rotate my projects for a safe and even application of a finish. I chose to use MDF for this project. MDF makes a good choice because it is inexpensive. Also, since MDF is flat, this becomes a quick project that can be completed in about an hour. This would make a good practice project before you made one with interesting wood for the dining table or as gift. This project could also be used as a basis for a rotating tool rack.
The Swivel
The magic happens with an inexpensive (less than $4) piece of hardware. This is merely a set of ball bearings captured in a two part metal frame, screws not included. I chose this
3" Lazy Susan Bearing. This is rated for an 18" turn table and will support up to an incredible 200 lbs.
Note: click on any picture to see a larger version.
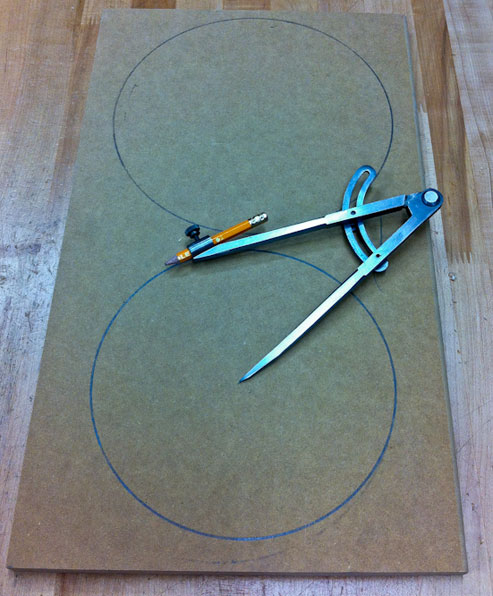
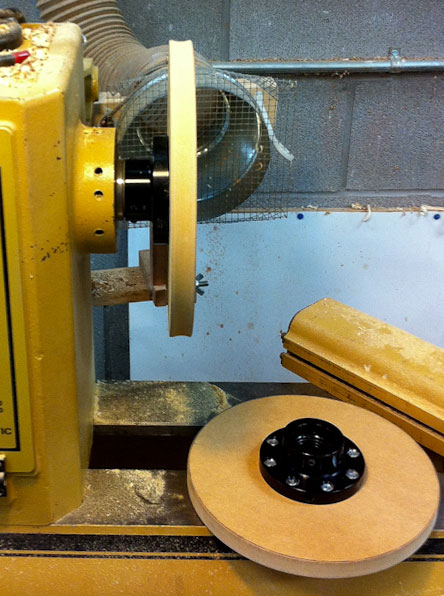
I used scrap MDF to lay out two circles (see photo above left) about 9-1/2" in diameter. I then cut the blanks on my bandsaw. I made one blank just a bit larger, to become the top. I then used a faceplate to mount the blank. I used 3/4" screws to attach the faceplate. These shorter screws helped to ensure that the screws didn't go through the surface of the blank. I turned the edge with a bowl gouge. The larger blank received a shallow cove to serve as a finger grip to better rotate the table while spraying (see photo above right). There was no need to true up the face of the MDF because it was already flat and parallel to the back. I used the same procedure for the base (smaller blank). However, I didn't add the cove to the base.
If you are making a Lazy Susan for the dining table you should consider a more attractive edge treatment. It would also look nice to make the base recessed into to the top.
Turning MDF is a very dusty proposition. I used a dust mask and ran my dust collector while turning.
Next Step
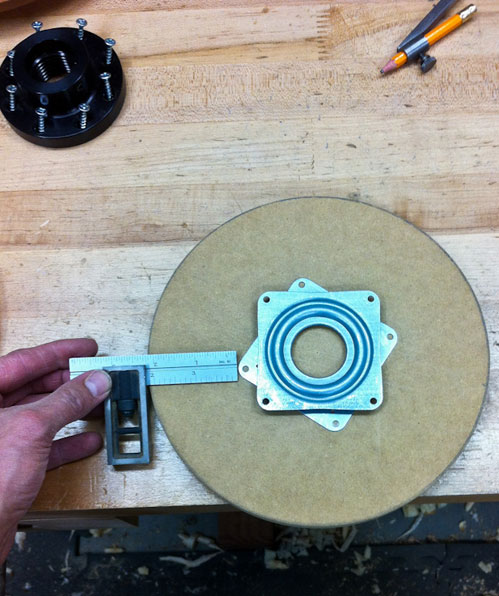
I placed the base with the screw holes facing up on my bench. I used a small square to align the Lazy Susan hardware in the middle of the base. I marked on the base where I wanted to mount the Lazy Susan.(see photo below left) I marked a location for a 3/8" access hole that was offset from the hardware. I used a Forstner bit to drill all the way through the base. The Forstner bit leaves a very clean hole square to the surface. This access hole allowed me to attach the base to the top. (see photo below center).
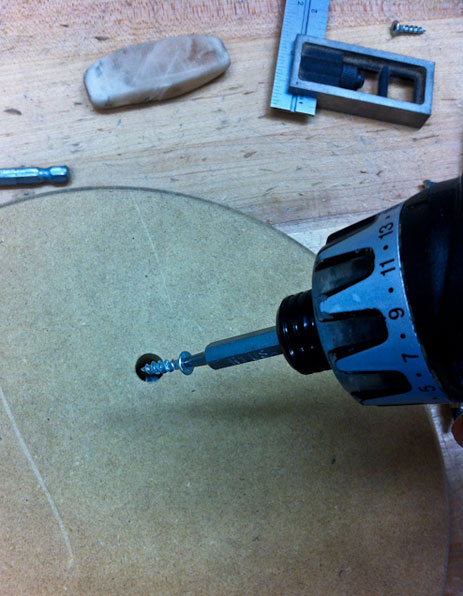
However, before attaching the top, I added a ring of 1/8" holes to the top. These holes will receive sharpened dowels, to serve as adjustable supports. (see photo above right).
I used the screw holes from the face plate as a starting point for the first series of holes. I then used
my favorite compass
to strike a line. I then laid out marks to add more holes.
Just Add Wax
I added small amount of paste wax into each hole. I found that with my original spray finish setup, over time, spray paint and finishes collected in the holes and made it difficult to remove and replace the small dowels. I hope this will help solve that issue.
Painter's Pyramid
Of course, there is already a better solution to sharpening dowels in your pencil sharpener:
Painter's Pyramids. This is one of those simple but quite useful products. I must admit to being a bit skeptical that something was better than my dowels. However, I have been very pleased with this product. The helpful thing about the Painter's Pyramids is their infinite adjustability. They can be spaced out to support any size project. They are also tall enough to allow for good ventilation while a finish dries. They are of course very stable. I can use the Painter's Pyramids on my new turn table or use my dowels if the piece is small and requires closer spacing.

I have used these on much larger, non-turning projects. (Yes, I sometimes dabble on the dark side known as "flat woodworking.") Remember that pull-out shelf I committed to build for my wife? I am happy to report that it is now complete and in service. I used the Painter's Pyramids for that project to support the shelf while the stain and finished dried. The first pull out shelf was so warmly received, that now there is another on order. I think that one will require new tool. Hmmm… If she plays her cards right, she just might get a new Lazy Susan for her birthday!
Sanding Disk
A sanding disk is another very simple yet helpful project that is closely related to the procedure above. It is worth discussing here. I created a hook and loop sanding disk for one of my smaller lathes. I dedicated a 3" faceplate to this task. Faceplates are so useful, I find it helpful to have several on hand. I recommend you have
two or three faceplates in various sizes
depending on your needs.
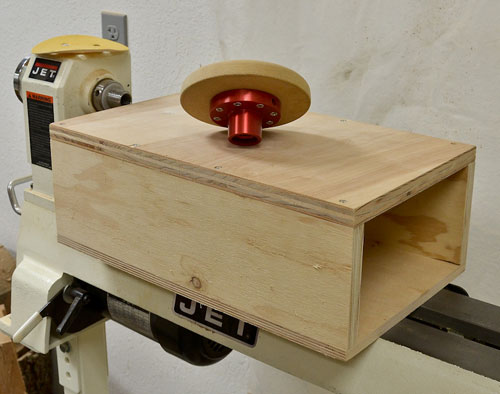
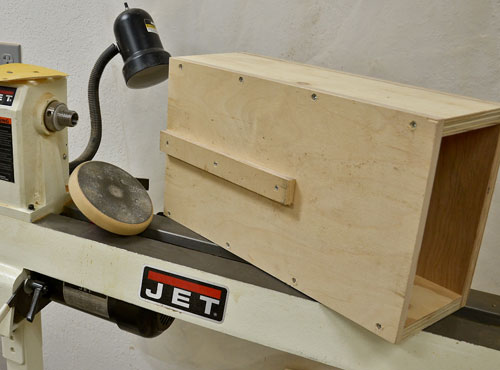
I mounted a faceplate to disk of MDF measuring about 7" in diameter, and turned it to slightly larger than my 5" hook and loop sand paper. I applied a slightly oversized sheet of the self adhesive hook and loop to the MDF and turned way the excess over 5". (see photo below left) I made sure to round off the edges to reduce the risk of catching the edge of the MDF with my hand or project piece.
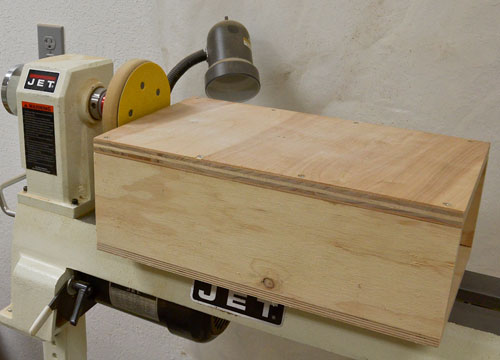
I constructed a table to mount between the ways of the lathe. This table should approximately line up with the center of the sanding disk. This table is merely a hollow box made from 3/4" scrap plywood. (see photo above center) The hollow allows for mounting of clamps to secure the table to the lathe. This makes for a fantastic variable speed sanding disk. Of course, you can make the disk any size to meet your requirements.
Good luck adding these assistants to your shop. They are worth carving out a few hours of shop time to construct. You will find them useful for years.
Curtis is a former President of
Central Texas Woodturners, a member of the
American Association of Woodturners, and a member of
Fine Woodworkers of Austin. Curtis teaches and demonstrates nationally for Lie-Nielsen Toolworks. He also teaches for TechShop. He owns a studio where he teaches and works. Curtis lives in Central Texas with his wife and four young children. Take a look at his website at
www.curtisturnerstudio.com or visit his
Instagram: tx_planes.